Woodworker's Journal winter-2009, страница 17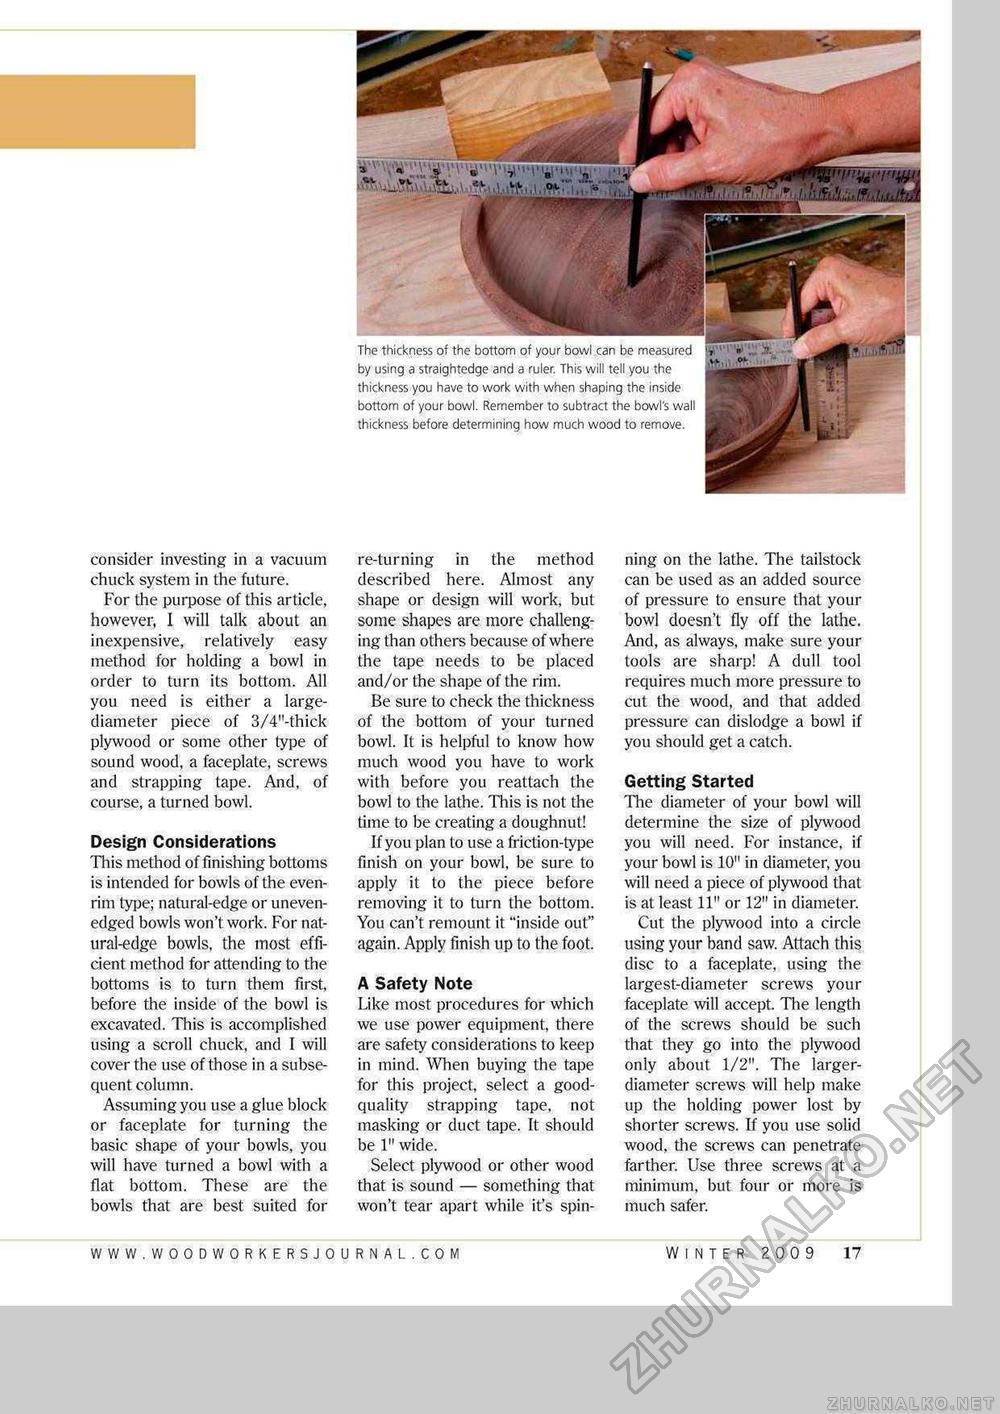
The thickness of the bottom of your bowl can be measured by using a straightedge and a ruler. This will tell you the thickness you have to work with when shaping the inside bottom of your bowl. Remember to subtract the bowl's wall thickness before determining how much wood to remove. consider investing in a vacuum chuck system in the future. For the purpose of this article, however, I will talk about an inexpensive, relatively easy method for holding a bowl in order to turn its bottom. All you need is either a large-diameter piece of 3/4"-thick plywood or some other type of sound wood, a faceplate, screws and strapping tape. And, of course, a turned bowl. Design Considerations This method of finishing bottoms is intended for bowls of the even-rim type; natural-edge or uneven-edged bowls won't work. For nat-ural-edge bowls, the most efficient method for attending to the bottoms is to turn them first, before the inside of the bowl is excavated. This is accomplished using a scroll chuck, and I will cover the use of those in a subsequent column. Assuming you use a glue block or faceplate for turning the basic shape of your bowls, you will have turned a bowl with a flat bottom. These are the bowls that are best suited for re-turning in the method described here. Almost any shape or design will work, but some shapes are more challenging than others because of where the tape needs to be placed and/or the shape of the rim. Be sure to check the thickness of the bottom of your turned bowl. It is helpful to know how much wood you have to work with before you reattach the bowl to the lathe. This is not the time to be creating a doughnut! If you plan to use a friction-type finish on your bowl, be sure to apply it to the piece before removing it to turn the bottom. You can't remount it "inside out" again. Apply finish up to the foot. A Safety Note Like most procedures for which we use power equipment, there are safety considerations to keep in mind. When buying the tape for this project, select a good-quality strapping tape, not masking or duct tape. It should be 1" wide. Select plywood or other wood that is sound — something that won't tear apart while it's spin ning on the lathe. The tailstock can be used as an added source of pressure to ensure that your bow] doesn't fly off the lathe. And, as always, make sure your tools are sharp! A dull tool requires much More pressure to cut the wood, and that added pressure can dislodge a bowl if you should get a catch. Getting Started The diameter of your bowl will determine the size of plywood you will need. For instance, if your bowl is 10" in diameter, you will need a piece of plywood that is at least 11" or 12" in diameter. Cut the plywood into a circle using your band saw. Attach this disc to a faceplate, using the largest-diameter screws your faceplate will accept. The length of the screws should be such that they go into the plywood only about 1/2". The larger-diameter screws will help make up the holding power lost by shorter screws. If you use solid wood, the screws can penetrate farther. Use three screws at a minimum, but four or more is much safer. WINTER 2009 17 |


