Woodworker's Journal winter-2009, страница 68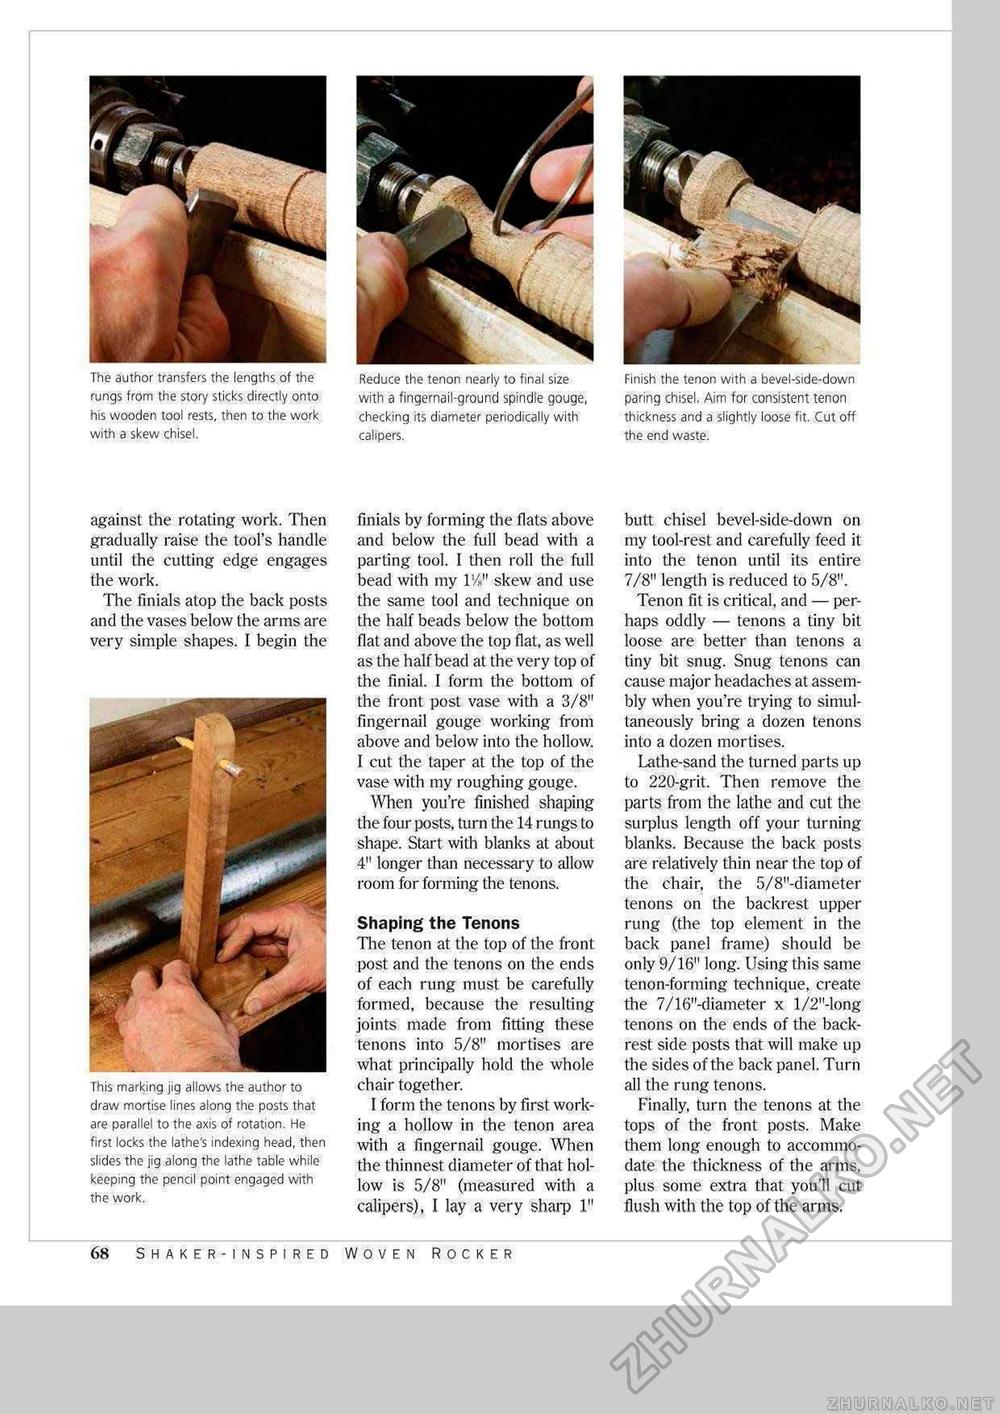
The author transfers the lengths of the rungs from the story sticks directly onto his wooden tool rests, then to the work with a skew chisel. Reduce the tenon nearly to final size with a fingernail-ground spindle gouge, checking its diameter periodically with calipers. Finish the tenon with a bevel-side-down paring chisel. Aim for consistent tenon thickness and a slightly loose fit. Cut off the end waste. against the rotating work. Then gradually raise the tool's handle until the cutting edge engages the work. The finials atop the back posts and the vases below the arms are very simple shapes. I begin the This marking jig allows the author to draw mortise lines along the posts that are parallel to the axis of rotation. He first locks the lathe's indexing head, then slides the jig along the lathe table while keeping the pencil point engaged with the work. finials by forming the flats above and below the full bead with a parting tool. I then roll the full bead with my l'/s" skew and use the same tool and technique on the half beads below the bottom flat and above the top flat, as well as the half bead at the very top of the finial. I form the bottom of the front post vase with a 3/8" fingernail gouge working from above and below into the hollow. I cut the taper at the top of the vase with my roughing gouge. When you're finished shaping the four posts, turn the 14 rungs to shape. Start with blanks at about 4" longer than necessary to allow room for forming the tenons. Shaping the Tenons The tenon at the top of the front post and the tenons on the ends of each rung must be carefully formed, because the resulting joints made from fitting these tenons into 5/8" mortises are what principally hold the whole chair together. I form the tenons by first working a hollow in the tenon area with a fingernail gouge. When the thinnest diameter of that hollow is 5/8" (measured with a calipers), I lay a very sharp 1" butt chisel bevel-side-down on my tool-rest and carefully feed it into the tenon until its entire 7/8" length is reduced to 5/8". Tenon fit is critical, and — perhaps oddly — tenons a tiny bit loose are better than tenons a tiny bit snug. Snug tenons can cause major headaches at assembly when you're trying to simultaneously bring a dozen tenons into a dozen mortises. Lathe-sand the turned parts up to 220-grit. Then remove the parts from the lathe and cut the surplus length off your turning blanks. Because the back posts are relatively thin near the top of the chair, the 5/8"-diameter tenons on the backrest upper rung (the top element in the back panel frame) should be only 9/16" long. Using this same tenon-forming technique, create the 7/16"-diameter x l/2"-long tenons on the ends of the backrest side posts that will make up the sides of the back panel. Turn all the rung tenons. Finally, turn the tenons at the tops of the front posts. Make them long enough to accommodate the thickness of the arms, plus some extra that you'll cut flush with the top of the arms. 68 Shaker-inspired woven Rocker |


