Creative Woodworks & crafts 2000-03, страница 100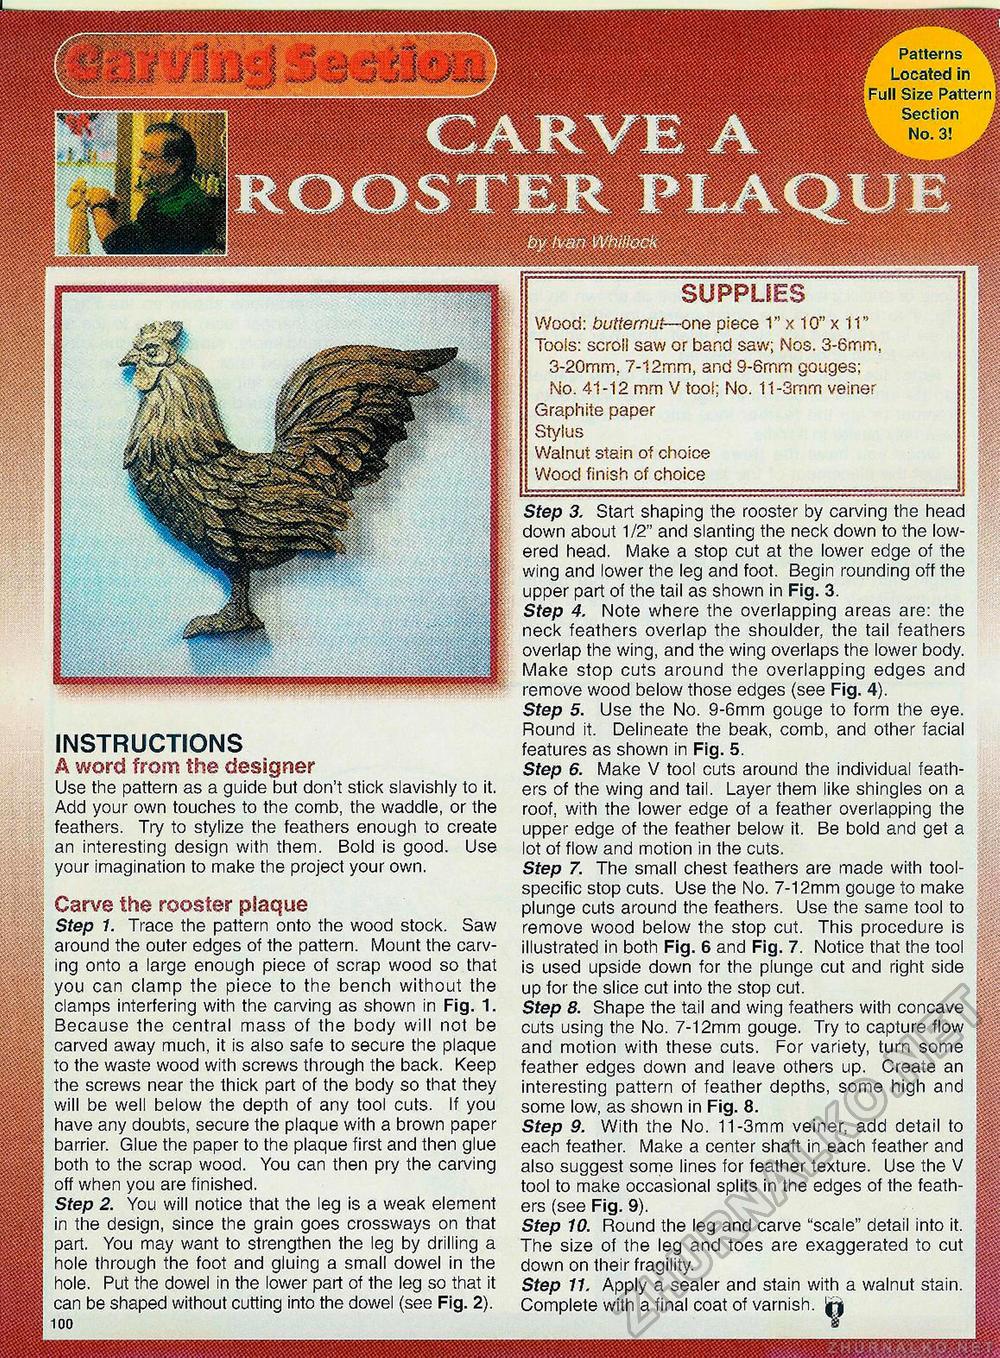
I? Patterns % ; Located in Full Size Pattern t Section J k No. 3! A Wood: butternut—one piece 1" x 10" x 11" Tools: scroii saw or band saw; Nos. 3-6mm 3-20mm, 7-12mm, and 9-6rnm gouges; No. 41-12 mm V tool: No. 11-3mm veiner Graphite paper Stylus Walnut stain of choice Wood finish of choice INSTRUCTIONS A word from the designer Use the pattern as a guide but don't stick slavishly to it. Add your own touches to the comb, the waddle, or the feathers. Try to stylize the feathers enough to create an interesting design with them. Bold is good. Use your imagination to make the project your own. Carve the rooster plaque Step 1. Trace the pattern onto the wood stock. Saw around the outer edges of the pattern. Mount the carving onto a large enough piece of scrap wood so that you can clamp the piece to the bench without the clamps interfering with the carving as shown in Fig. 1. Because the central mass of the body will not be carved away much, it is also safe to secure the plaque to the waste wood with screws through the back. Keep the screws near the thick part of the body so that they will be well below the depth of any tool cuts. If you have any doubts, secure the plaque with a brown paper barrier. Glue the paper to the plaque first and then glue both to the scrap wood. You can then pry the carving off when you are finished. Step 2. You will notice that the leg is a weak element in the design, since the grain goes crossways on that part. You may want to strengthen the leg by drilling a hole through the foot and gluing a small dowel in the hole. Put the dowel in the lower part of the leg so that it can be shaped without cutting into the dowel (see Fig. 2). Step 3. Start shaping the rooster by carving the head down about 1/2" and slanting the neck down to the lowered head. Make a stop cut at the lower edge of the wing and lower the leg and foot. Begin rounding off the upper part of the tail as shown in Fig. 3. Step 4. Note where the overlapping areas are: the neck feathers overlap the shoulder, the tail feathers overlap the wing, and the wing overlaps the lower body. Make stop cuts around the overlapping edges and remove wood below those edges (see Fig. 4). Step 5. Use the No. 9-6mm gouge to form the eye. Round it. Delineate the beak, comb, and other facial features as shown in Fig. 5. Step 6. Make V tool cuts around the individual feathers of the wing and tail. Layer them like shingles on a roof, with the lower edge of a feather overlapping the upper edge of the feather below it. Be bold and get a lot of flow and motion in the cuts. Step 7. The small chest feathers are made with tool-specific stop cuts. Use the No. 7-12mm gouge to make plunge cuts around the feathers. Use the same tool to remove wood below the stop cut. This procedure is illustrated in both Fig. 6 and Fig. 7. Notice that the tool is used upside down for the plunge cut and right side up for the slice cut into the stop cut. Step 8. Shape the tail and wing feathers with concave cuts using the No. 7-12mm gouge. Try to capture flow and motion with these cuts. For variety, turn some feather edges down and leave others up. Create an interesting pattern of feather depths, some high and some low, as shown in Fig. 8. Step 9. With the No. 11-3mm veiner, add detail to each feather. Make a center shaft in each feather and also suggest some lines for feather texture. Use the V tool to make occasional splits in the edges of the feathers (see Fig. 9). Step 10. Round the leg and carve "scale" detail into it. The size of the leg and toes are exaggerated to cut down on their fragility. Step 11. Apply a sealer and stain with a walnut stain. Complete with a final coat of varnish. |r| |


