Creative Woodworks & crafts 2000-03, страница 96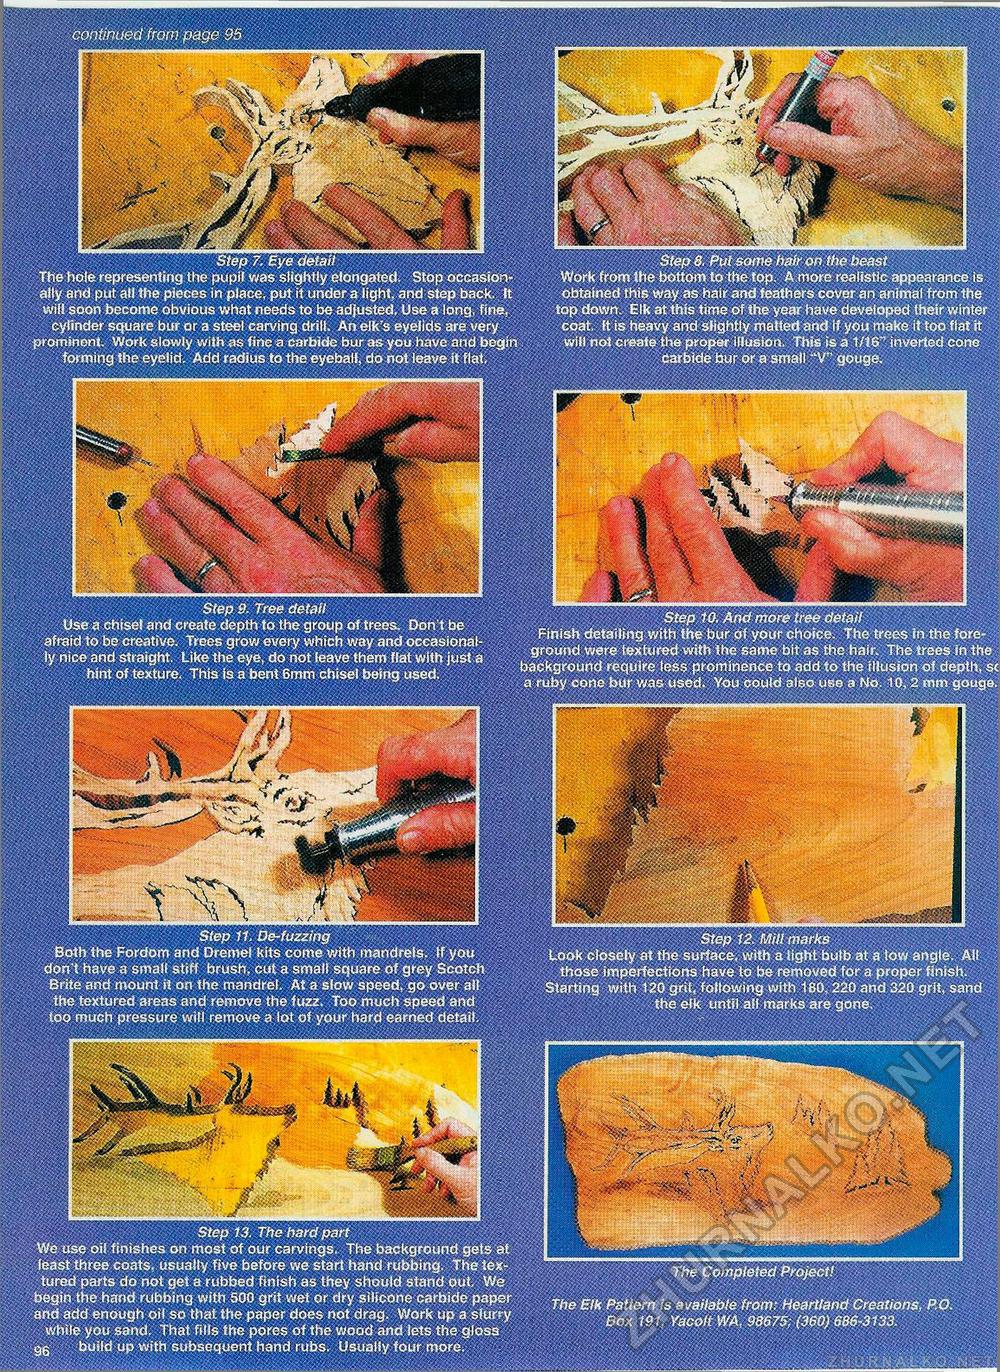
IBB wm&m continued from page 95 , . Step 7. Eye detail ..... The hole representing the pupil was slightly elongated, Stop occasionally and put all the pieces In place, put it under a light, and step back, ft will soon become obvious what needs to be adjusted. Use a long, fine, cylinder square bur or a steel carving drill. Ah elk's eyelids are very prominent. Work Slowly with as fine a carbide bur as you have and begin forming the eyelid. Add radius to the eyeball, do not leave it flat. Step S. Put some hair on the beast Work from ibe bottom to the top. A.more realistic appearance is obtained this way as hair and feathers cover an animal from the top down. Elk at this time of the year have developed their winter coat. It is heavy and slightly matted and if you make it too flat it will not create the proper illusion. This is a 1/16'' inverted cone carbide bur or a small "V" gouge. Step 9. Tree detail Use a chisel and create depth to the group of trees. Don't be afraid to be creative. Trees grow every which way and occasionally nice and straight. Like the eye, do not leave them flat with just a hint of texture. This is a bent 6mm chisel being used. Step 10. And more tree detail Finish detailing with the bur of your choice. The trees in the foreground were textured with the same bit as the hair. The trees in the background require less prominence to add to the illusion of depth, sc a ruby cone bur was used. You could also use a No. 10, 2 mm gouge. Step 11. De-fuzzing Both the Fordom and Dremel kits come with mandrels. If you don't have a small stiff brush, cut a small square of grey Scotch Briie and mount it on the mandrel. At a slow speed, go over alt the textured areas and remove the fuzz. Too much speed and too much pressure will remove a lot of your hard earned detail. Step 12. Mill marks Look closely at the surface, with a light bulb at a tow angle. All those imperfections have to be removed for a proper finish. Starting with 120 grit, following with 180,220 and 320 grit, sand the elk until ail marks are gone. Step 13. The hard part We use oii finishes on most of our carvings, The background gets at least three coats, usually five before we start hand rubbing. The textured parts do not get a rubbed finish as they should stand put; We begin the hand rubbing with 500 grit wet or dry silicone carbide paper and add enough oil so that the paper does not drag. Work up a slurry while you sand. That fills the pores of the wood and lets the gloss gs build up with subsequent hand rubs. Usually four more. The Completed Project! The Elk Pattern is available from: Heartland Creations. P.O. Box 191. Yacoti WA, 98675: (360) 686-3133. |


