Creative Woodworks & crafts 2001-01, страница 44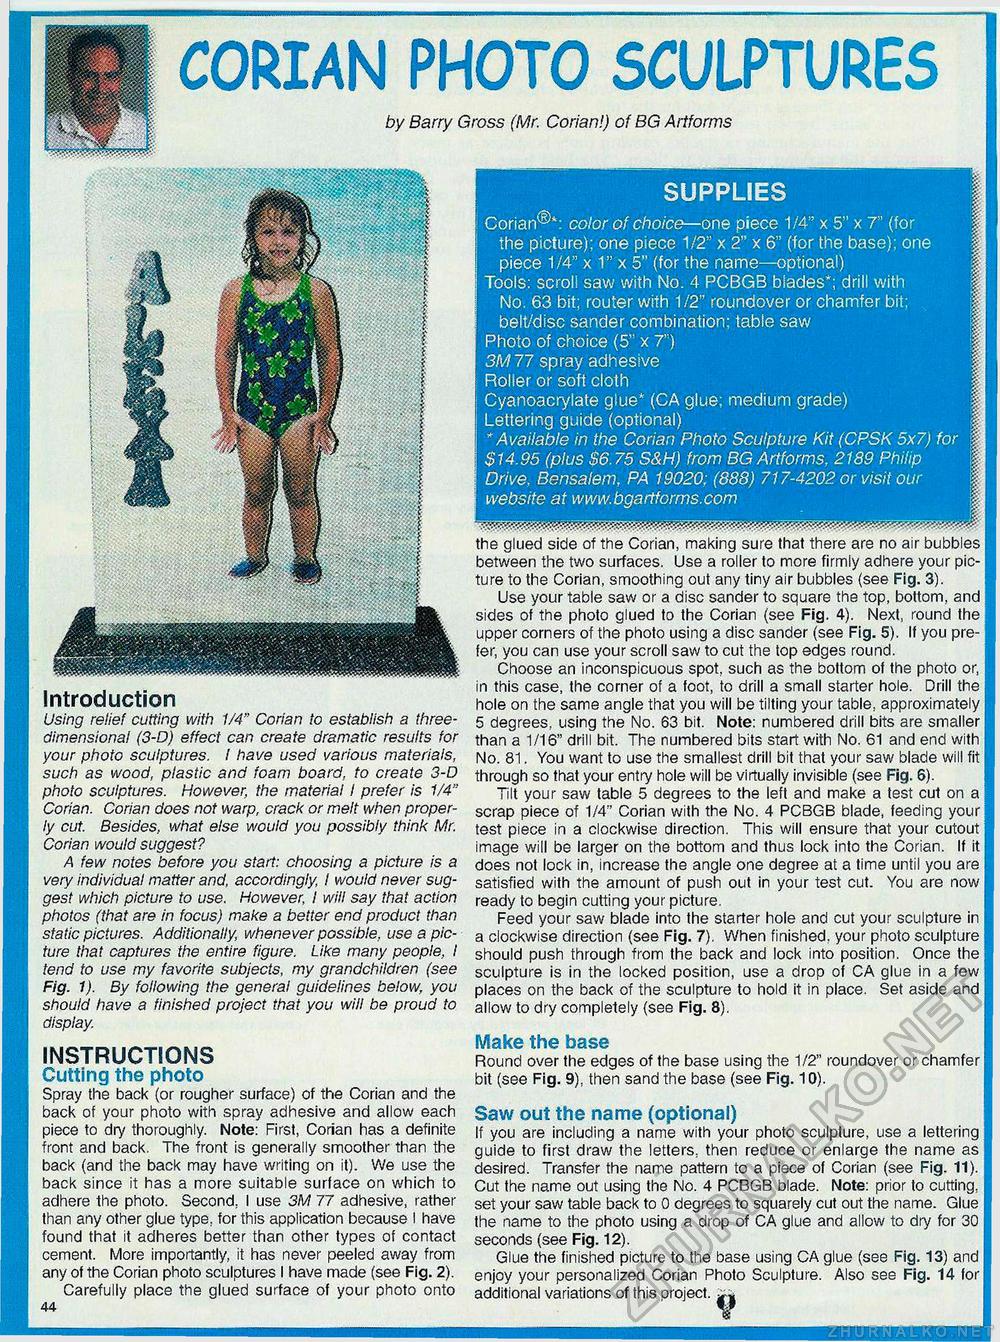
CORIAN PHOTO SCULPTURES by Barry Gross (Mr. Corian!) of BG Artforms Introduction Using relief cutting with 1/4" Corian to establish a three-dimensional (3-D) effect can create dramatic results for your photo sculptures. I have used various materials, such as wood, plastic and foam board, to create 3-D photo sculptures. However, the material I prefer is 1/4" Corian. Corian does not warp, crack or melt when properly cut. Besides, what else would you possibly think Mr. Corian would suggest? A few notes before you start: choosing a picture is a very individual matter and, accordingly, I would never suggest which picture to use. However, I will say that action photos (that are in focus) make a better end product than static pictures. Additionally, whenever possible, use a picture that captures the entire figure. Like many people, / tend to use my favorite subjects, my grandchildren (see Fig. 1). By following the general guidelines below, you should have a finished project that you will be proud to display. INSTRUCTIONS Cutting the photo Spray the back (or rougher surface) of the Corian and the back of your photo with spray adhesive and allow each piece to dry thoroughly. Note: First, Corian has a definite front and back. The front is generally smoother than the back (and the back may have writing on it). We use the back since it has a more suitable surface on which to adhere the photo. Second, I use 3M 77 adhesive, rather than any other glue type, for this application because I have found that it adheres better than other types of contact cement. More importantly, it has never peeled away from any of the Corian photo sculptures I have made (see Fig. 2). Carefully place the glued surface of your photo onto 44 SUPPLIES Corian®*: color of choice—one piece 1/4" x 5" x 7" (for the picture); one piece 1/2" x 2" x 6" (for the base); one piece 1/4" x 1" x 5" (for the name—optional) Tools: scroll saw with No. 4 PCBGB blades*; drill with No. 63 bit; router with 1/2" roundover or chamfer bit; belt/disc sander combination; table saw Photo of choice (5" x 7") 3M77 spray adhesive Roller or soft cloth Cyanoacrylate glue* (CA glue; medium grade) Lettering guide (optional) * Available in the Corian Photo Sculpture Kit (CPSK 5x7) for $14.95 (plus $6.75 S&H) from BG Artforms, 2189 Philip Drive, Bensalem, PA 19020; (888) 717-4202 or visit our website at www.bgartforms.com the glued side of the Corian, making sure that there are no air bubbles between the two surfaces. Use a roller to more firmly adhere your picture to the Corian, smoothing out any tiny air bubbles (see Fig. 3). Use your table saw or a disc sander to square the top, bottom, and sides of the photo glued to the Corian (see Fig. 4). Next, round the upper corners of the photo using a disc sander (see Fig. 5). If you prefer, you can use your scroll saw to cut the top edges round. Choose an inconspicuous spot, such as the bottom of the photo or, in this case, the corner of a foot, to drill a small starter hole. Drill the hole on the same angle that you will be tilting your table, approximately 5 degrees, using the No. 63 bit. Note: numbered drill bits are smaller than a 1/16" drill bit. The numbered bits start with No. 61 and end with No. 81. You want to use the smallest drill bit that your saw blade will fit through so that your entry hole will be virtually invisible (see Fig. 6). Tilt your saw table 5 degrees to the left and make a test cut on a scrap piece of 1/4" Corian with the No. 4 PCBGB blade, feeding your test piece in a clockwise direction. This will ensure that your cutout image will be larger on the bottom and thus lock into the Corian. If it does not lock in, increase the angle one degree at a time until you are satisfied with the amount of push out in your test cut. You are now ready to begin cutting your picture. Feed your saw blade into the starter hole and cut your sculpture in a clockwise direction (see Fig. 7). When finished, your photo sculpture should push through from the back and lock into position. Once the sculpture is in the locked position, use a drop of CA glue in a few places on the back of the sculpture to hold it in place. Set aside and allow to dry completely (see Fig. 8). Make the base Round over the edges of the base using the 1/2" roundover or chamfer bit (see Fig. 9), then sand the base (see Fig. 10). Saw out the name (optional) If you are including a name with your photo sculpture, use a lettering guide to first draw the letters, then reduce or enlarge the name as desired. Transfer the name pattern to a piece of Corian (see Fig. 11). Cut the name out using the No. 4 PCBGB blade. Note: prior to cutting, set your saw table back to 0 degrees to squarely cut out the name. Glue the name to the photo using a drop of CA glue and allow to dry for 30 seconds (see Fig. 12). Glue the finished picture to the base using CA glue (see Fig. 13) and enjoy your personalized Corian Photo Sculpture. Also see Fig. 14 for additional variations of this project. V |


