Creative Woodworks & crafts 2001-10, страница 53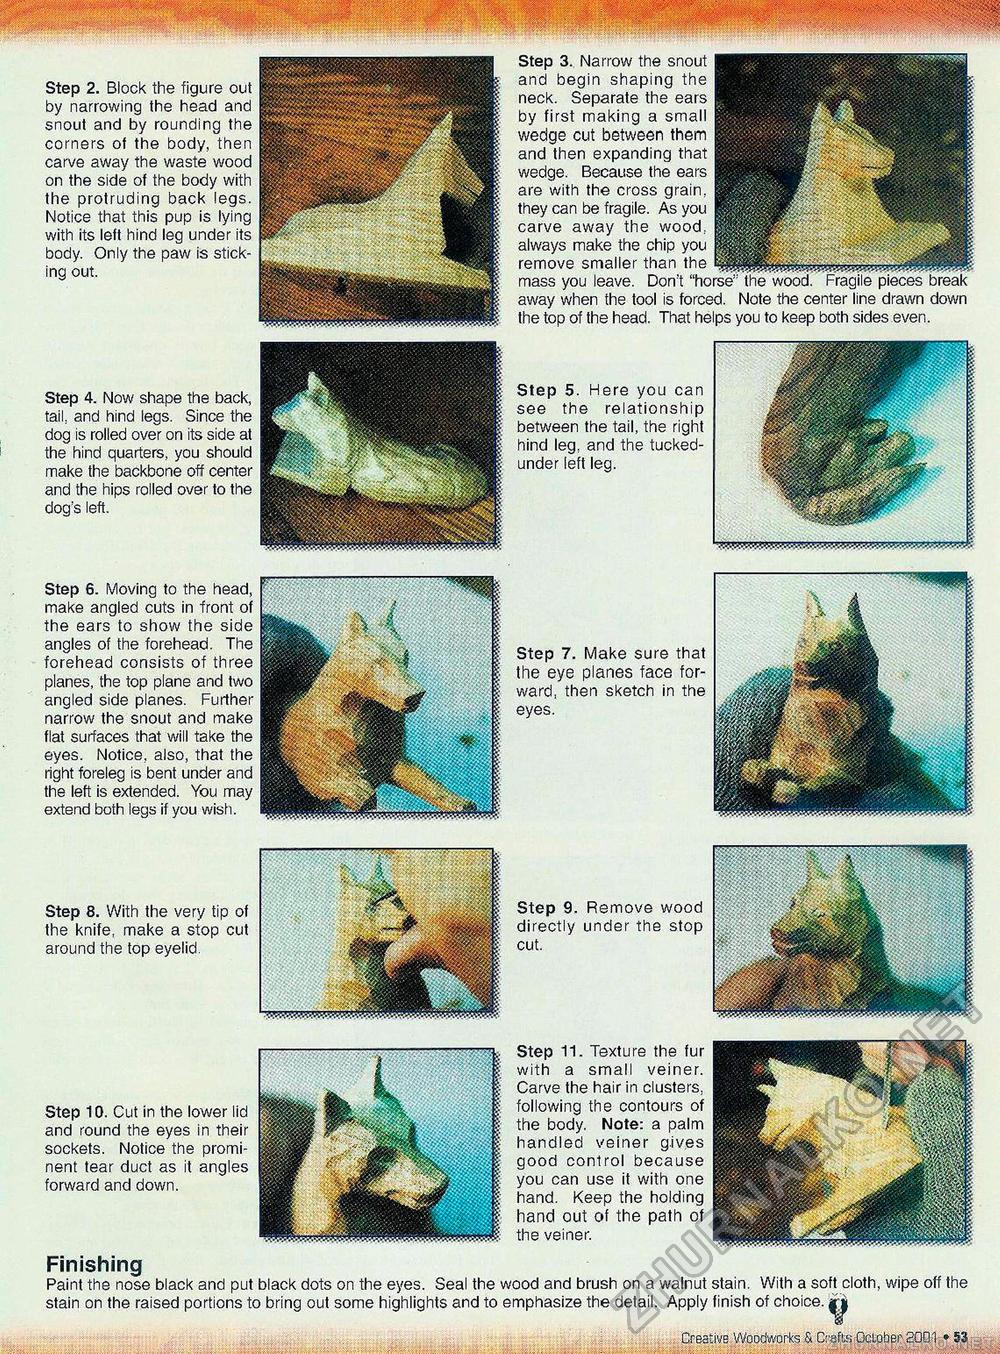
Step 2. Block the figure out by narrowing the head and snout and by rounding the corners of the body, then carve away the waste wood on the side of the body with the protruding back legs. Notice that this pup is lying with its left hind leg under its body. Only the paw is sticking out. Step 5. Here you can see the relationship between the tail, the right hind leg, and the tucked-under left leg. Step 4. Now shape the back, tail, and hind legs. Since the dog is rolled over on its side at the hind quarters, you should make the backbone off center and the hips rolled over to the dog:s left. Step 6. Moving to the head, make angled cuts in tront of the ears to show the side angles of the forehead. The forehead consists of three planes, the top plane and two angled side planes. Further narrow the snout and make flat surfaces that will take the eyes. Notice, also, that the right foreleg is bent under and the left is extended. You may extend both legs if you wish. Step 7. Make sure that the eye planes face forward, then sketch in the eyes. Step 8. With the very tip of the knife, make a stop cut around the top eyelid. Step 9. Remove wood directly under the stop cut. Finishing Paint the nose black and put black dots on the eyes. Seal the wood and brush on a walnut stain. With a soft cloth, wipe off the stain on the raised portions to bring out some highlights and to emphasize the detail. Apply finish of choice. ^ Creative Woodworks & Crafts Qqiober 2QD1 » 53 Step 10. Cut in the lower lid and round the eyes in their sockets. Notice the prominent tear duct as it angles forward and down. Step 11. Texture the fur with a small veiner. Carve the hair in clusters, following the contours of the body. Note: a palm handled veiner gives good control because you can use it with one hand. Keep the holding hand out of the path of the veiner. Step 3. Narrow the snout and begin shaping the neck. Separate the ears by first making a small wedge cut between them and then expanding that wedge. Because the ears are with the cross grain, they can be fragile. As you carve away the wood, always make the chip you remove smaller than the mass you leave. Don't ______ ______ . ,------------ away when the tool is forced. Note the center line drawn down the top of the head. That helps you to keep both sides even. |


