Creative Woodworks & crafts 2002-04, страница 20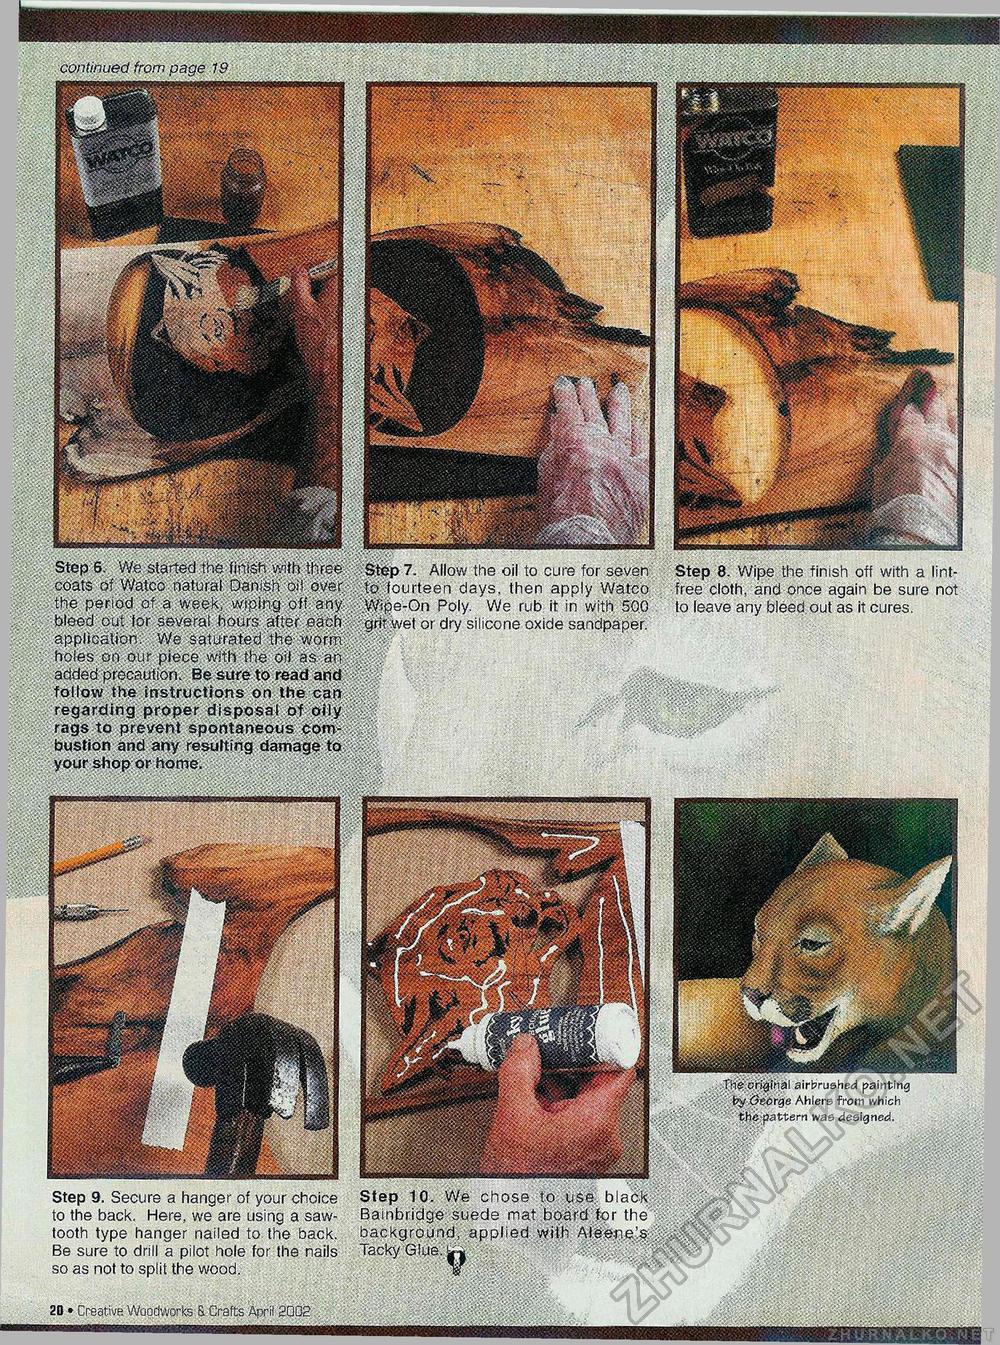
continued from page 19 PIPIPPIP? WsStsxtm^fW^ Step 6. We started the finish with three coats of Watco natural Danish.oif over the period of a week, wiping off any bleed out for several hours after each application. We saturated the worm holes on .our piece with the oil as'an added precaution. Be sure to read arid follow the instructions on the can regarding proper disposal of oily rags to prevent spontaneous combustion and any resulting damage to your shop or home. Step 7. Allow the oil to cure for seven Step 8. Wipe the finish off with a lint- to fourteen days, then apply Watco free cloth, and once again be sure not .Wipe-On Poly. We rub it in with 500 to leave any bleed out as it cures, grit wet or dry silicone oxide sandpaper. Tfie orijjina. airbrushed painting by.Csorge Ahlers from which the pattern was designed. Step 10. We chose to use b ack Bainbridge suede mat board for the background, applied with Aleen.e's Tacky Glue, j™ Step 9. Secure a hanger of your choice to the back. Here, we are using a sawtooth type hanger nailed to the back. Be sure to drill a pilot hole for the nails so as not to split the wood. 2D • Creative Woodworks a Crafts April 2002' |


