Creative Woodworks & crafts 2002-08, страница 50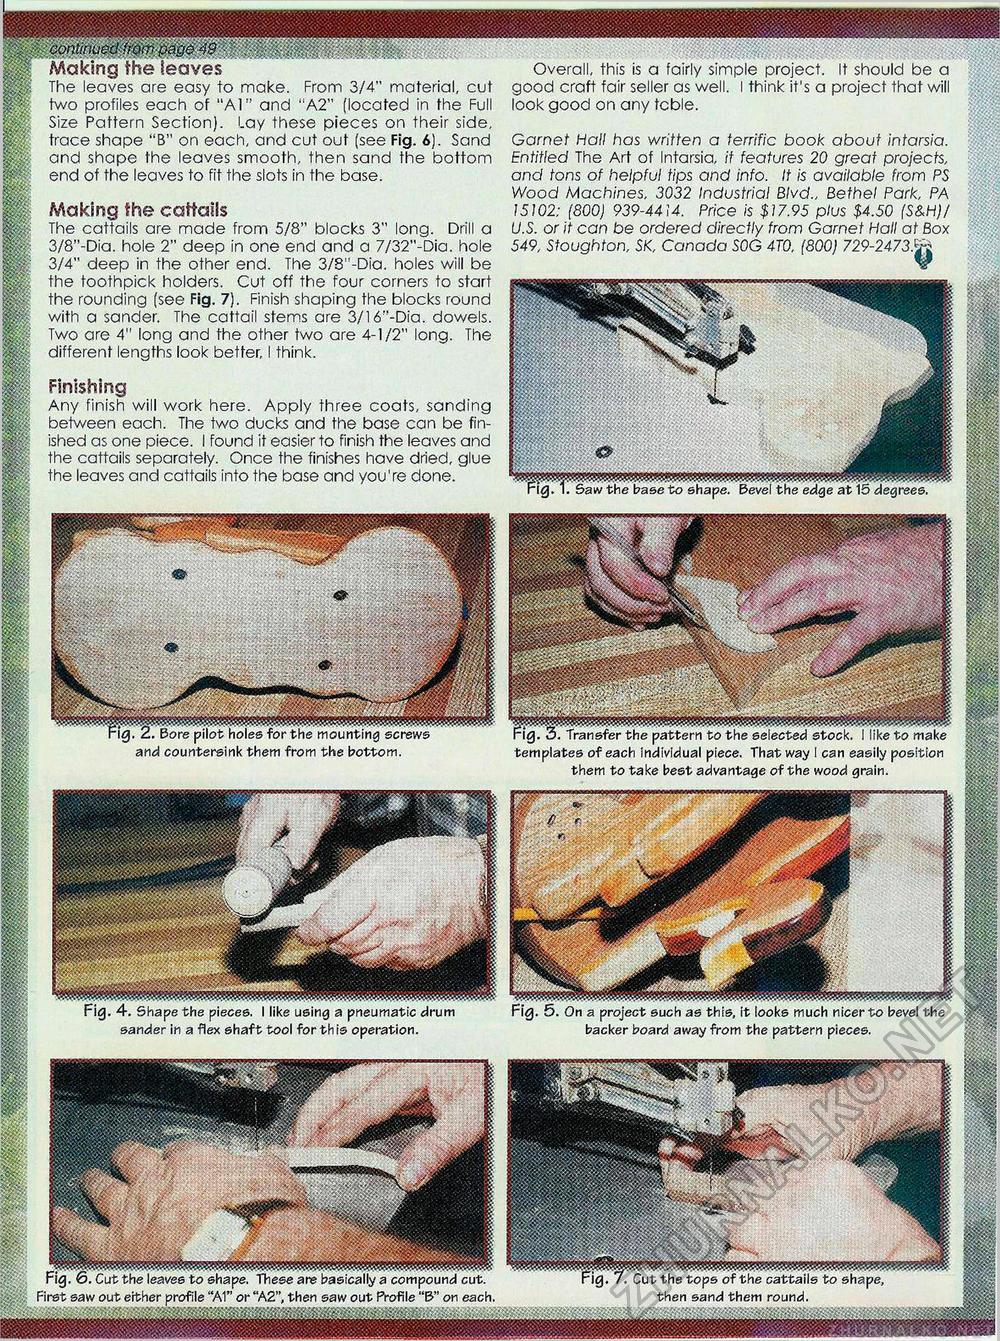
continued | 6m pag& 49 Making the leaves The leaves are easy to make. From 3/4" material, cut two profiles each of "A1" and "A2" (located in the Full Size Pattern Section). Lay these pieces on their side, trace shape "B" on each, and cut out (see Fig. 6). Sand and shape the leaves smooth, then sand the bottom end of the leaves to fit the slots in the base. Overall, this is a fairly simple project. It should be a good craft fair seller as well. I think it's a project that will look good on any tcble. Garnet Hall has written a terrific book about intarsia. Entitled The Art of Intarsia, if features 20 great projects, and tons of helpful tips and info. It is available from PS Wood Machines, 3032 Industrial Blvd., Bethel Park, PA 15102; (800) 939-4414. Price is $17.95 plus $4.50 (S&H)/ U.S. or it can be ordered directly from Garnet Hall at Box 549, Stoughton, SK, Canada SOG 4T0, (800) 729-2473 Making the cattails The cattails are made from 5/8" blocks 3" long. Drill a 3/8"-Dia. hole 2" deep in one end and a 7/32"-Dia. hole 3/4" deep in the other end. The 3/8"-Dia. holes will be the toothpick holders. Cut off the four corners to start the rounding (see Fig. 7). Finish shaping the blocks round with a sander. The cattail stems are 3/16"-Dia. dowels. Two are 4" long and the other two are 4-1/2" long. The different lengths look better, I think. Finishing Any finish will work here. Apply three coats, sanding between each. The two ducks and the base can be finished as one piece. I found it easier to finish the leaves and the cattails separately. Once the finishes have dried, glue the leaves and cattails into the base and you're done. Saw the base to shape. Bevel the edge at 15 degrees. ig. 2. Bore pilot hoiee for the mounting screws and countersink them from the bottom. Fig. 3. Transfer the pattern to the selected stock. I like to make templates of each individual piece. That way I can easily position them to take best advantage of the wood grain. Fig. 4. Shape the pieces. I like using a pneumatic dru sander in a flex shaft tool for th is operation. Fig. 5. On a project such as this, it looks much nicerto bevel the backer board away from the pattern pieces. Cut the tops of the cattails to shape, then sand them round. Fig. 0. Cut the leaves to shape. These are basically a compound cut. First saw out either profile "A1" or "A2", then saw out Profile "B" on each, |


