Creative Woodworks & crafts 2003-01, страница 47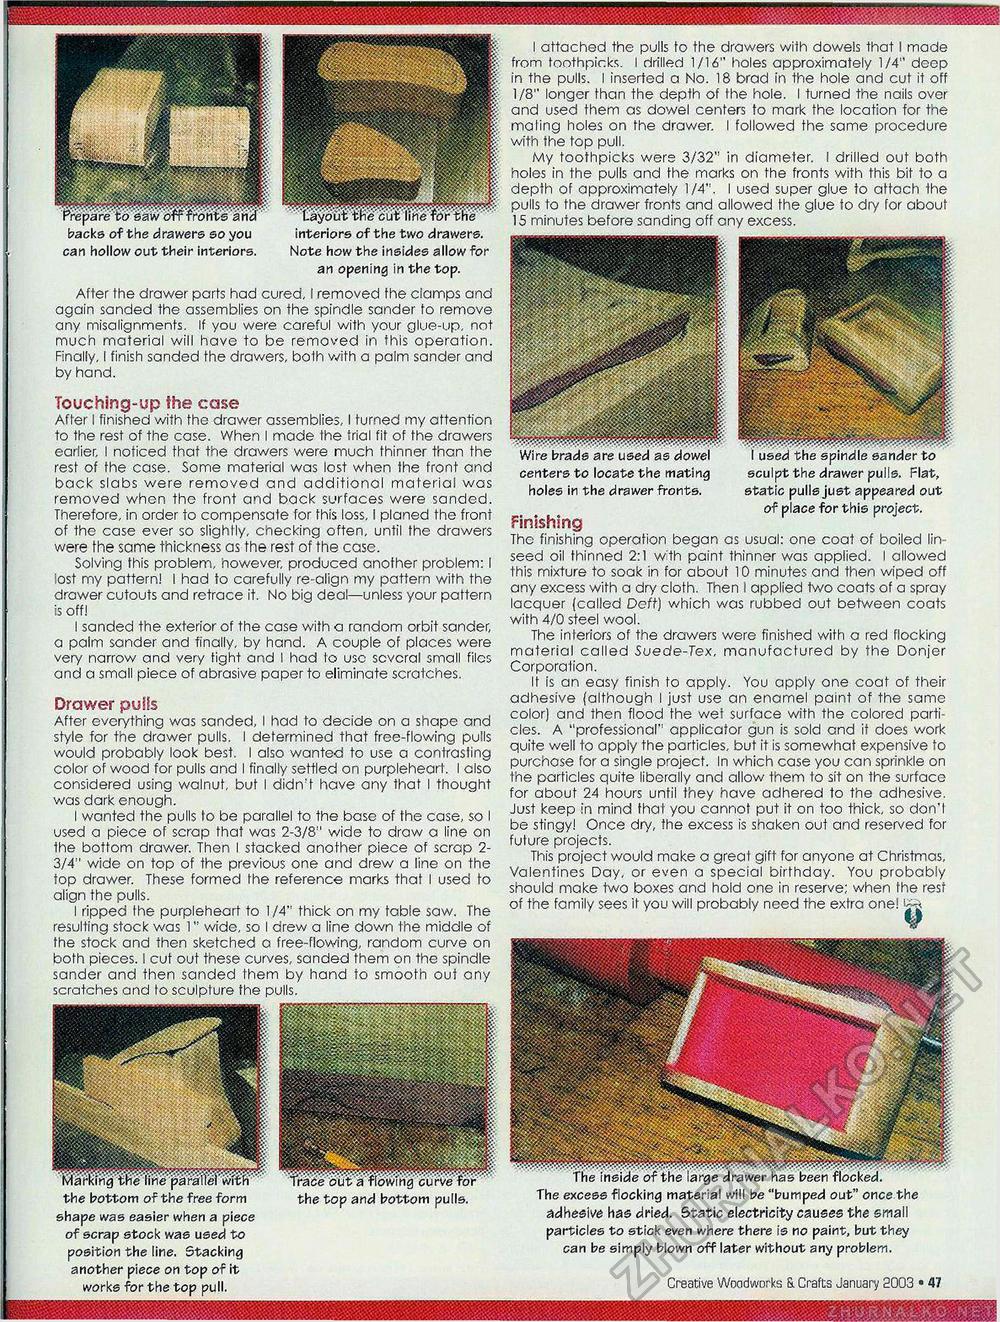
mmrnm Prepare t6 saw"6rrfronts aha'' backs of the drawers so you interiors of the two drawers, can hollow out their interiors. Note how the insides allow for an opening in the top. After the drawer parts had cured, I removed the clamps and again sanded the assemblies on the spindle sander to remove any misalignments. If you were careful with your glue-up, not much material will have to be removed in this operation. Finally, I finish sanded the drawers, both with a palm sander and by hand. Touching-up the case After I finished with the drawer assemblies, I turned my attention to the rest of the case. When I made the trial fit of the drawers earlier, I noticed that the drawers were much thinner than the rest of the case. Some material was lost when the front and back slabs were removed and additionol material was removed when the front and back surfaces were sanded. Therefore, in order to compensate for this loss, I planed the front of the case ever so slightly, checking often, until the drawers were the same thickness as the rest of the case. Solving this problem, however, produced another problem: I lost my pattern! I had to carefully re-align my pattern with the drawer cutouts and retrace it. No big deal—unless your pattern is off! I sanded the exterior of the case with a random orbit sander, a palm sander and finally, by hand. A couple of places were very narrow and very fight and I had lo use several small files and a small piece of abrasive paper to eliminate scratches. Drawer pulls After everything was sanded, I had to decide on a shape and style for the drawer pulls. I determined that free-flowing pulls would probably look best. I also wanted to use a contrasting color of wood for pulls and 1 finally settled on purpleheart. I also considered using walnut, but I didn't have any that I thought was dark enough. I wanted the pulls to be parallel to the base of the case, so I used a piece of scrap that was 2-3/8" wide to draw a line on the bottom drawer. Then I stacked another piece of scrap 2-3/4" wide on top of the previous one and drew a line on the top drawer. These formed the reference marks that I used to align the pulls. I ripped the purpleheart to 1/4" thick on my table saw. The resulting stock was 1" wide, so I drew a line down the middle of the stock and then sketched a free-flowing, random curve on both pieces. I cut out these curves, sanded them on the spindle sander and then sanded them by hand to smooth out ony scratches and lo sculpture the pulls. Marking tri£ line parallel Wn( the bottom of the free form shape was easier when a piece of scrap stock was used to position the line. Stacking another piece on top of it works for the top pull. Trace out a flowing curVe for the top and bottom pulls. I attached the pulls to the drawers with dowels that I made from toothpicks. I drilled 1/16" holes approximately 1/4" deep in the pulls. 1 inserted a No. 18 brad in the hole and cut it off 1/8" longer than the depth of the hole. I turned the nails over and used them as dowel centers to mark the location for the moling holes on the drawer. I followed the same procedure with the top pull. My toothpicks were 3/32" in diameter. I drilled out both holes in the pulls and the marks on the fronts with this bit to a depth of approximately 1/4". I used super glue to attach the pulls to the drawer fronts and allowed the glue to dry for about 15 minutes before sanding off any excess. Wire brads are used as dowel I used the spindle sander to centers to locate the mating sculpt the drawer pulls. Flat, holes in the drawer fronts. static pulls just appeared out of place for this project. Finishing The finishing operation began as usual: one coat of boiled linseed oil thinned 2:1 w'th paint thinner was applied. I allowed this mixture to soak in for about 10 minutes and then wiped off any excess with a dry cloth. Then I applied two coats of a spray lacquer (called Deft) which was rubbed out between coats with 4/0 steel wool. The interiors of the drawers were finished with a red flocking material called Suede-Tex. manufactured by the Donjer Corporation. It is an easy finish to apply. You apply one coat of their adhesive (although I just use an enamel paint of the same color) and then flood the wet surface with the colored particles. A "professional" applicator gun is sold and it does work quite well to apply the particles, but it is somewhat expensive to purchose for a single project. In which case you can sprinkle on the particles quite liberally and allow them to sit on the surface for about 24 hours until they have adhered to the adhesive. Just keep in mind that you cannot put it on too thick, so don'I be stingy! Once dry, the excess is shaken out and reserved for future projects. This project would make a great gift for anyone at Christmas, Valentines Day, or even a special birthday. You probably should make two boxes and hold one in reserve; when the rest of the family sees it you will probably need the extra one! ka The inside of the large drawer has been flocked. The excess flocking material will be "bumped out" once the adhesive has dried. Static electricity causes the small particles to stick even where there is no paint, but they can be simply blown off later without any problem. Creative Woodworks & Crafts January 2003 • 47 ••;.••.;. ■..... |


