Creative Woodworks & crafts 2004-11, страница 60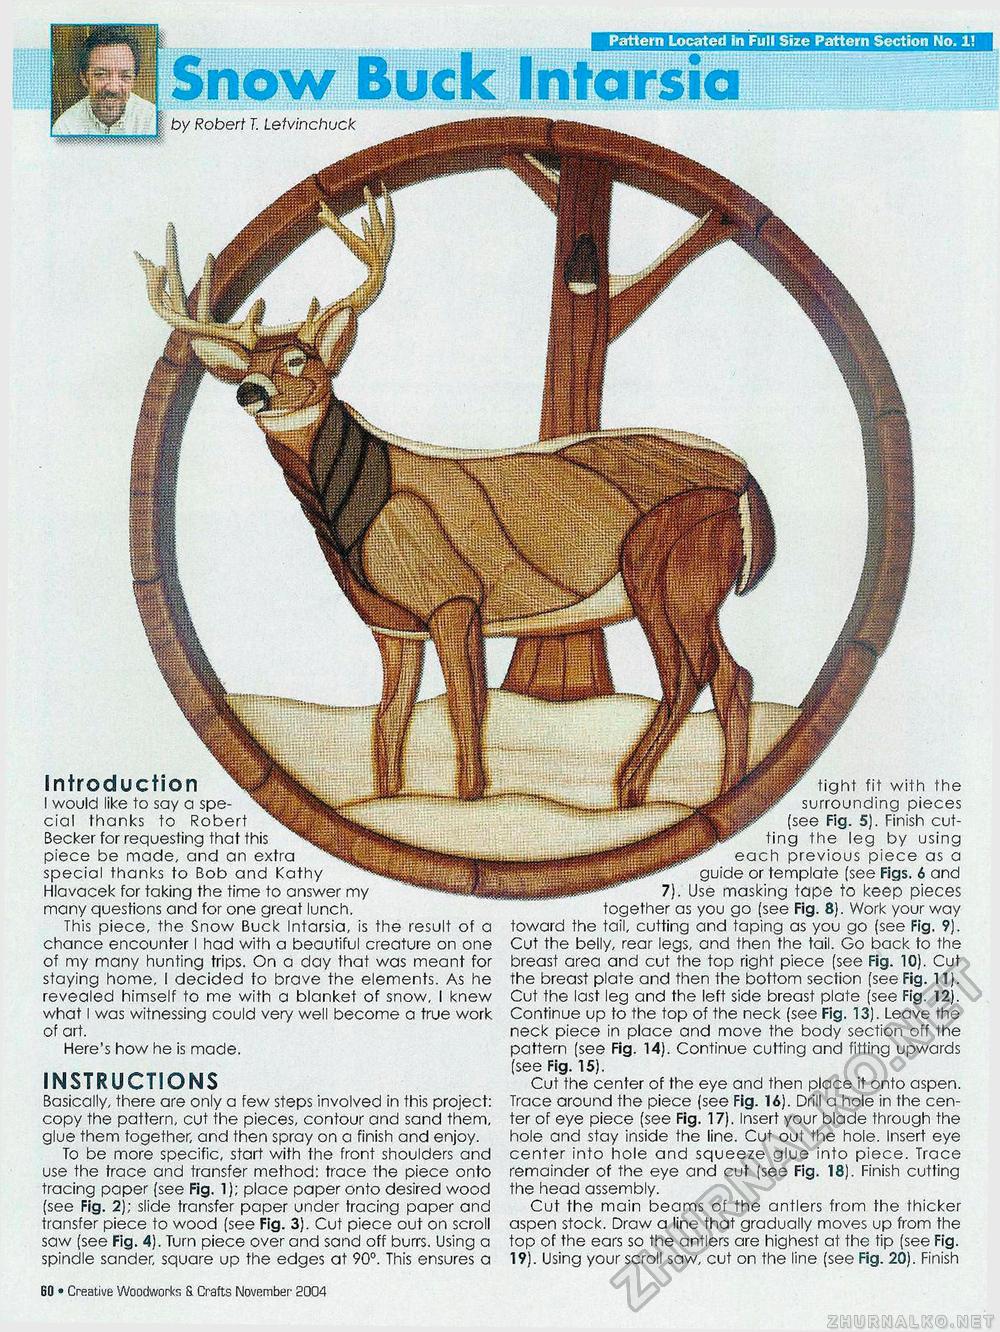
Pattern Located In Full Size Pattern Section No. 1! Snow Buck Intarsia | by Robert T. Lefvinchuck tight fit with the surrounding pieces (see Fig. 5). Finish cutting the leg by using each previous piece as a guide or template (see Figs. 6 and 7). Use masking tape to keep pieces together as you go (see Fig. 8). Work your way toward the tail, cutting and taping as you go (see Fig. 9). Cut the belly, rear legs, and then the tail. Go back to the breast area and cut the top right piece (see Fig. 10). Cut the breast plate and then the bottom section (see Fig. 11). Cut the last leg and the left side breast plate (see Fig. 12). Continue up to the top of the neck (see Fig. 13). Leave the neck piece in place and move the body section off the pattern (see Fig. 14). Continue cutting and fitting upwards (see Fig. 15). Cut the center of the eye and then place it onto aspen. Trace around the piece (see Fig. 16). Drill a hole in the center of eye piece (see Fig. 17). Insert your blade through the hole and stay inside the line. Cut out the hole. Insert eye center into hole and squeeze glue into piece. Trace remainder of the eye and cut (see Fig. 18). Finish cutting the head assembly. Cut the main beams of the antlers from the thicker aspen stock. Draw a line that gradually moves up from the top of the ears so the antlers are highest at the tip (see Fig. 19). Using your scroll saw, cut on the line (see Fig. 20). Finish INSTRUCTIONS Basically, there are only a few steps involved in this project: copy the pattern, cut the pieces, contour and sand them, glue them together, and then spray on a finish and enjoy. To be more specific, start with the front shoulders and use the trace and transfer method: trace the piece onto tracing paper (see Fig. 1); place paper onto desired wood (see Fig. 2); slide transfer paper under tracing paper and transfer piece to wood (see Fig. 3). Cut piece out on scroll saw (see Fig. 4). Turn piece over and sand off burrs. Using a spindle sander, square up the edges at 90°. This ensures a Introduction I would like to say a special thanks to Robert Becker for requesting that this piece be made, and an extra special thanks to Bob and Kathy Hlavacek for taking the time to answer my many questions and for one great lunch. This piece, the Snow Buck Intarsia, is the result of a chance encounter I had with a beautiful creature on one of my many hunting trips. On a day that was meant for staying home, I decided to brave the elements. As he revealed himself to me with a blanket of snow, I knew what I was witnessing could very well become a true work of art. Here's how he is made. 60 • Creative Woodworks S. Crafts November 2004 |


