Creative Woodworks & crafts 2004-11, страница 58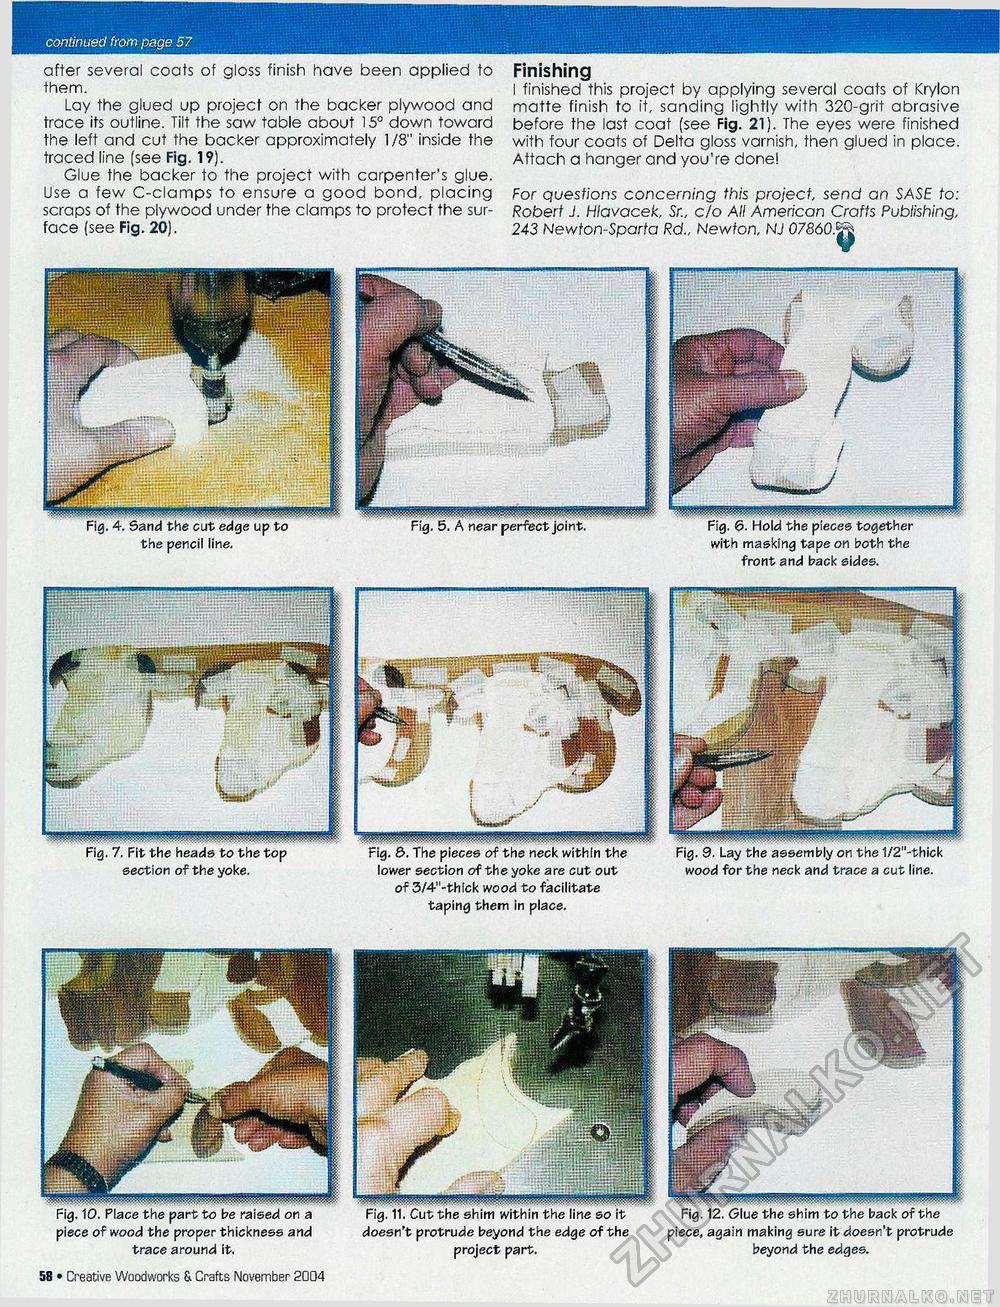
continued from page 51 after several coats of gloss finish have been applied to them. Lay the glued up project on the backer plywood and trace its outline. Tilt the saw table about 15° down toward the left and cut the backer approximately 1/8" inside the traced line (see Fig. 19). Glue the backer to the project with carpenter's glue. Use a few C-clamps to ensure a good bond, placing scraps of the plywood under the clamps to protect the surface (see Fig. 20). Finishing I finished this project by applying several coats of Krylon matte finish to it, sanding lightly with 320-grit abrasive before the last coat (see Fig. 21). The eyes were finished with four coats of Delta gloss varnish, then glued in place. Attach a hanger and you're done! For questions concerning this project, send an SASE to: Robert J. Hlavacek, Sr., c/o All American Crafts Publishing, 243 Newton-Sparta Rd„ Newton, NJ 07860.*jfi with masking tape on both the front and back sides. section oftheyoke. lower section of the yoke are cut out wood for the neck and trace a cut line. of 3/4"-thick wood to facilitate taping them in place. piece of wood the proper thickness and doesn't protrude beyond the edge of the piece, again making sure it doesn't protrude trace around It. project part. beyond the edges. 58 • Creative Woodworks S. Crafts November 2004 |


