Creative Woodworks & crafts 2005-04, страница 64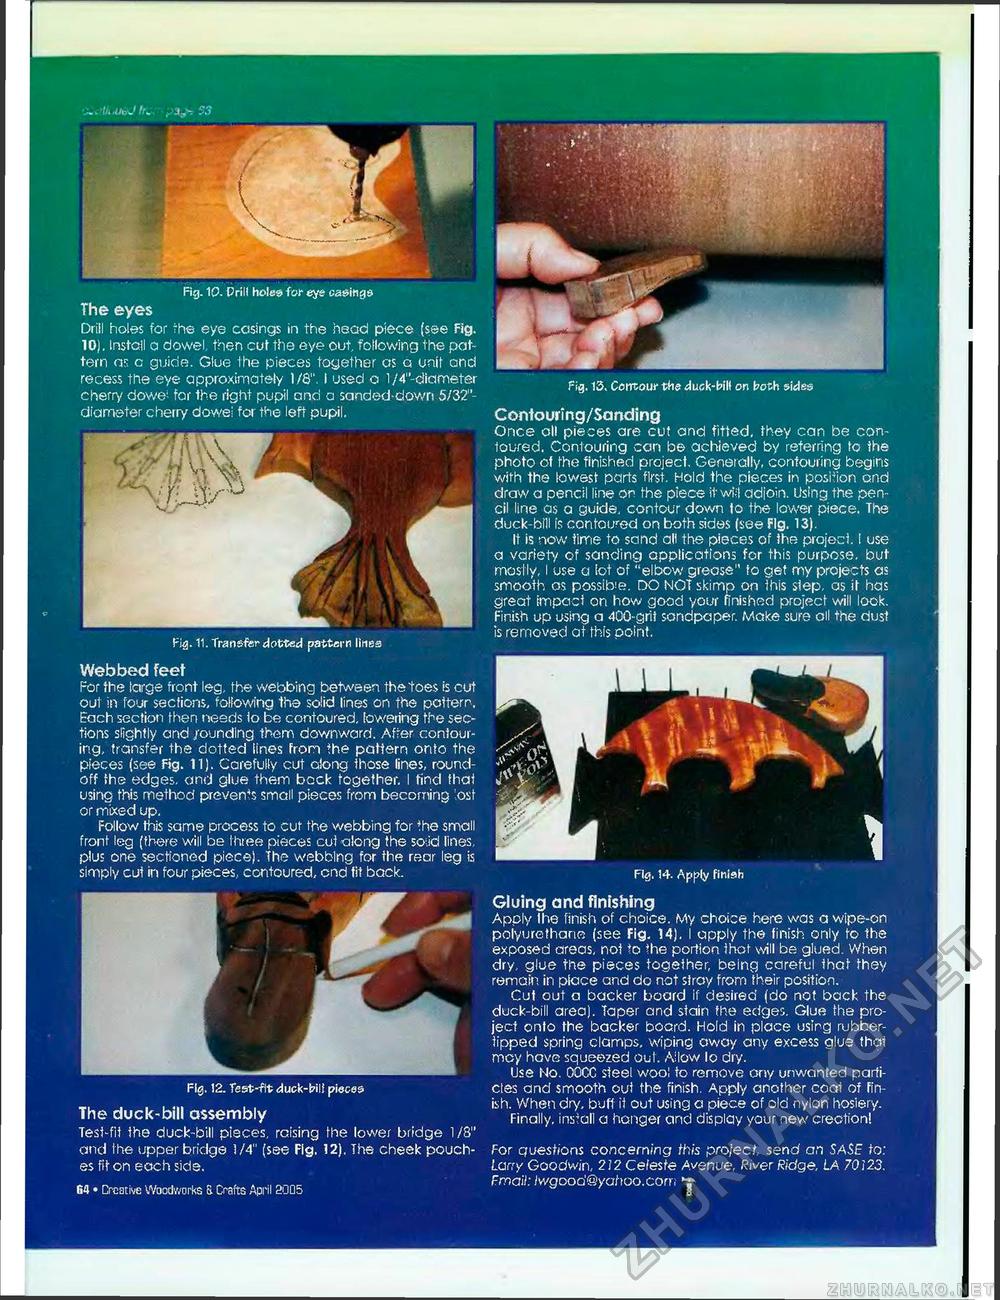
..tii.U&JIU ,.>a»»= S3 « Fig. 11. transfer dotted pattern lines Fig. 12. Test-fit duck-bill pieces The duck-bill assembly Test-fit ihe duck-bill pisces, raising the lower bridge 1/8" and the upper bridge i/4" (see Fig. 12). The cheek pouches fit on each side. 6a • Creative Woodworks a Crafts April 2005 Fig. 10. Prill holes for eye casings The eyes Drill holes for the eye casings in the head piece (see Fig. 10). install a dowel, then cut the eye out, following the pattern as c guide. Glue the pieces together as a unit and recess the eye approximately 1/8". I used a 1/4"-diameter cherry dowe^ for the right pupil and a sanded-down 5/32"-diameter cherry dowei for the left pupil. Fig. 13. Contour the duck-bill on both sides Contouring/Sanding Once all pieces are cut and fitted, they can be contoured. Contouring can be achieved by referring to the photo of the finished project. Generally, contouring begins with the lowest parts first. Hold the pieces in position and draw a pencil line on the piece itwi-it adjoin. Using the pencil line as a guide, contour down to the lower piece. The duck-bill is contained on both sides (see Fig. 13). It is now time to sand all the pieces of the project. I use a variety of sanding applications for this purpose, but mostly, I use a lot of "elbow grease" fo get my projects as smooth as possibe. DO NOT skimp on this step, as il has great impact on how good your finished project will look. Finish up using a 400-grit sandpaper. Make sure all the dust is removed at this point. Webbed feet For the large front leg, the webbing between the toes is cut out in four sections, following the solid lines on the pattern. Each section then needs lo be contoured, lowering the sections slightly and /ounding them dov/nward. After contouring, transfer the dotted lines From the pattern onto the pieces (see Fig. 11). Carefully cut along those lines, roundoff the edges, and glue them bcck together. I find that using this method prevents small pieces from becoming ;ost or mixed up. Follow this same process to cut the webbing for the small front leg (there will be three pieces cut along the solid lines, plus one sectioned piece). The webbing for the rear leg is simply cut in four pieces, contoured, end fit back. -'Jf.Mb-' ^ I .a .r Fig. 14. Apply finish Gluing and finishing Apply Ihe finish of choice. My choice here was a wipe-on poiyurethane (see Fig. 14). I apply the finish only fo the exposed areas, not to the portion that will be glued. When dry, glue the pieces together, being careful that they remain in place and do not stray from their position. Cut out a backer board if desired (do not back the duck-bill area). Taper and stain the edges. Glue the project onto the backer board. Hold in place using rubber-tipped spring clamps, wiping away any excess glue that mcy have squeezed out. Ailow lo dry. Use No. 00CC steel wool to remove any unwanted particles and smooth out the finish. Apply another coat of Finish. When dry, buff it out using a piece of old nylon hosiery. Finally, install a hanger and display your new crection! For questions concerning this project, send an SASE to: Larry Goodwin, 2 J 2 Celeste Avenue, River Ridge, LA 70i23. Fmail: lwgood@yahoo.com <f |


