Popular Woodworking 2002-04 № 127, страница 36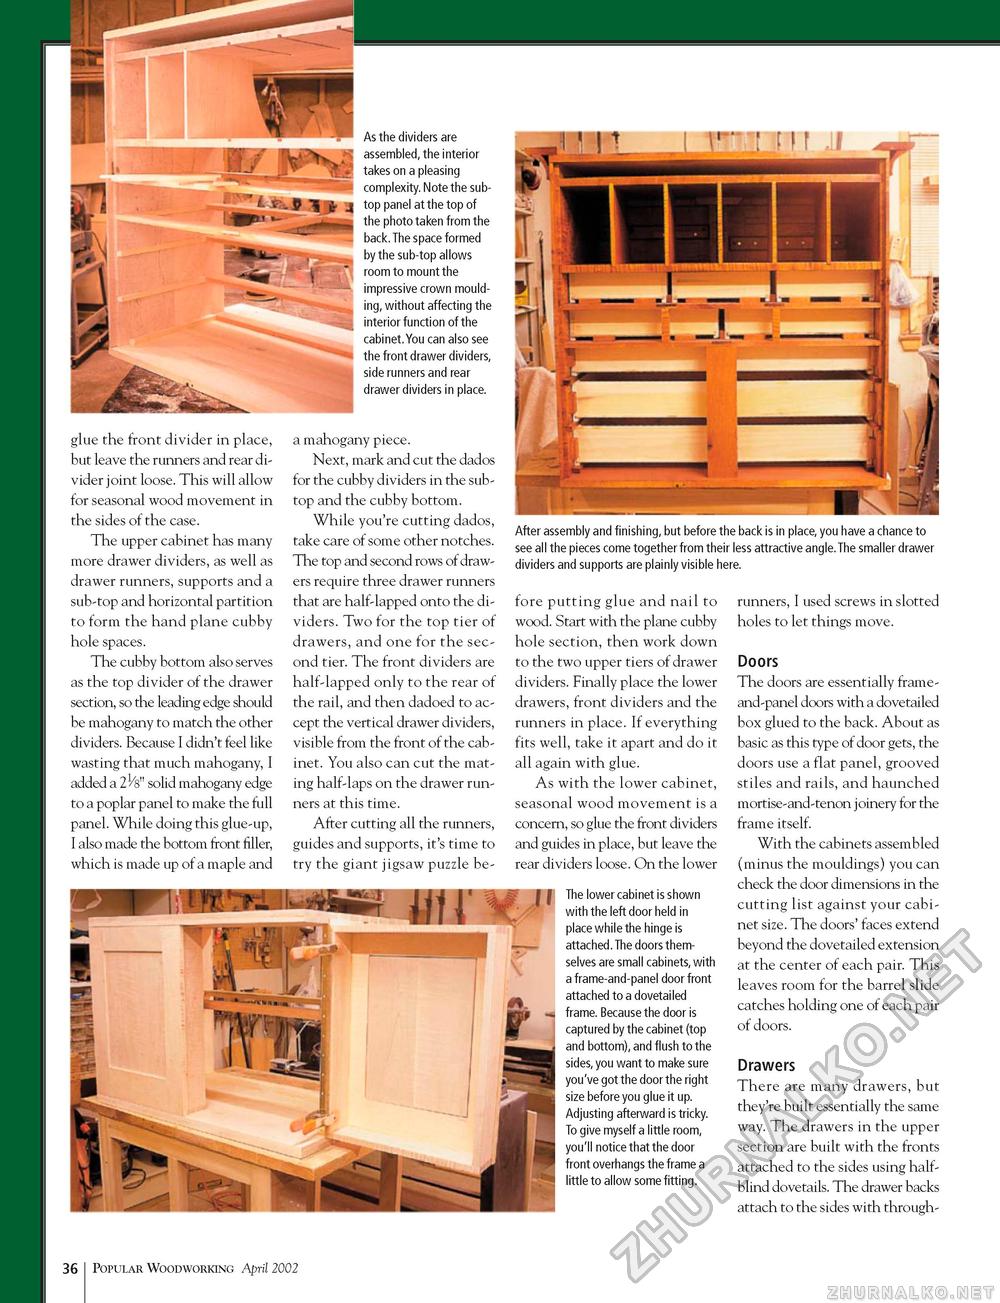
glue the front divider in place, but leave the runners and rear divider joint loose. This will allow for seasonal wood movement in the sides of the case. The upper cabinet has many more drawer dividers, as well as drawer runners, supports and a sub-top and horizontal partition to form the hand plane cubby hole spaces. The cubby bottom also serves as the top divider of the drawer section, so the leading edge should be mahogany to match the other dividers. Because I didn't feel like wasting that much mahogany, I added a solid mahogany edge to a poplar panel to make the full panel. While doing this glue-up, I also made the bottom front filler, which is made up of a maple and As the dividers are assembled, the interior takes on a pleasing complexity. Note the sub-top panel at the top of the photo taken from the back. The space formed by the sub-top allows room to mount the impressive crown moulding, without affecting the interior function of the cabinet.You can also see the front drawer dividers, side runners and rear drawer dividers in place. a mahogany piece. Next, mark and cut the dados for the cubby dividers in the sub-top and the cubby bottom. While you're cutting dados, take care of some other notches. The top and second rows of drawers require three drawer runners that are half-lapped onto the dividers. Two for the top tier of drawers, and one for the second tier. The front dividers are half-lapped only to the rear of the rail, and then dadoed to accept the vertical drawer dividers, visible from the front of the cabinet. You also can cut the mating half-laps on the drawer runners at this time. After cutting all the runners, guides and supports, it's time to try the giant jigsaw puzzle be fore putting glue and nail to wood. Start with the plane cubby hole section, then work down to the two upper tiers of drawer dividers. Finally place the lower drawers, front dividers and the runners in place. If everything fits well, take it apart and do it all again with glue. As with the lower cabinet, seasonal wood movement is a concern, so glue the front dividers and guides in place, but leave the rear dividers loose. On the lower The lower cabinet is shown with the left door held in place while the hinge is attached. The doors themselves are small cabinets, with a frame-and-panel door front attached to a dovetailed frame. Because the door is captured by the cabinet (top and bottom), and flush to the sides, you want to make sure you've got the door the right size before you glue it up. Adjusting afterward is tricky. To give myself a little room, you'll notice that the door front overhangs the frame a little to allow some fitting. runners, I used screws in slotted holes to let things move. Doors The doors are essentially frame-and-panel doors with a dovetailed box glued to the back. About as basic as this type of door gets, the doors use a flat panel, grooved stiles and rails, and haunched mortise-and-tenon joinery for the frame itself. With the cabinets assembled (minus the mouldings) you can check the door dimensions in the cutting list against your cabinet size. The doors' faces extend beyond the dovetailed extension at the center of each pair. This leaves room for the barrel slide catches holding one of each pair of doors. Drawers There are many drawers, but they're built essentially the same way. The drawers in the upper section are built with the fronts attached to the sides using half-blind dovetails. The drawer backs attach to the sides with through- 36 Popular Woodworking April 2002 |


