Popular Woodworking 2002-06 № 128, страница 66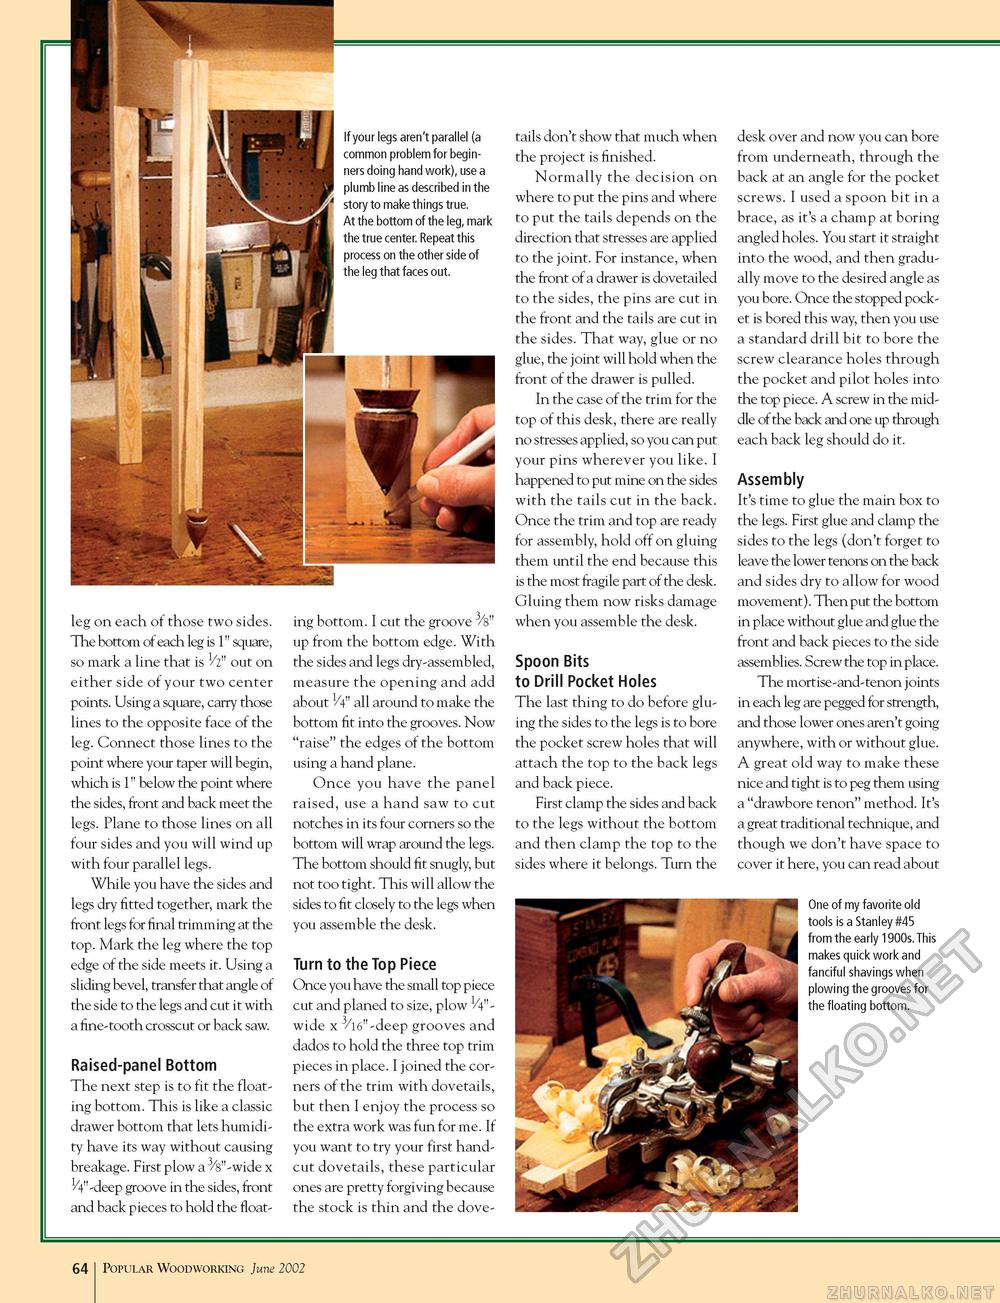
If your legs aren't parallel (a common problem for beginners doing hand work), use a plumb line as described in the story to make things true. At the bottom of the leg, mark the true center. Repeat this process on the other side of the leg that faces out. leg on each of those two sides. The bottom of each leg is 1" square, so mark a line that is 1/2" out on either side of your two center points. Using a square, carry those lines to the opposite face of the leg. Connect those lines to the point where your taper will begin, which is 1" below the point where the sides, front and back meet the legs. Plane to those lines on all four sides and you will wind up with four parallel legs. While you have the sides and legs dry fitted together, mark the front legs for final trimming at the top. Mark the leg where the top edge of the side meets it. Using a sliding bevel, transfer that angle of the side to the legs and cut it with a fine-tooth crosscut or back saw. Raised-panel Bottom The next step is to fit the floating bottom. This is like a classic drawer bottom that lets humidity have its way without causing breakage. First plow a 3/s"-wide x ^V'-deep groove in the sides, front and back pieces to hold the float ing bottom. I cut the groove 3/s" up from the bottom edge. With the sides and legs dry-assembled, measure the opening and add about V4" all around to make the bottom fit into the grooves. Now "raise" the edges of the bottom using a hand plane. Once you have the panel raised, use a hand saw to cut notches in its four corners so the bottom will wrap around the legs. The bottom should fit snugly, but not too tight. This will allow the sides to fit closely to the legs when you assemble the desk. Turn to the Top Piece Once you have the small top piece cut and planed to size, plow 1/4"-wide x 3/l6"-deep grooves and dados to hold the three top trim pieces in place. I joined the corners of the trim with dovetails, but then I enjoy the process so the extra work was fun for me. If you want to try your first hand-cut dovetails, these particular ones are pretty forgiving because the stock is thin and the dove tails don't show that much when the project is finished. Normally the decision on where to put the pins and where to put the tails depends on the direction that stresses are applied to the joint. For instance, when the front of a drawer is dovetailed to the sides, the pins are cut in the front and the tails are cut in the sides. That way, glue or no glue, the joint will hold when the front of the drawer is pulled. In the case of the trim for the top of this desk, there are really no stresses applied, so you can put your pins wherever you like. I happened to put mine on the sides with the tails cut in the back. Once the trim and top are ready for assembly, hold off on gluing them until the end because this is the most fragile part of the desk. Gluing them now risks damage when you assemble the desk. Spoon Bits to Drill Pocket Holes The last thing to do before gluing the sides to the legs is to bore the pocket screw holes that will attach the top to the back legs and back piece. First clamp the sides and back to the legs without the bottom and then clamp the top to the sides where it belongs. Turn the desk over and now you can bore from underneath, through the back at an angle for the pocket screws. I used a spoon bit in a brace, as it's a champ at boring angled holes. You start it straight into the wood, and then gradually move to the desired angle as you bore. Once the stopped pocket is bored this way, then you use a standard drill bit to bore the screw clearance holes through the pocket and pilot holes into the top piece. A screw in the middle of the back and one up through each back leg should do it. Assembly It's time to glue the main box to the legs. First glue and clamp the sides to the legs (don't forget to leave the lower tenons on the back and sides dry to allow for wood movement). Then put the bottom in place without glue and glue the front and back pieces to the side assemblies. Screw the top in place. The mortise-and-tenon joints in each leg are pegged for strength, and those lower ones aren't going anywhere, with or without glue. A great old way to make these nice and tight is to peg them using a "drawbore tenon" method. It's a great traditional technique, and though we don't have space to cover it here, you can read about One of my favorite old tools is a Stanley #45 from the early 1900s.This makes quick work and fanciful shavings when plowing the grooves for the floating bottom. 64 Popular Woodworking June 2002 |


