Popular Woodworking 2002-06 № 128, страница 68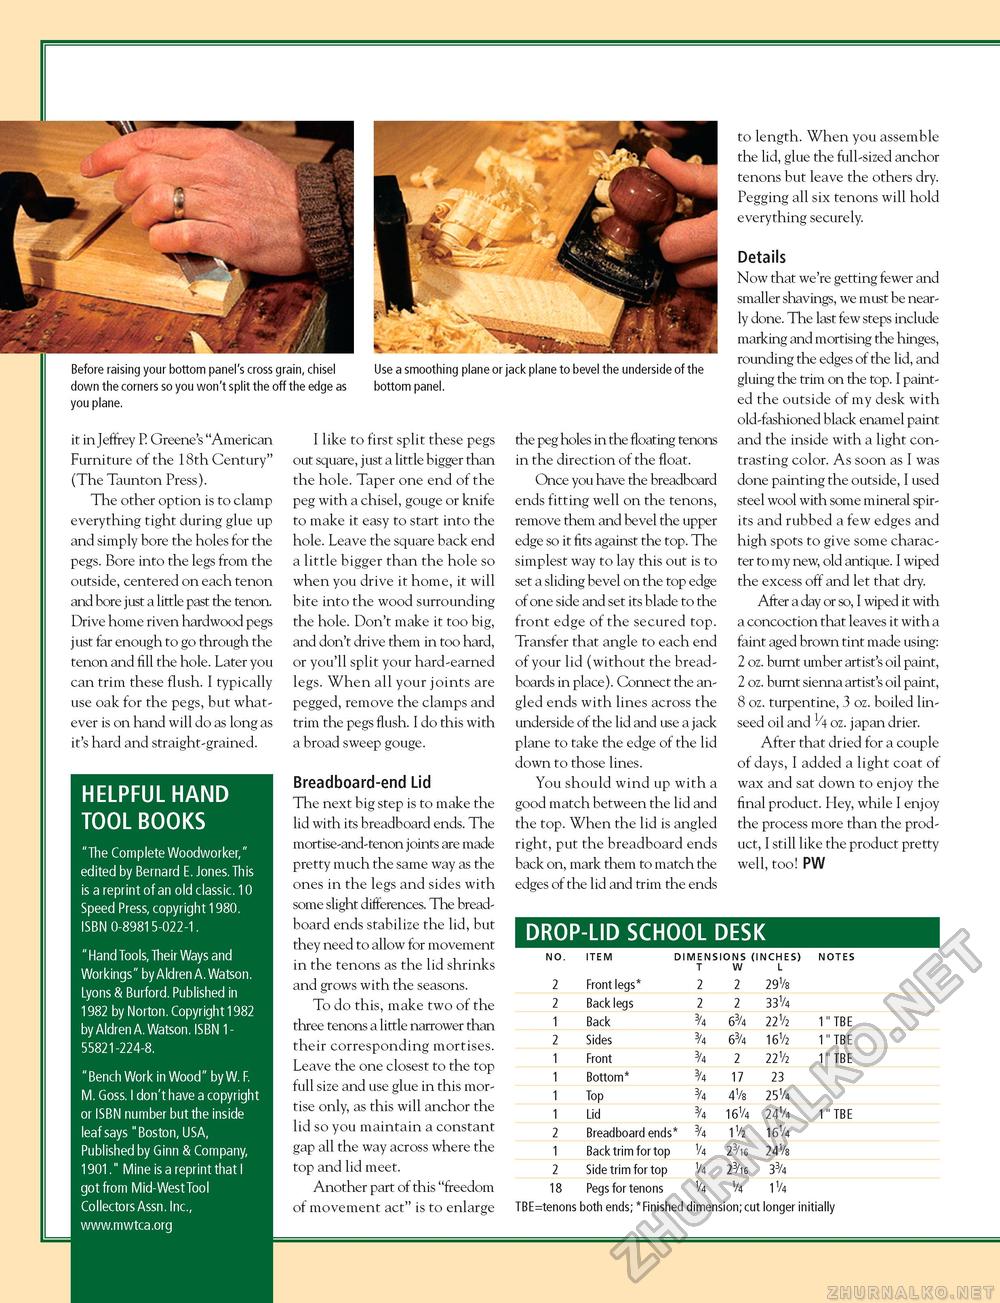
it in Jeffrey P. Greene's "American Furniture of the 18th Century" (The Taunton Press). The other option is to clamp everything tight during glue up and simply bore the holes for the pegs. Bore into the legs from the outside, centered on each tenon and bore just a little past the tenon. Drive home riven hardwood pegs just far enough to go through the tenon and fill the hole. Later you can trim these flush. I typically use oak for the pegs, but whatever is on hand will do as long as it's hard and straight-grained. I like to first split these pegs out square, just a little bigger than the hole. Taper one end of the peg with a chisel, gouge or knife to make it easy to start into the hole. Leave the square back end a little bigger than the hole so when you drive it home, it will bite into the wood surrounding the hole. Don't make it too big, and don't drive them in too hard, or you'll split your hard-earned legs. When all your joints are pegged, remove the clamps and trim the pegs flush. I do this with a broad sweep gouge. Breadboard-end Lid The next big step is to make the lid with its breadboard ends. The mortise-and-tenon joints are made pretty much the same way as the ones in the legs and sides with some slight differences. The breadboard ends stabilize the lid, but they need to allow for movement in the tenons as the lid shrinks and grows with the seasons. To do this, make two of the three tenons a little narrower than their corresponding mortises. Leave the one closest to the top full size and use glue in this mortise only, as this will anchor the lid so you maintain a constant gap all the way across where the top and lid meet. Another part of this "freedom of movement act" is to enlarge jack plane to bevel the underside of the the peg holes in the floating tenons in the direction of the float. Once you have the breadboard ends fitting well on the tenons, remove them and bevel the upper edge so it fits against the top. The simplest way to lay this out is to set a sliding bevel on the top edge of one side and set its blade to the front edge of the secured top. Transfer that angle to each end of your lid (without the breadboards in place). Connect the angled ends with lines across the underside of the lid and use a jack plane to take the edge of the lid down to those lines. You should wind up with a good match between the lid and the top. When the lid is angled right, put the breadboard ends back on, mark them to match the edges of the lid and trim the ends to length. When you assemble the lid, glue the full-sized anchor tenons but leave the others dry. Pegging all six tenons will hold everything securely. Details Now that we're getting fewer and smaller shavings, we must be nearly done. The last few steps include marking and mortising the hinges, rounding the edges of the lid, and gluing the trim on the top. I painted the outside of my desk with old-fashioned black enamel paint and the inside with a light contrasting color. As soon as I was done painting the outside, I used steel wool with some mineral spirits and rubbed a few edges and high spots to give some character to my new, old antique. I wiped the excess off and let that dry. After a day or so, I wiped it with a concoction that leaves it with a faint aged brown tint made using: 2 oz. burnt umber artist's oil paint, 2 oz. burnt sienna artist's oil paint, 8 oz. turpentine, 3 oz. boiled linseed oil and 1/4 oz. japan drier. After that dried for a couple of days, I added a light coat of wax and sat down to enjoy the final product. Hey, while I enjoy the process more than the product, I still like the product pretty well, too! PW
HELPFUL HAND TOOL BOOKS "The Complete Woodworker," edited by Bernard E. Jones. This is a reprint of an old classic. 10 Speed Press, copyright 1980. ISBN 0-89815-022-1. "Hand Tools, Their Ways and Workings" by Aldren A.Watson. Lyons & Burford. Published in 1982 by Norton. Copyright 1982 by Aldren A.Watson.ISBN 155821-224-8. "Bench Work in Wood" by W. F. M. Goss. I don't have a copyright or ISBN number but the inside leaf says "Boston, USA, Published by Ginn & Company, 1901." Mine is a reprint that I got from Mid-West Tool Collectors Assn. Inc., www.mwtca.org |
||||||||||||||||||||||||||||||||||||||||||||||||||||||||||||||||||||||||||||||||||||||||||


