Popular Woodworking 2003-04 № 133, страница 68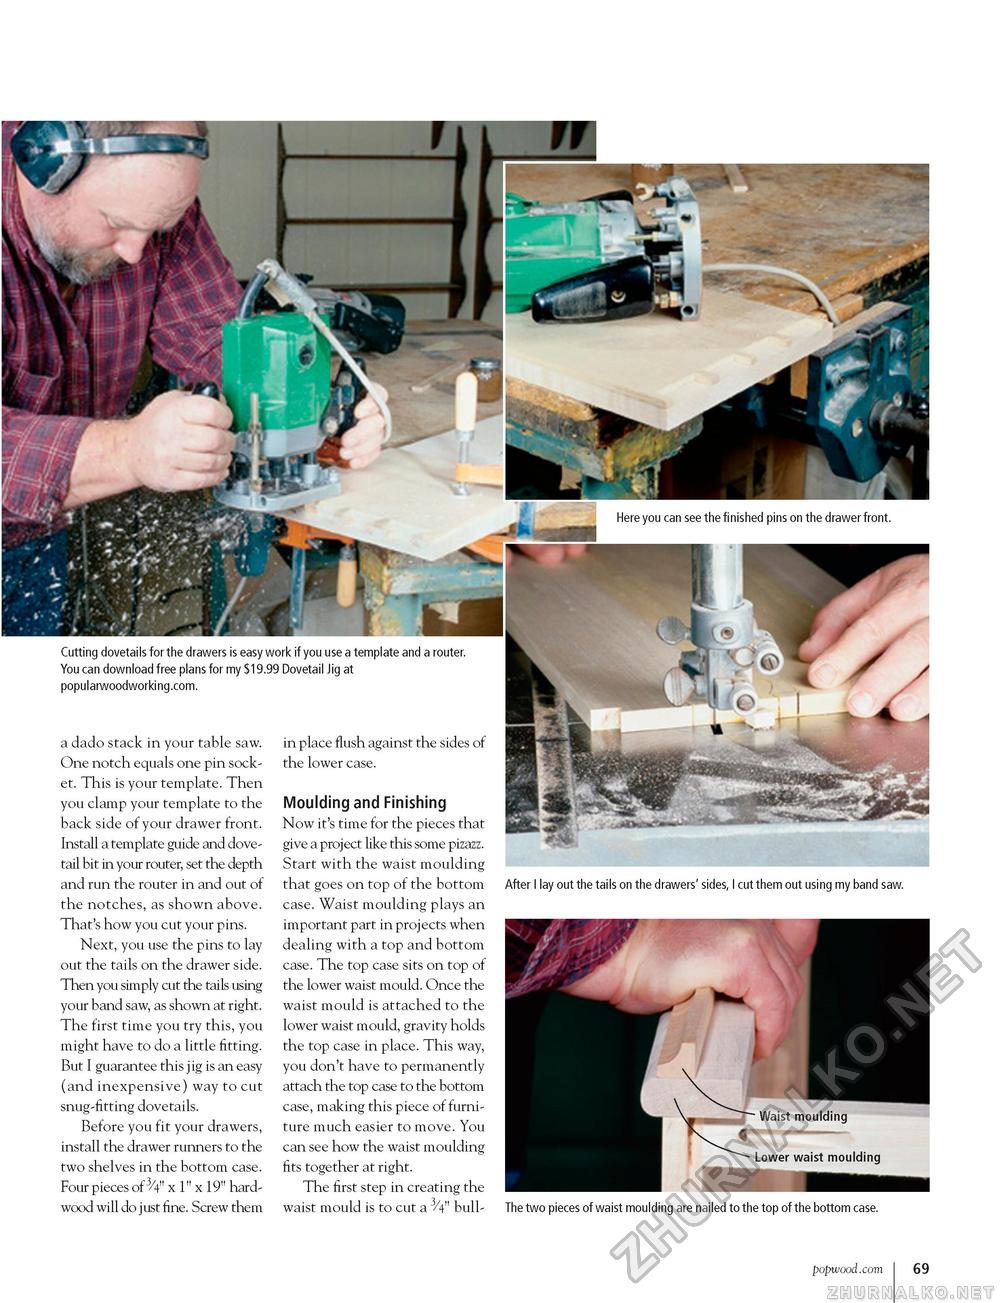
Cutting dovetails for the drawers is easy work if you use a template and a router. You can download free plans for my $19.99 Dovetail Jig at popularwoodworking.com. a dado stack in your table saw. One notch equals one pin socket. This is your template. Then you clamp your template to the back side of your drawer front. Install a template guide and dovetail bit in your router, set the depth and run the router in and out of the notches, as shown above. That's how you cut your pins. Next, you use the pins to lay out the tails on the drawer side. Then you simply cut the tails using your band saw, as shown at right. The first time you try this, you might have to do a little fitting. But I guarantee this jig is an easy (and inexpensive) way to cut snug-fitting dovetails. Before you fit your drawers, install the drawer runners to the two shelves in the bottom case. Four pieces of 3/4" x 1" x 19" hardwood will do just fine. Screw them Moulding and Finishing Now it's time for the pieces that give a project like this some pizazz. Start with the waist moulding that goes on top of the bottom case. Waist moulding plays an important part in projects when dealing with a top and bottom case. The top case sits on top of the lower waist mould. Once the waist mould is attached to the lower waist mould, gravity holds the top case in place. This way, you don't have to permanently attach the top case to the bottom case, making this piece of furniture much easier to move. You can see how the waist moulding fits together at right. The first step in creating the waist mould is to cut a 3/4" bull- After I lay out the tails on the drawers' sides, I cut them out using my band saw. The two pieces of waist moulding are nailed to the top of the bottom case. popwood.com 69 |


