Popular Woodworking 2003-04 № 133, страница 69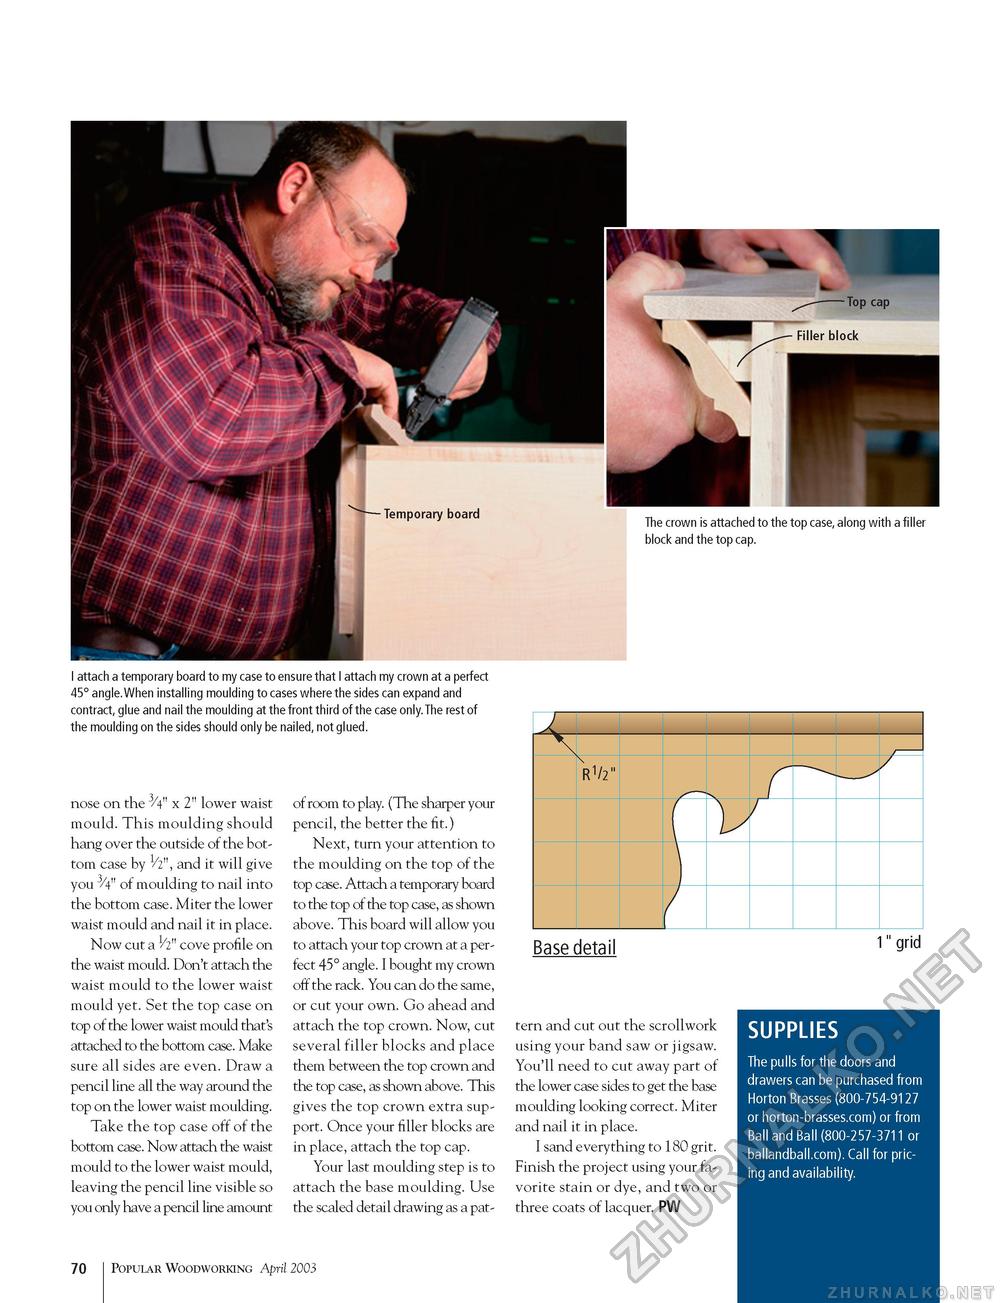
The crown is attached to the top case, along with a filler block and the top cap. I attach a temporary board to my case to ensure that I attach my crown at a perfect 45° angle.When installing moulding to cases where the sides can expand and contract, glue and nail the moulding at the front third of the case only.The rest of the moulding on the sides should only be nailed, not glued. nose on the 3/4" x 2" lower waist mould. This moulding should hang over the outside of the bottom case by 1/2", and it will give you 3/4" of moulding to nail into the bottom case. Miter the lower waist mould and nail it in place. Now cut a 1/2" cove profile on the waist mould. Don't attach the waist mould to the lower waist mould yet. Set the top case on top of the lower waist mould that's attached to the bottom case. Make sure all sides are even. Draw a pencil line all the way around the top on the lower waist moulding. Take the top case off of the bottom case. Now attach the waist mould to the lower waist mould, leaving the pencil line visible so you only have a pencil line amount of room to play. (The sharper your pencil, the better the fit.) Next, turn your attention to the moulding on the top of the top case. Attach a temporary board to the top of the top case, as shown above. This board will allow you to attach your top crown at a perfect 45° angle. I bought my crown off the rack. You can do the same, or cut your own. Go ahead and attach the top crown. Now, cut several filler blocks and place them between the top crown and the top case, as shown above. This gives the top crown extra support. Once your filler blocks are in place, attach the top cap. Your last moulding step is to attach the base moulding. Use the scaled detail drawing as a pat-
Base detail tern and cut out the scrollwork using your band saw or jigsaw. You'll need to cut away part of the lower case sides to get the base moulding looking correct. Miter and nail it in place. I sand everything to 180 grit. Finish the project using your favorite stain or dye, and two or three coats of lacquer. PW 1" grid SUPPLIES The pulls for the doors and drawers can be purchased from Horton Brasses (800-754-9127 or horton-brasses.com) or from Ball and Ball (800-257-3711 or ballandball.com).Call for pricing and availability. 70 Popular Woodworking April 2003 |
||||||||||||||||||||||||||||||||||||||||||||||||||||||||||||


