Popular Woodworking 2003-04 № 133, страница 66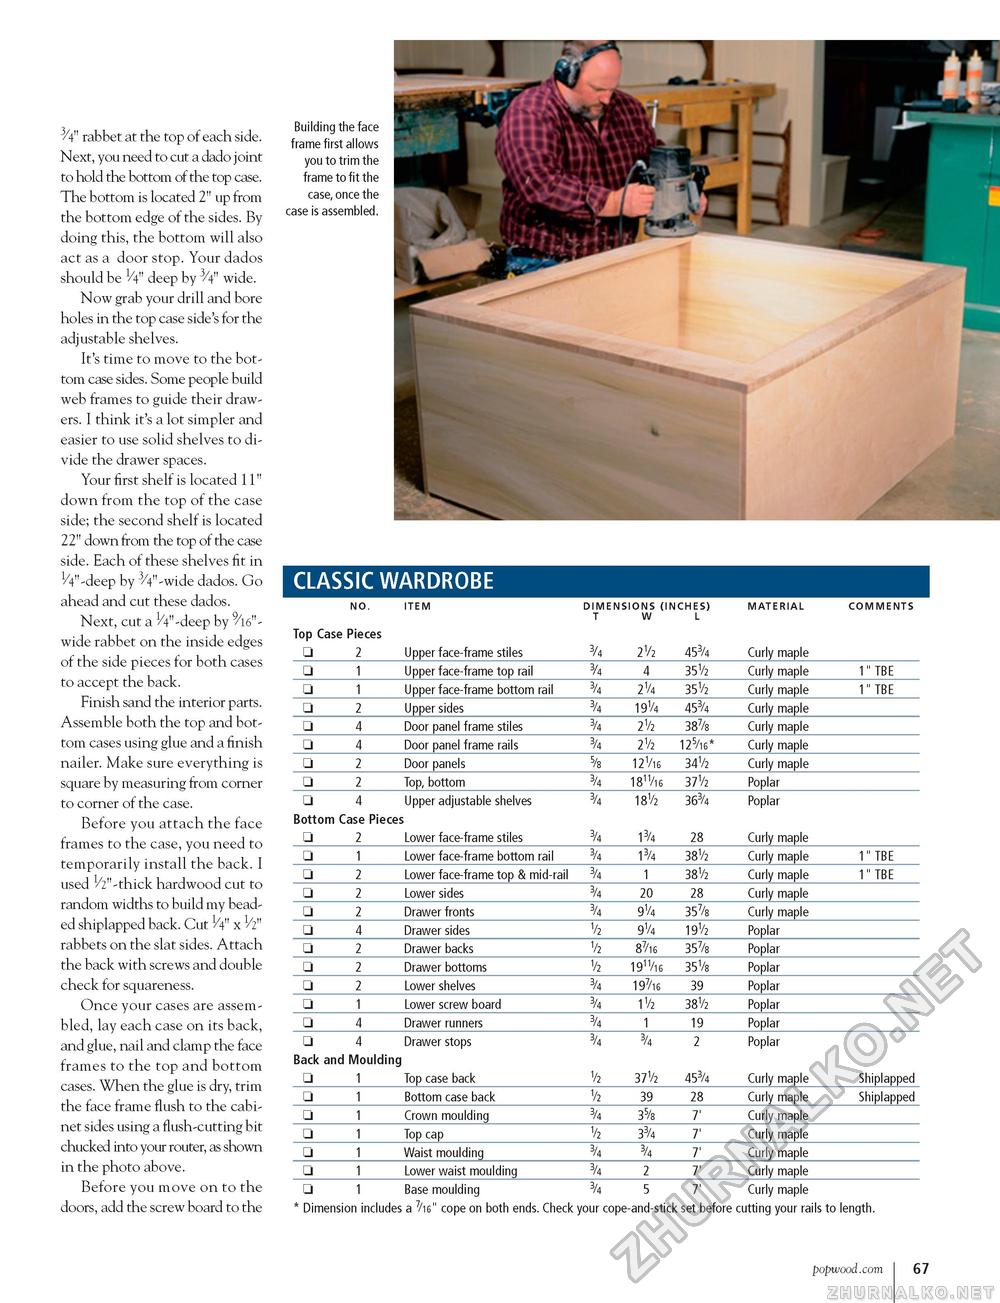
3/4" rabbet at the top of each side. Next, you need to cut a dado joint to hold the bottom of the top case. The bottom is located 2" up from the bottom edge of the sides. By doing this, the bottom will also act as a door stop. Your dados should be 1/4" deep by 3/4" wide. Now grab your drill and bore holes in the top case side's for the adjustable shelves. It's time to move to the bottom case sides. Some people build web frames to guide their drawers. I think it's a lot simpler and easier to use solid shelves to divide the drawer spaces. Your first shelf is located 11" down from the top of the case side; the second shelf is located 22" down from the top of the case side. Each of these shelves fit in 1/4"-deep by 3/4" -wide dados. Go ahead and cut these dados. Next, cut a 1/4"-deep by 9/l6"-wide rabbet on the inside edges of the side pieces for both cases to accept the back. Finish sand the interior parts. Assemble both the top and bottom cases using glue and a finish nailer. Make sure everything is square by measuring from corner to corner of the case. Before you attach the face frames to the case, you need to temporarily install the back. I used 1/2"-thick hardwood cut to random widths to build my beaded shiplapped back. Cut 1/4" x 1/2" rabbets on the slat sides. Attach the back with screws and double check for squareness. Once your cases are assembled, lay each case on its back, and glue, nail and clamp the face frames to the top and bottom cases. When the glue is dry, trim the face frame flush to the cabinet sides using a flush-cutting bit chucked into your router, as shown in the photo above. Before you move on to the doors, add the screw board to the Building the face frame first allows you to trim the frame to fit the case, once the case is assembled. CLASSIC WARDROBE Top Case Pieces DIMENSIONS (INCHES) T W L COMMENTS Top Case Pieces DIMENSIONS (INCHES) T W L COMMENTS
* Dimension includes a 7/i6" cope on both ends. Check your cope-and-stick se before cutting your rails to length. * Dimension includes a 7/i6" cope on both ends. Check your cope-and-stick se before cutting your rails to length. popwood.com 67 |
||||||||||||||||||||||||||||||||||||||||||||||||||||||||||||||||||||||||||||||||||||||||||||||||||||||||||||||||||||||||||||||||||||||||||||||||||||||||||||||||||||||||||||||||||||||||||||||||||||||||||||||||||||||||||||||||||||||||||||||||


