Popular Woodworking 2003-04 № 133, страница 67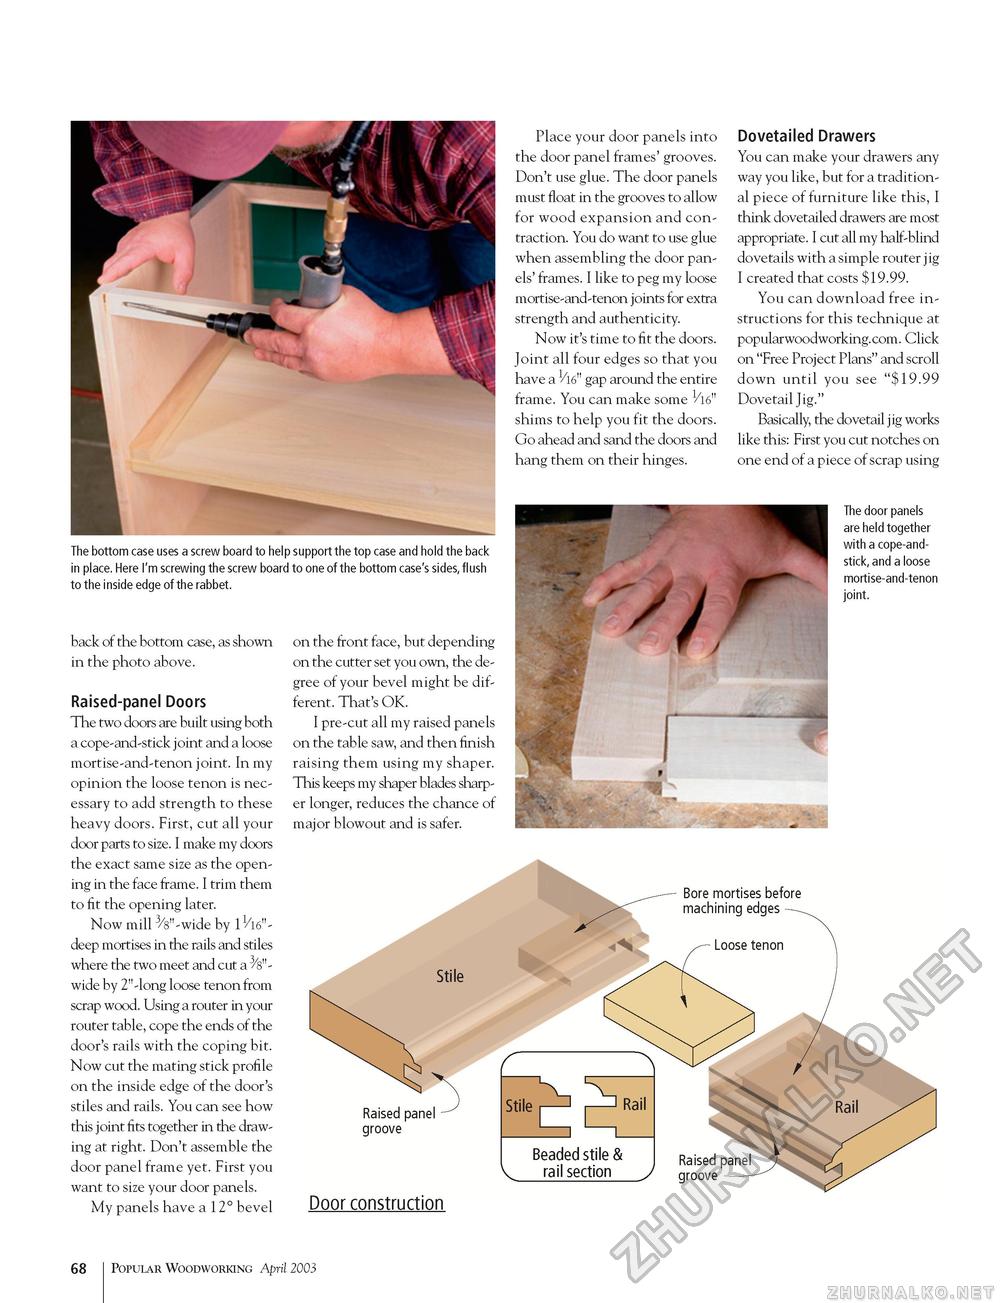
back of the bottom case, as shown in the photo above. Raised-panel Doors The two doors are built using both a cope-and-stick joint and a loose mortise-and-tenon joint. In my opinion the loose tenon is necessary to add strength to these heavy doors. First, cut all your door parts to size. I make my doors the exact same size as the opening in the face frame. I trim them to fit the opening later. Now mill 3/s"-wide by 11/l6n-deep mortises in the rails and stiles where the two meet and cut a ^s"-wide by 2"-long loose tenon from scrap wood. Using a router in your router table, cope the ends of the door's rails with the coping bit. Now cut the mating stick profile on the inside edge of the door's stiles and rails. You can see how this joint fits together in the drawing at right. Don't assemble the door panel frame yet. First you want to size your door panels. My panels have a 12° bevel on the front face, but depending on the cutter set you own, the degree of your bevel might be different. That's OK. I pre-cut all my raised panels on the table saw, and then finish raising them using my shaper. This keeps my shaper blades sharper longer, reduces the chance of major blowout and is safer. Stile groove Door construction Place your door panels into the door panel frames' grooves. Don't use glue. The door panels must float in the grooves to allow for wood expansion and contraction. You do want to use glue when assembling the door panels' frames. I like to peg my loose mortise-and-tenon joints for extra strength and authenticity. Now it's time to fit the doors. Joint all four edges so that you have a gap around the entire frame. You can make some shims to help you fit the doors. Go ahead and sand the doors and hang them on their hinges. Dovetailed Drawers You can make your drawers any way you like, but for a traditional piece of furniture like this, I think dovetailed drawers are most appropriate. I cut all my half-blind dovetails with a simple router jig I created that costs $19.99. You can download free instructions for this technique at popularwoodworking.com. Click on "Free Project Plans" and scroll down until you see "$19.99 Dovetail Jig." Basically, the dovetail jig works like this: First you cut notches on one end of a piece of scrap using The bottom case uses a screw board to help support the top case and hold the back in place. Here I'm screwing the screw board to one of the bottom case's sides, flush to the inside edge of the rabbet. The door panels are held together with a cope-and-stick, and a loose mortise-and-tenon joint. Bore mortises before machining edges 68 Popular Woodworking April 2003 |


