Popular Woodworking 2003-10 № 136, страница 48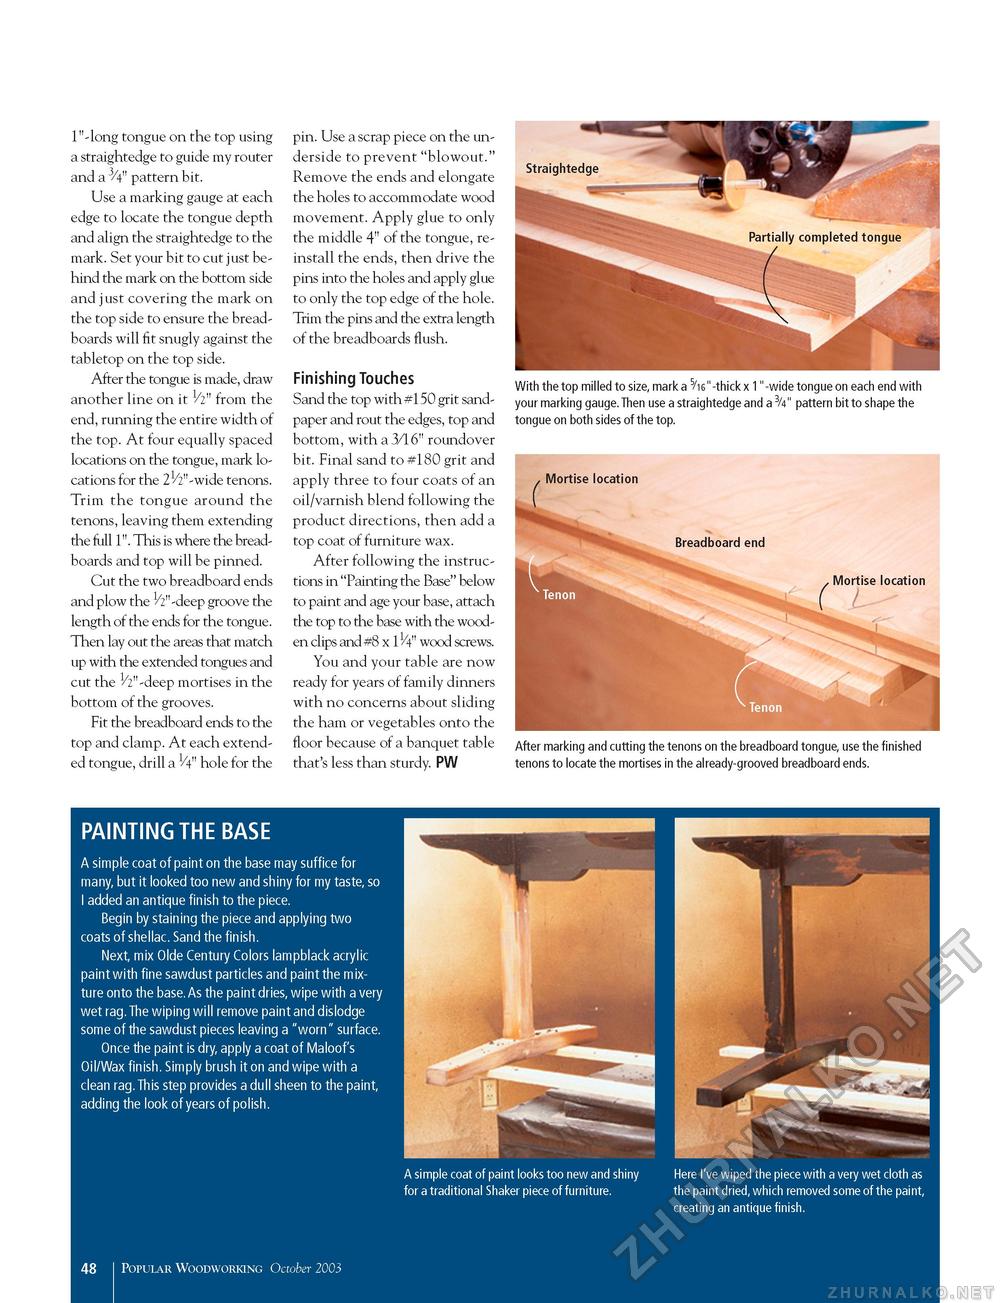
1"-long tongue on the top using a straightedge to guide my router and a 3/4" pattern bit. Use a marking gauge at each edge to locate the tongue depth and align the straightedge to the mark. Set your bit to cut just behind the mark on the bottom side and just covering the mark on the top side to ensure the breadboards will fit snugly against the tabletop on the top side. After the tongue is made, draw another line on it 1/2" from the end, running the entire width of the top. At four equally spaced locations on the tongue, mark locations for the 21/2"-wide tenons. Trim the tongue around the tenons, leaving them extending the full 1". This is where the breadboards and top will be pinned. Cut the two breadboard ends and plow the 1/2"-deep groove the length of the ends for the tongue. Then lay out the areas that match up with the extended tongues and cut the 1/2"-deep mortises in the bottom of the grooves. Fit the breadboard ends to the top and clamp. At each extended tongue, drill a 1/4" hole for the pin. Use a scrap piece on the underside to prevent "blowout." Remove the ends and elongate the holes to accommodate wood movement. Apply glue to only the middle 4" of the tongue, reinstall the ends, then drive the pins into the holes and apply glue to only the top edge of the hole. Trim the pins and the extra length of the breadboards flush. Finishing Touches Sand the top with #150 grit sandpaper and rout the edges, top and bottom, with a 3/16" roundover bit. Final sand to #180 grit and apply three to four coats of an oil/varnish blend following the product directions, then add a top coat of furniture wax. After following the instructions in "Painting the Base" below to paint and age your base, attach the top to the base with the wooden clips and #8 x 11/4" wood screws. You and your table are now ready for years of family dinners with no concerns about sliding the ham or vegetables onto the floor because of a banquet table that's less than sturdy. PW With the top milled to size, mark a 5/16"-thick x 1"-wide tongue on each end with your marking gauge.Then use a straightedge and a 3/4" pattern bit to shape the tongue on both sides of the top. After marking and cutting the tenons on the breadboard tongue, use the finished tenons to locate the mortises in the already-grooved breadboard ends. PAINTING THE BASE A simple coat of paint on the base may suffice for many, but it looked too new and shiny for my taste, so I added an antique finish to the piece. Begin by staining the piece and applying two coats of shellac. Sand the finish. Next, mix Olde Century Colors lampblack acrylic paint with fine sawdust particles and paint the mixture onto the base. As the paint dries, wipe with a very wet rag.The wiping will remove paint and dislodge some of the sawdust pieces leaving a "worn" surface. Once the paint is dry, apply a coat of Maloof's Oil/Wax finish. Simply brush it on and wipe with a clean rag.This step provides a dull sheen to the paint, adding the look of years of polish. A simple coat of paint looks too new and shiny for a traditional Shaker piece of furniture. Here I've wiped the piece with a very wet cloth as the paint dried, which removed some of the paint, creating an antique finish. 48 I Popular Woodworking October 2003 |


