Popular Woodworking 2003-11 № 137, страница 46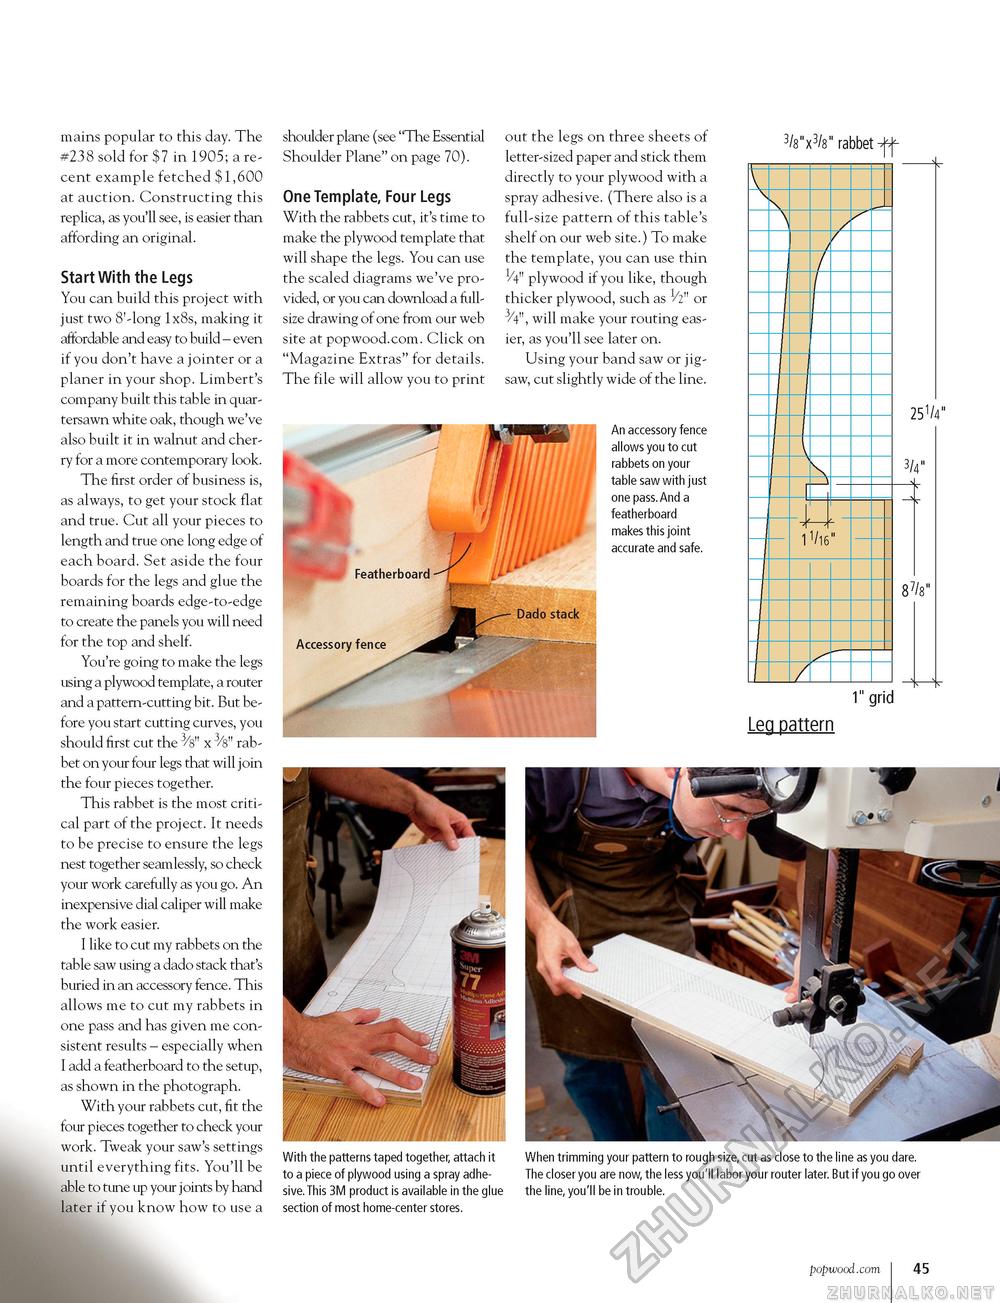
mains popular to this day. The #238 sold for $7 in 1905; a recent example fetched $1,600 at auction. Constructing this replica, as you'll see, is easier than affording an original. Start With the Legs You can build this project with just two 8'-long 1x8s, making it affordable and easy to build - even if you don't have a jointer or a planer in your shop. Limbert's company built this table in quar-tersawn white oak, though we've also built it in walnut and cherry for a more contemporary look. The first order of business is, as always, to get your stock flat and true. Cut all your pieces to length and true one long edge of each board. Set aside the four boards for the legs and glue the remaining boards edge-to-edge to create the panels you will need for the top and shelf. You're going to make the legs using a plywood template, a router and a pattern-cutting bit. But before you start cutting curves, you should first cut the 3/8" x 3/8" rabbet on your four legs that will join the four pieces together. This rabbet is the most critical part of the project. It needs to be precise to ensure the legs nest together seamlessly, so check your work carefully as you go. An inexpensive dial caliper will make the work easier. I like to cut my rabbets on the table saw using a dado stack that's buried in an accessory fence. This allows me to cut my rabbets in one pass and has given me consistent results - especially when I add a featherboard to the setup, as shown in the photograph. With your rabbets cut, fit the four pieces together to check your work. Tweak your saw's settings until everything fits. You'll be able to tune up your joints by hand later if you know how to use a shoulder plane (see "The Essential Shoulder Plane" on page 70). One Template, Four Legs With the rabbets cut, it's time to make the plywood template that will shape the legs. You can use the scaled diagrams we've provided, or you can download a full-size drawing of one from our web site at popwood.com. Click on "Magazine Extras" for details. The file will allow you to print out the legs on three sheets of letter-sized paper and stick them directly to your plywood with a spray adhesive. (There also is a full-size pattern of this table's shelf on our web site.) To make the template, you can use thin 1/4" plywood if you like, though thicker plywood, such as 1/2" or 3/4", will make your routing easier, as you'll see later on. Using your band saw or jigsaw, cut slightly wide of the line. An accessory fence allows you to cut rabbets on your table saw with just one pass.And a featherboard makes this joint accurate and safe. 3/8"x3/8" rabbet-ff
251/4 3/4" 251/4 3/4" 1" grid Leg pattern With the patterns taped together,attach it to a piece of plywood using a spray adhesive. This 3M product is available in the glue section of most home-center stores. When trimming your pattern to rough size, cut as close to the line as you dare. The closer you are now, the less you'll labor your router later. But if you go over the line, you'll be in trouble. popwood.com 45 |


