Popular Woodworking 2003-11 № 137, страница 48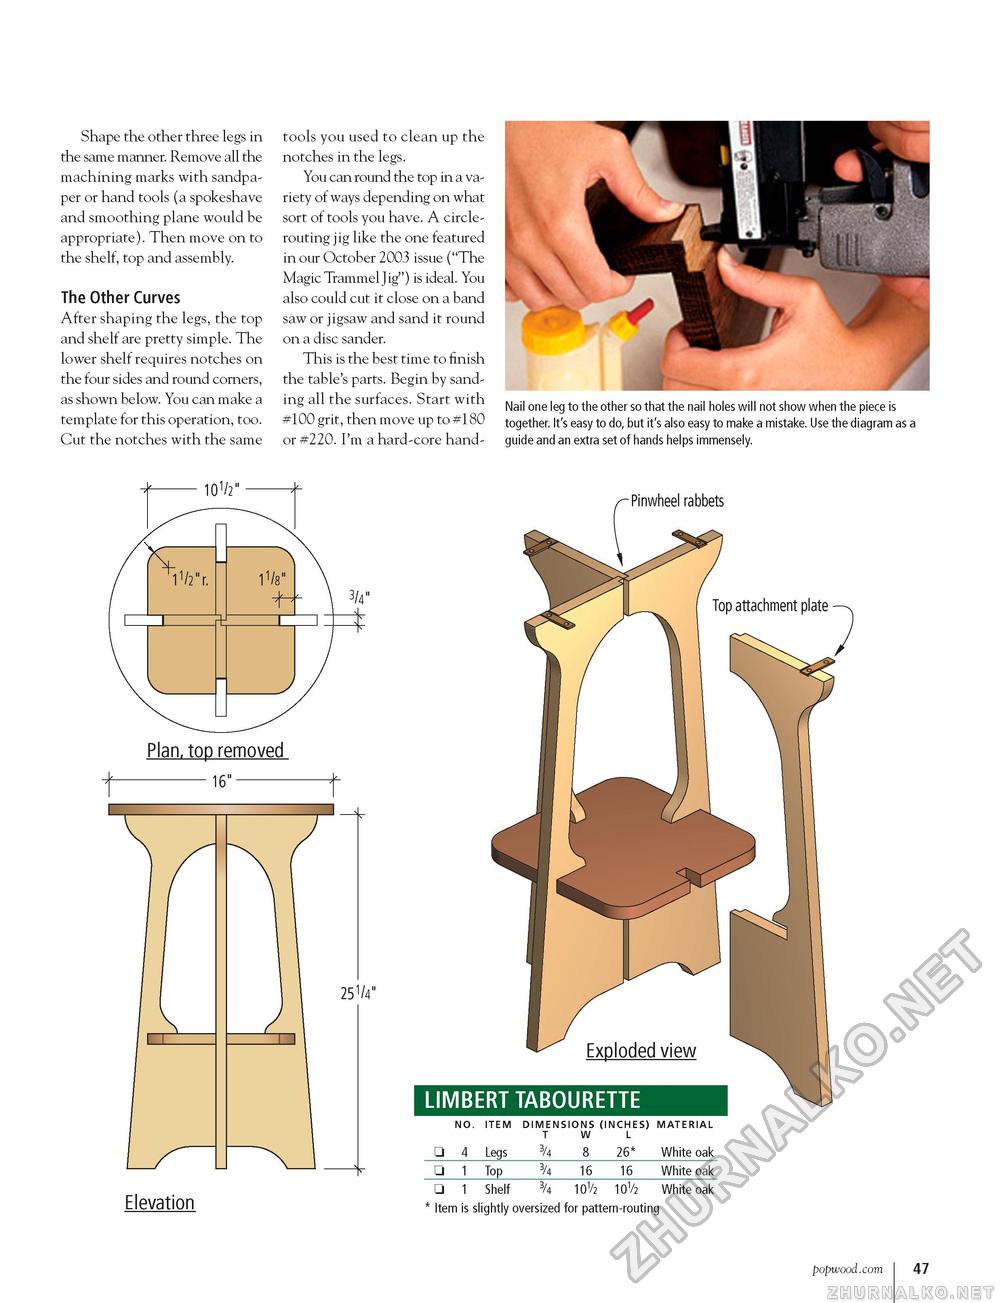
Shape the other three legs in the same manner. Remove all the machining marks with sandpaper or hand tools (a spokeshave and smoothing plane would be appropriate). Then move on to the shelf, top and assembly. The Other Curves After shaping the legs, the top and shelf are pretty simple. The lower shelf requires notches on the four sides and round corners, as shown below. You can make a template for this operation, too. Cut the notches with the same tools you used to clean up the notches in the legs. You can round the top in a variety of ways depending on what sort of tools you have. A circle-routing jig like the one featured in our October 2003 issue ("The Magic Trammel Jig") is ideal. You also could cut it close on a band saw or jigsaw and sand it round on a disc sander. This is the best time to finish the table's parts. Begin by sanding all the surfaces. Start with #100 grit, then move up to #180 or #220. I'm a hard-core hand- Nail one leg to the other so that the nail holes will not show when the piece is together. It's easy to do, but it's also easy to make a mistake. Use the diagram as a guide and an extra set of hands helps immensely. Pinwheel rabbets Plan, top removed 251/4" Elevation popwood.com 47 |


