Popular Woodworking 2003-11 № 137, страница 49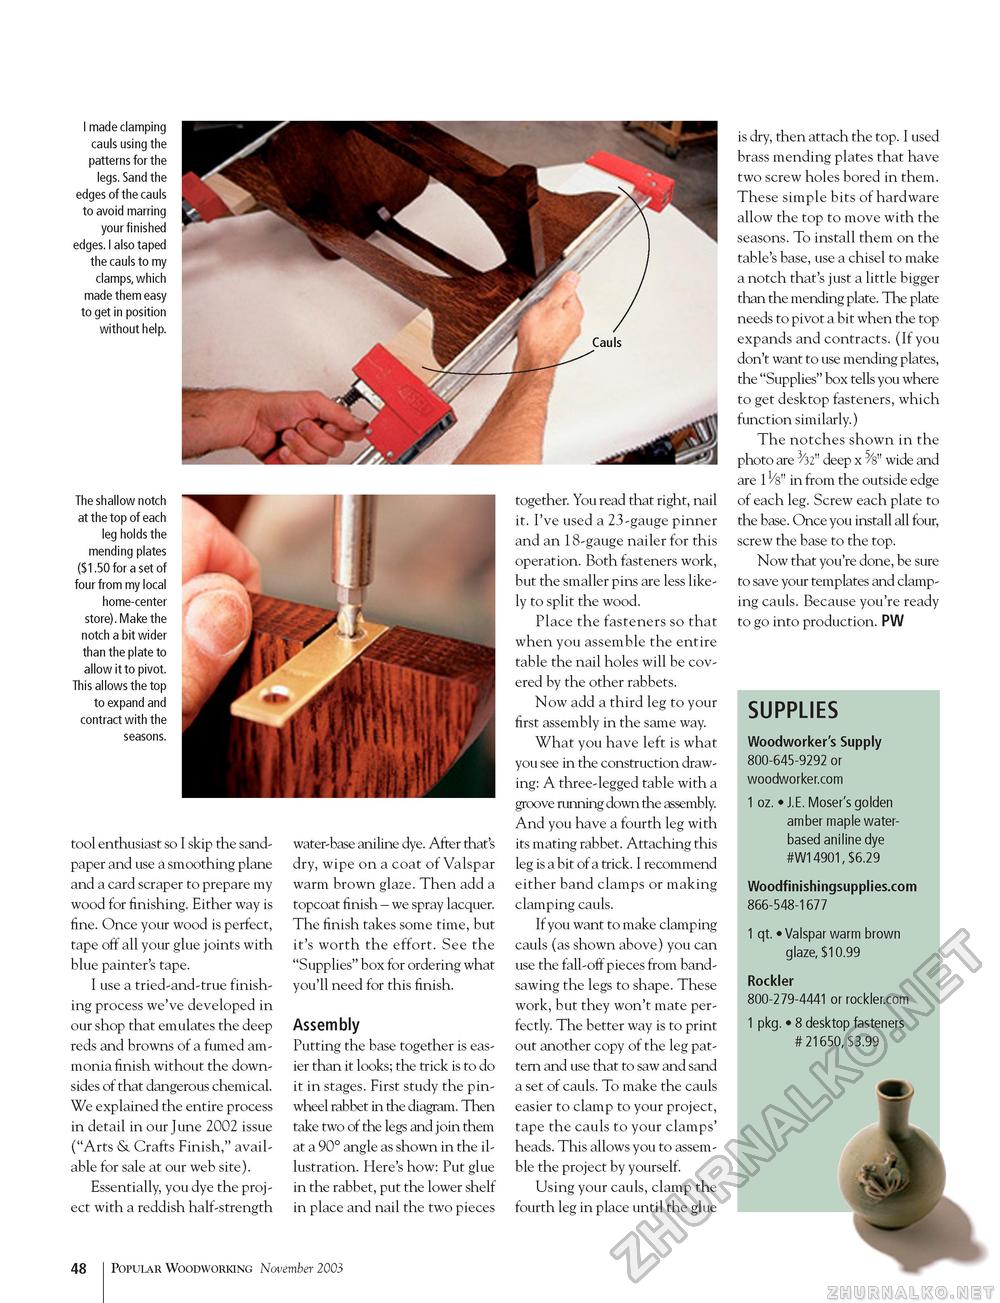
I made clamping cauls using the patterns for the legs. Sand the edges of the cauls to avoid marring your finished edges. I also taped the cauls to my clamps, which made them easy to get in position without help. The shallow notch at the top of each leg holds the mending plates ($1.50 for a set of four from my local home-center store). Make the notch a bit wider than the plate to allow it to pivot. This allows the top to expand and contract with the seasons. tool enthusiast so I skip the sandpaper and use a smoothing plane and a card scraper to prepare my wood for finishing. Either way is fine. Once your wood is perfect, tape off all your glue joints with blue painter's tape. I use a tried-and-true finishing process we've developed in our shop that emulates the deep reds and browns of a fumed ammonia finish without the downsides of that dangerous chemical. We explained the entire process in detail in our June 2002 issue ("Arts & Crafts Finish," available for sale at our web site). Essentially, you dye the project with a reddish half-strength water-base aniline dye. After that's dry, wipe on a coat of Valspar warm brown glaze. Then add a topcoat finish - we spray lacquer. The finish takes some time, but it's worth the effort. See the "Supplies" box for ordering what you'll need for this finish. Assembly Putting the base together is easier than it looks; the trick is to do it in stages. First study the pin-wheel rabbet in the diagram. Then take two of the legs and join them at a 90° angle as shown in the illustration. Here's how: Put glue in the rabbet, put the lower shelf in place and nail the two pieces together. You read that right, nail it. I've used a 23-gauge pinner and an 18-gauge nailer for this operation. Both fasteners work, but the smaller pins are less likely to split the wood. Place the fasteners so that when you assemble the entire table the nail holes will be covered by the other rabbets. Now add a third leg to your first assembly in the same way. What you have left is what you see in the construction drawing: A three-legged table with a groove running down the assembly. And you have a fourth leg with its mating rabbet. Attaching this leg is a bit of a trick. I recommend either band clamps or making clamping cauls. If you want to make clamping cauls (as shown above) you can use the fall-off pieces from band-sawing the legs to shape. These work, but they won't mate perfectly. The better way is to print out another copy of the leg pattern and use that to saw and sand a set of cauls. To make the cauls easier to clamp to your project, tape the cauls to your clamps' heads. This allows you to assemble the project by yourself. Using your cauls, clamp the fourth leg in place until the glue 48 Popular Woodworking November 2003 is dry, then attach the top. I used brass mending plates that have two screw holes bored in them. These simple bits of hardware allow the top to move with the seasons. To install them on the table's base, use a chisel to make a notch that's just a little bigger than the mending plate. The plate needs to pivot a bit when the top expands and contracts. (If you don't want to use mending plates, the "Supplies" box tells you where to get desktop fasteners, which function similarly.) The notches shown in the photo are 3^2" deep x 5/8" wide and are in from the outside edge of each leg. Screw each plate to the base. Once you install all four, screw the base to the top. Now that you're done, be sure to save your templates and clamping cauls. Because you're ready to go into production. PW SUPPLIES Woodworker's Supply 800-645-9292 or woodworker.com 1 oz. • J.E. Moser's golden amber maple water-based aniline dye #W14901, $6.29 Woodfinishingsupplies.com 866-548-1677 1 qt. • Valspar warm brown glaze, $10.99 Rockler 800-279-4441 or rockler.com 1 pkg. • 8 desktop fasteners # 21650, $3.99 |


