Popular Woodworking 2003-11 № 137, страница 47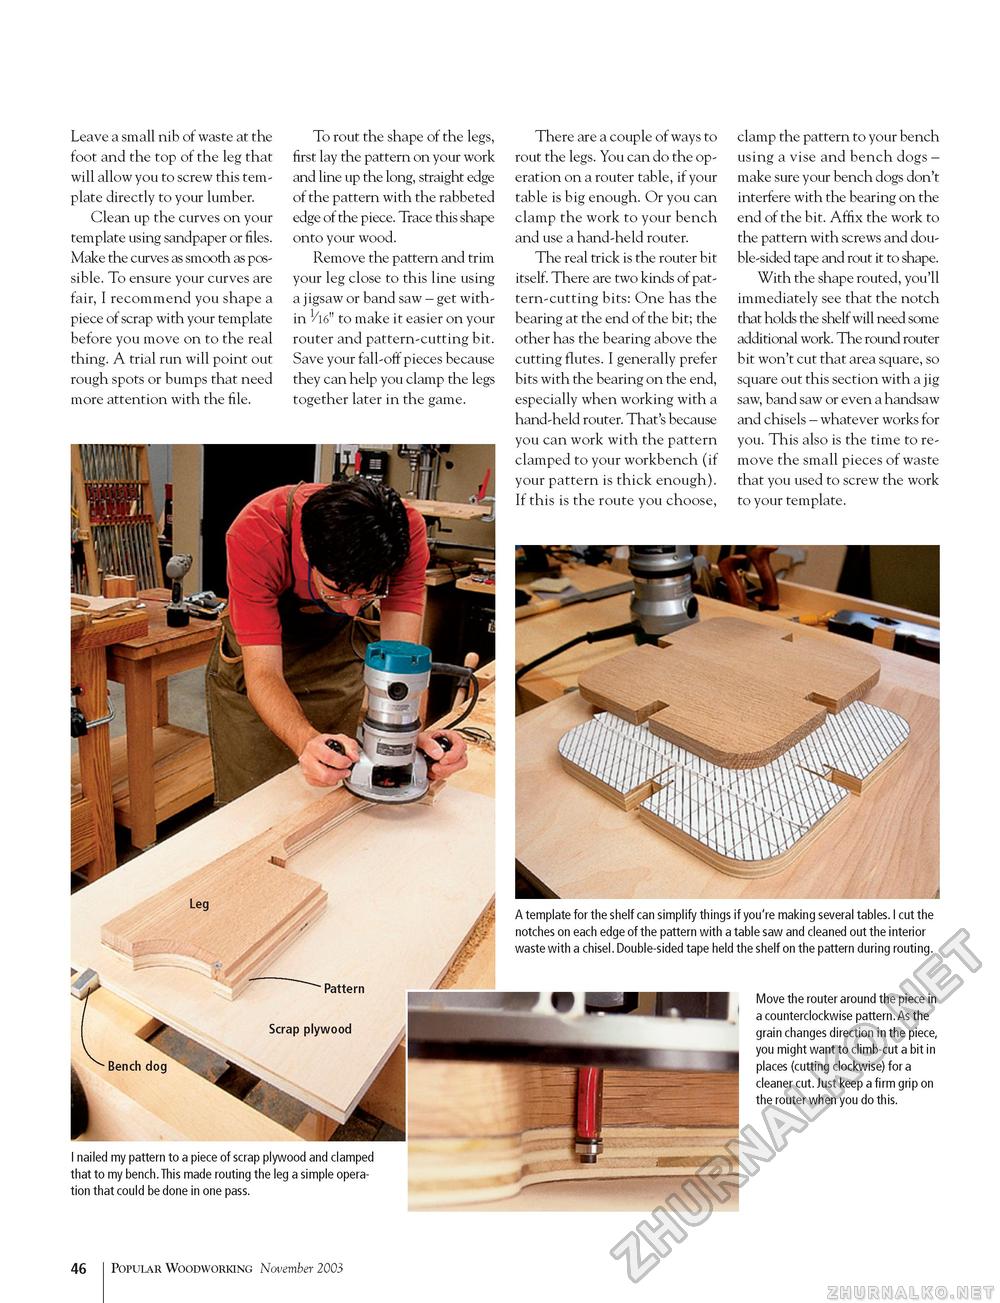
Leave a small nib of waste at the foot and the top of the leg that will allow you to screw this template directly to your lumber. Clean up the curves on your template using sandpaper or files. Make the curves as smooth as possible. To ensure your curves are fair, I recommend you shape a piece of scrap with your template before you move on to the real thing. A trial run will point out rough spots or bumps that need more attention with the file. To rout the shape of the legs, first lay the pattern on your work and line up the long, straight edge of the pattern with the rabbeted edge of the piece. Trace this shape onto your wood. Remove the pattern and trim your leg close to this line using a jigsaw or band saw - get within V16" to make it easier on your router and pattern-cutting bit. Save your fall-off pieces because they can help you clamp the legs together later in the game. There are a couple of ways to rout the legs. You can do the operation on a router table, if your table is big enough. Or you can clamp the work to your bench and use a hand-held router. The real trick is the router bit itself. There are two kinds of pattern-cutting bits: One has the bearing at the end of the bit; the other has the bearing above the cutting flutes. I generally prefer bits with the bearing on the end, especially when working with a hand-held router. That's because you can work with the pattern clamped to your workbench (if your pattern is thick enough). If this is the route you choose, clamp the pattern to your bench using a vise and bench dogs -make sure your bench dogs don't interfere with the bearing on the end of the bit. Affix the work to the pattern with screws and double-sided tape and rout it to shape. With the shape routed, you'll immediately see that the notch that holds the shelf will need some additional work. The round router bit won't cut that area square, so square out this section with a jig saw, band saw or even a handsaw and chisels - whatever works for you. This also is the time to remove the small pieces of waste that you used to screw the work to your template. Move the router around the piece in a counterclockwise pattern.As the grain changes direction in the piece, you might want to climb-cut a bit in places (cutting clockwise) for a cleaner cut. Just keep a firm grip on the router when you do this. I nailed my pattern to a piece of scrap plywood and clamped that to my bench.This made routing the leg a simple operation that could be done in one pass. 46 Popular Woodworking November 2003 |


