Popular Woodworking 2004-02 № 139, страница 50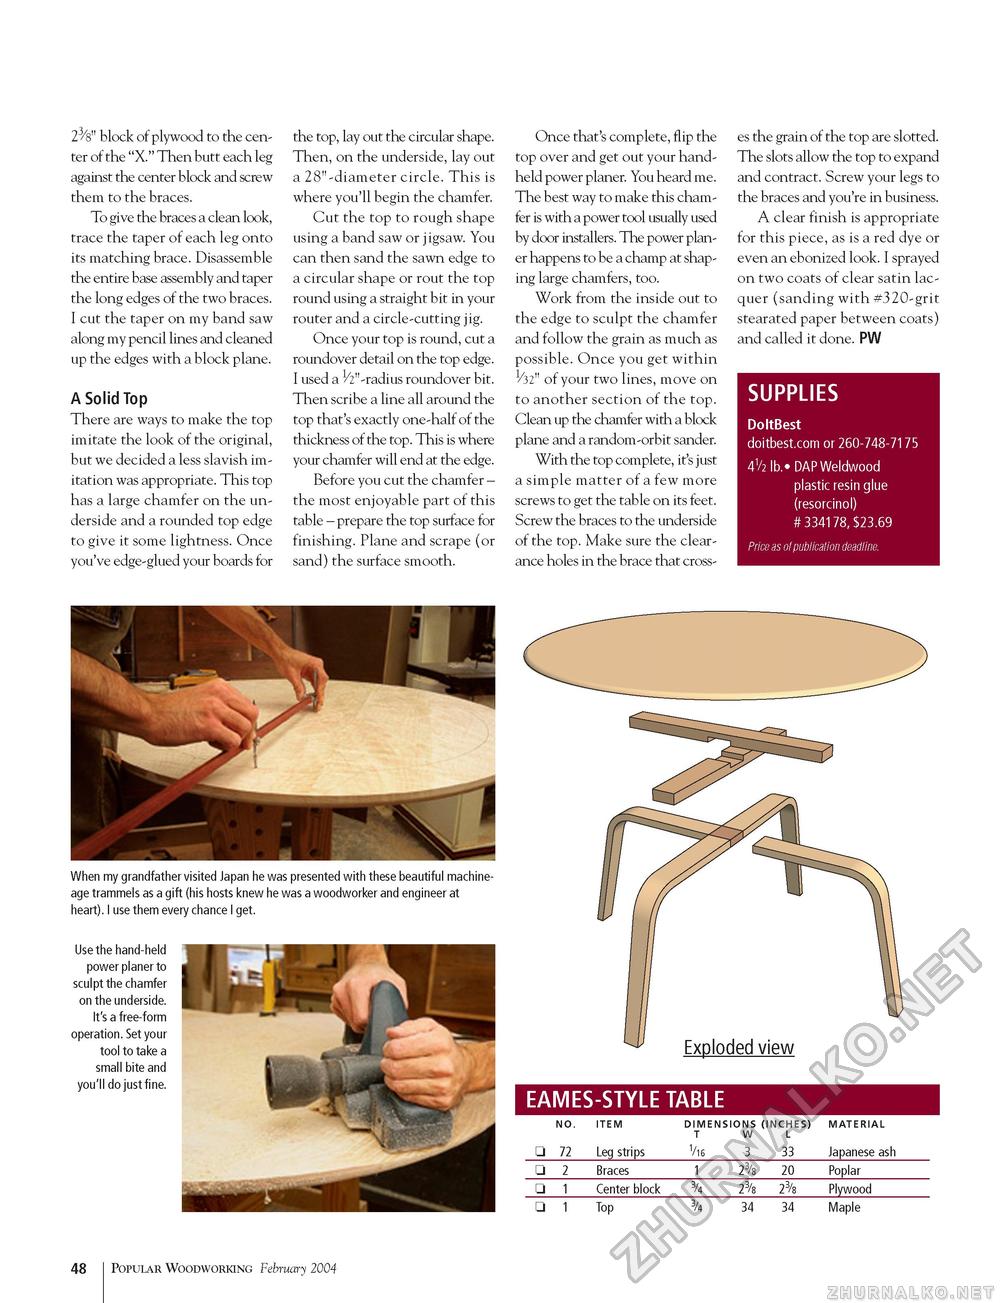
23/8" block of plywood to the center of the "X." Then butt each leg against the center block and screw them to the braces. To give the braces a clean look, trace the taper of each leg onto its matching brace. Disassemble the entire base assembly and taper the long edges of the two braces. I cut the taper on my band saw along my pencil lines and cleaned up the edges with a block plane. A Solid Top There are ways to make the top imitate the look of the original, but we decided a less slavish imitation was appropriate. This top has a large chamfer on the underside and a rounded top edge to give it some lightness. Once you've edge-glued your boards for the top, lay out the circular shape. Then, on the underside, lay out a 28"-diameter circle. This is where you'll begin the chamfer. Cut the top to rough shape using a band saw or jigsaw. You can then sand the sawn edge to a circular shape or rout the top round using a straight bit in your router and a circle-cutting jig. Once your top is round, cut a roundover detail on the top edge. I used a ^"-radius roundover bit. Then scribe a line all around the top that's exactly one-half of the thickness of the top. This is where your chamfer will end at the edge. Before you cut the chamfer -the most enjoyable part of this table - prepare the top surface for finishing. Plane and scrape (or sand) the surface smooth. Once that's complete, flip the top over and get out your handheld power planer. You heard me. The best way to make this chamfer is with a power tool usually used by door installers. The power planer happens to be a champ at shaping large chamfers, too. Work from the inside out to the edge to sculpt the chamfer and follow the grain as much as possible. Once you get within 1/32" of your two lines, move on to another section of the top. Clean up the chamfer with a block plane and a random-orbit sander. With the top complete, it's just a simple matter of a few more screws to get the table on its feet. Screw the braces to the underside of the top. Make sure the clearance holes in the brace that cross es the grain of the top are slotted. The slots allow the top to expand and contract. Screw your legs to the braces and you're in business. A clear finish is appropriate for this piece, as is a red dye or even an ebonized look. I sprayed on two coats of clear satin lacquer (sanding with #320-grit stearated paper between coats) and called it done. PW SUPPLIES DoItBest doitbest.com or 260-748-7175 41/2 lb.» DAP Weldwood plastic resin glue (resorcinol) # 334178, $23.69 Price as of publication deadline. When my grandfather visited Japan he was presented with these beautiful machine-age trammels as a gift (his hosts knew he was a woodworker and engineer at heart). I use them every chance I get. Use the hand-held power planer to sculpt the chamfer on the underside. It's a free-form operation. Set your tool to take a small bite and you'll do just fine. EAMES-STYLE TABLE
48 Popular Woodworking February 2004 |
|||||||||||||||||||||||||||||||||||


