Popular Woodworking 2004-02 № 139, страница 56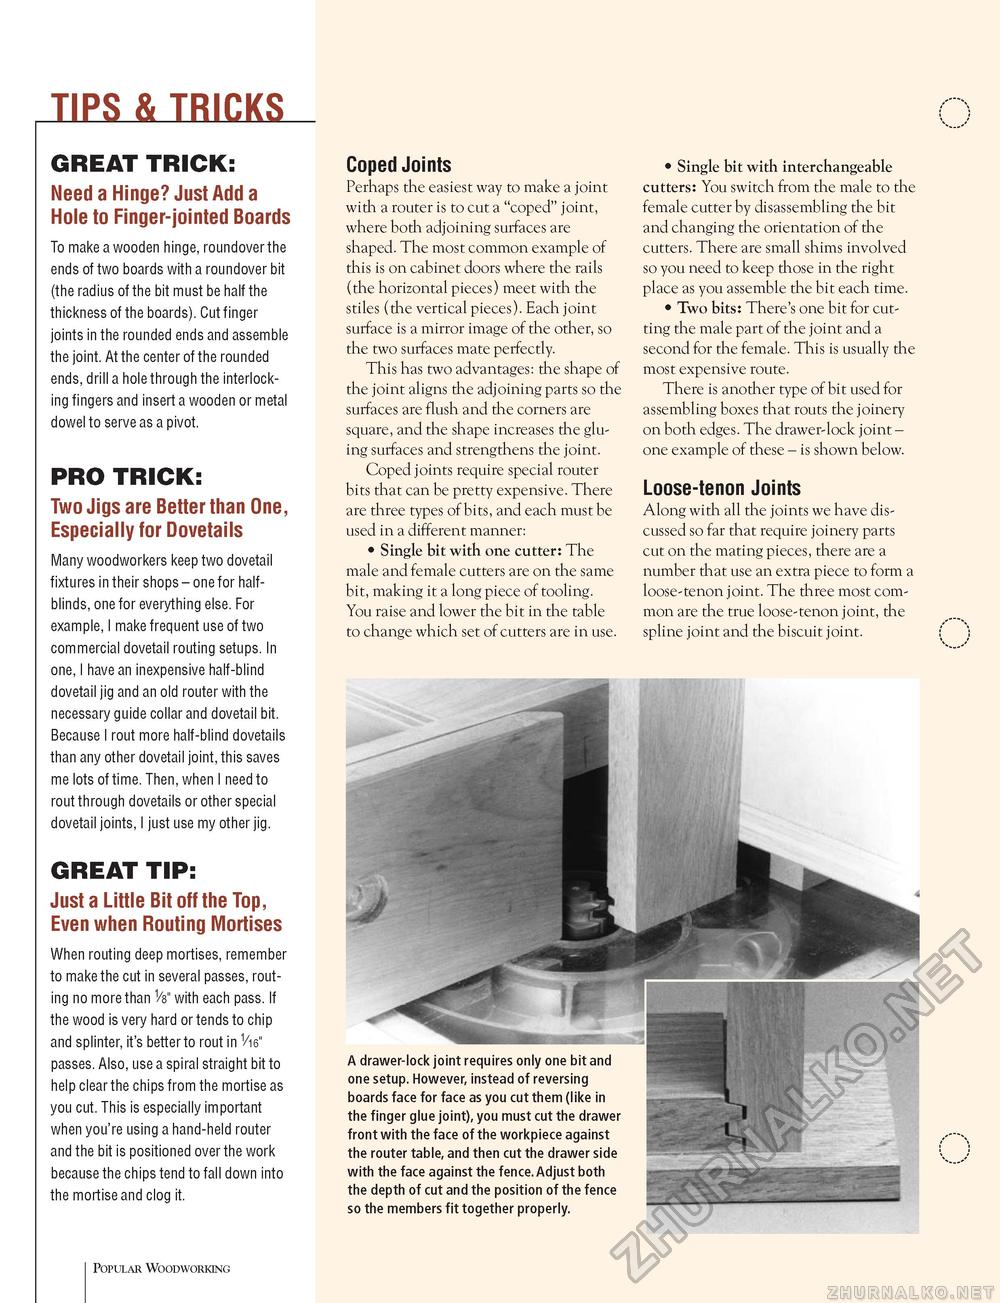
TIPS & TRICKS GREAT TRICK: Need a Hinge? Just Add a Hole to Finger-jointed Boards To make a wooden hinge, roundover the ends of two boards with a roundover bit (the radius of the bit must be half the thickness of the boards). Cut finger joints in the rounded ends and assemble the joint. At the center of the rounded ends, drill a hole through the interlocking fingers and insert a wooden or metal dowel to serve as a pivot. PRO TRICK: Two Jigs are Better than One, Especially for Dovetails Many woodworkers keep two dovetail fixtures in their shops - one for half-blinds, one for everything else. For example, I make frequent use of two commercial dovetail routing setups. In one, I have an inexpensive half-blind dovetail jig and an old router with the necessary guide collar and dovetail bit. Because I rout more half-blind dovetails than any other dovetail joint, this saves me lots of time. Then, when I need to rout through dovetails or other special dovetail joints, I just use my other jig. GREAT TIP: Just a Little Bit off the Top, Even when Routing Mortises When routing deep mortises, remember to make the cut in several passes, routing no more than 1/s" with each pass. If the wood is very hard or tends to chip and splinter, it's better to rout in V16" passes. Also, use a spiral straight bit to help clear the chips from the mortise as you cut. This is especially important when you're using a hand-held router and the bit is positioned over the work because the chips tend to fall down into the mortise and clog it. Coped Joints Perhaps the easiest way to make a joint with a router is to cut a "coped" joint, where both adjoining surfaces are shaped. The most common example of this is on cabinet doors where the rails (the horizontal pieces) meet with the stiles (the vertical pieces). Each joint surface is a mirror image of the other, so the two surfaces mate perfectly. This has two advantages: the shape of the joint aligns the adjoining parts so the surfaces are flush and the corners are square, and the shape increases the gluing surfaces and strengthens the joint. Coped joints require special router bits that can be pretty expensive. There are three types of bits, and each must be used in a different manner: • Single bit with one cutter: The male and female cutters are on the same bit, making it a long piece of tooling. You raise and lower the bit in the table to change which set of cutters are in use. • Single bit with interchangeable cutters: You switch from the male to the female cutter by disassembling the bit and changing the orientation of the cutters. There are small shims involved so you need to keep those in the right place as you assemble the bit each time. • Two bits: There's one bit for cutting the male part of the joint and a second for the female. This is usually the most expensive route. There is another type of bit used for assembling boxes that routs the joinery on both edges. The drawer-lock joint -one example of these - is shown below. Loose-tenon Joints Along with all the joints we have discussed so far that require joinery parts cut on the mating pieces, there are a number that use an extra piece to form a loose-tenon joint. The three most common are the true loose-tenon joint, the spline joint and the biscuit joint. A drawer-lock joint requires only one bit and one setup. However, instead of reversing boards face for face as you cut them (like in the finger glue joint), you must cut the drawer front with the face of the workpiece against the router table, and then cut the drawer side with the face against the fence.Adjust both the depth of cut and the position of the fence so the members fit together properly. Popular Woodworking |


