Popular Woodworking 2004-02 № 139, страница 91
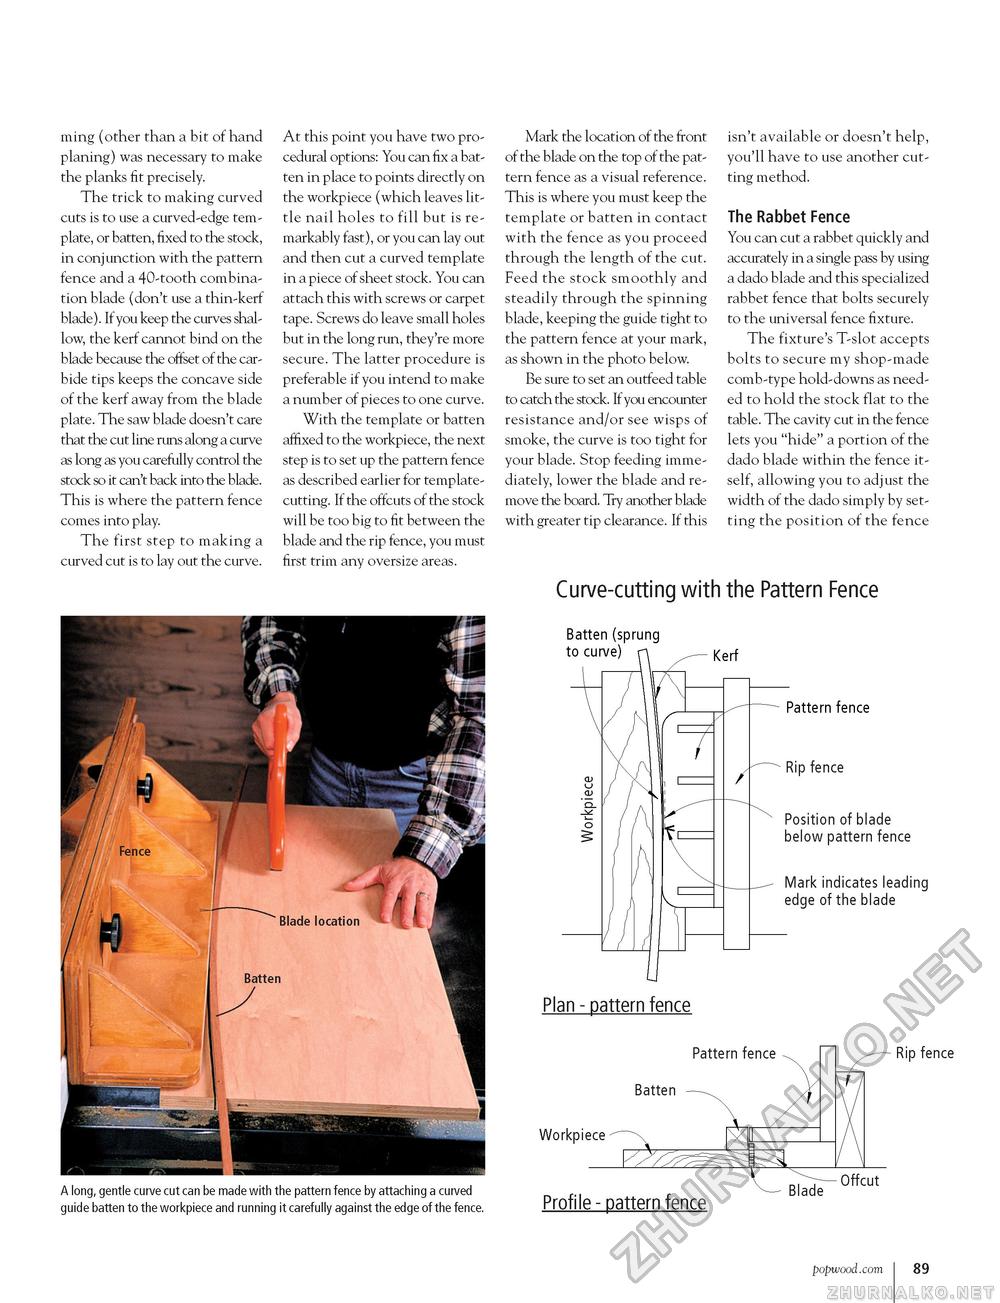
ming (other than a bit of hand planing) was necessary to make the planks fit precisely. The trick to making curved cuts is to use a curved-edge template, or batten, fixed to the stock, in conjunction with the pattern fence and a 40-tooth combination blade (don't use a thin-kerf blade). If you keep the curves shallow, the kerf cannot bind on the blade because the offset of the carbide tips keeps the concave side of the kerf away from the blade plate. The saw blade doesn't care that the cut line runs along a curve as long as you carefully control the stock so it can't back into the blade. This is where the pattern fence comes into play. The first step to making a curved cut is to lay out the curve. At this point you have two procedural options: You can fix a batten in place to points directly on the workpiece (which leaves little nail holes to fill but is remarkably fast), or you can lay out and then cut a curved template in a piece of sheet stock. You can attach this with screws or carpet tape. Screws do leave small holes but in the long run, they're more secure. The latter procedure is preferable if you intend to make a number of pieces to one curve. With the template or batten affixed to the workpiece, the next step is to set up the pattern fence as described earlier for template-cutting. If the offcuts of the stock will be too big to fit between the blade and the rip fence, you must first trim any oversize areas. Mark the location of the front of the blade on the top of the pattern fence as a visual reference. This is where you must keep the template or batten in contact with the fence as you proceed through the length of the cut. Feed the stock smoothly and steadily through the spinning blade, keeping the guide tight to the pattern fence at your mark, as shown in the photo below. Be sure to set an outfeed table to catch the stock. If you encounter resistance and/or see wisps of smoke, the curve is too tight for your blade. Stop feeding immediately, lower the blade and remove the board. Try another blade with greater tip clearance. If this isn't available or doesn't help, you'll have to use another cutting method. The Rabbet Fence You can cut a rabbet quickly and accurately in a single pass by using a dado blade and this specialized rabbet fence that bolts securely to the universal fence fixture. The fixture's T-slot accepts bolts to secure my shop-made comb-type hold-downs as needed to hold the stock flat to the table. The cavity cut in the fence lets you "hide" a portion of the dado blade within the fence itself, allowing you to adjust the width of the dado simply by setting the position of the fence Curve-cutting with the Pattern Fence Batten (sprung to curve) n Kerf Pattern fence Rip fence Position of blade below pattern fence Mark indicates leading edge of the blade Plan - pattern fence Pattern fence A long, gentle curve cut can be made with the pattern fence by attaching a curved guide batten to the workpiece and running it carefully against the edge of the fence. Rip fence Workpiece Profile - pattern fence Blade popwood.com 89 |


