Popular Woodworking 2004-02 № 139, страница 90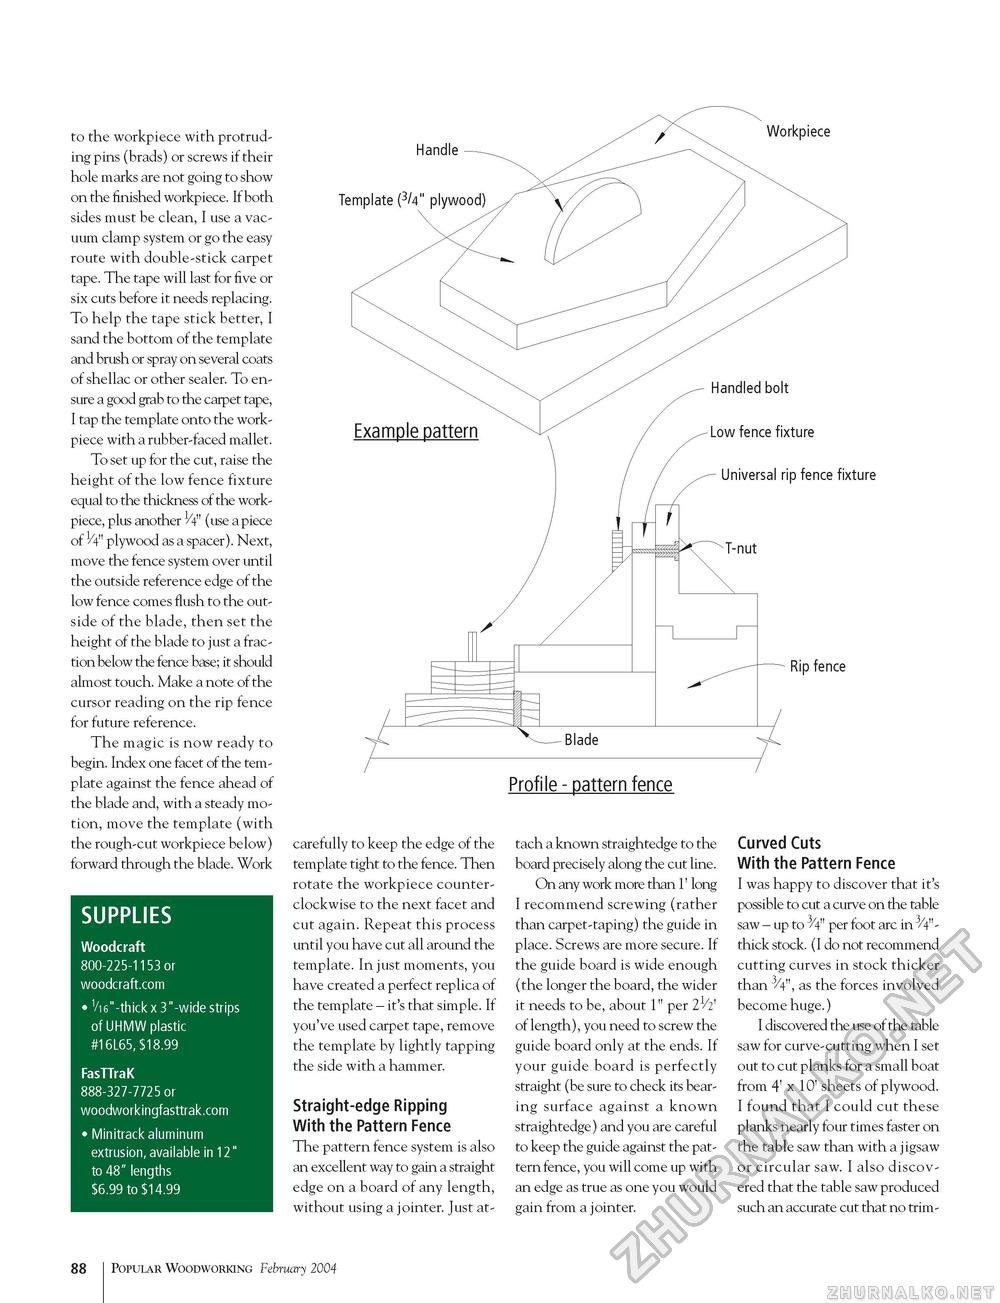
Workpiece Handle —^ to the workpiece with protruding pins (brads) or screws if their hole marks are not going to show on the finished workpiece. If both sides must be clean, I use a vacuum clamp system or go the easy route with double-stick carpet tape. The tape will last for five or six cuts before it needs replacing. To help the tape stick better, I sand the bottom of the template and brush or spray on several coats of shellac or other sealer. To ensure a good grab to the carpet tape, I tap the template onto the work-piece with a rubber-faced mallet. To set up for the cut, raise the height of the low fence fixture equal to the thickness of the work-piece, plus another 1/4" (use a piece of H" plywood as a spacer). Next, move the fence system over until the outside reference edge of the low fence comes flush to the outside of the blade, then set the height of the blade to just a fraction below the fence base; it should almost touch. Make a note of the cursor reading on the rip fence for future reference. The magic is now ready to begin. Index one facet of the template against the fence ahead of the blade and, with a steady motion, move the template (with the rough-cut workpiece below) forward through the blade. Work SUPPLIES Woodcraft 800-225-1153 or woodcraft.com • 1/i6"-thick x 3"-wide strips of UHMW plastic #16L65, $18.99 FasTTraK 888-327-7725 or woodworkingfasttrak.com • Minitrack aluminum extrusion, available in 12" to 48" lengths $6.99 to $14.99 carefully to keep the edge of the template tight to the fence. Then rotate the workpiece counterclockwise to the next facet and cut again. Repeat this process until you have cut all around the template. In just moments, you have created a perfect replica of the template - it's that simple. If you've used carpet tape, remove the template by lightly tapping the side with a hammer. Straight-edge Ripping With the Pattern Fence The pattern fence system is also an excellent way to gain a straight edge on a board of any length, without using a jointer. Just at- tach a known straightedge to the board precisely along the cut line. On any work more than 1' long I recommend screwing (rather than carpet-taping) the guide in place. Screws are more secure. If the guide board is wide enough (the longer the board, the wider it needs to be, about 1" per of length), you need to screw the guide board only at the ends. If your guide board is perfectly straight (be sure to check its bearing surface against a known straightedge) and you are careful to keep the guide against the pattern fence, you will come up with an edge as true as one you would gain from a jointer. Curved Cuts With the Pattern Fence I was happy to discover that it's possible to cut a curve on the table saw - up to ^/4" per foot arc in 3/4"-thick stock. (I do not recommend cutting curves in stock thicker than 3/4", as the forces involved become huge.) I discovered the use of the table saw for curve-cutting when I set out to cut planks for a small boat from 4' x 10' sheets of plywood. I found that I could cut these planks nearly four times faster on the table saw than with a jigsaw or circular saw. I also discovered that the table saw produced such an accurate cut that no trim- 88 Popular Woodworking February 2004 |


