Popular Woodworking 2004-02 № 139, страница 89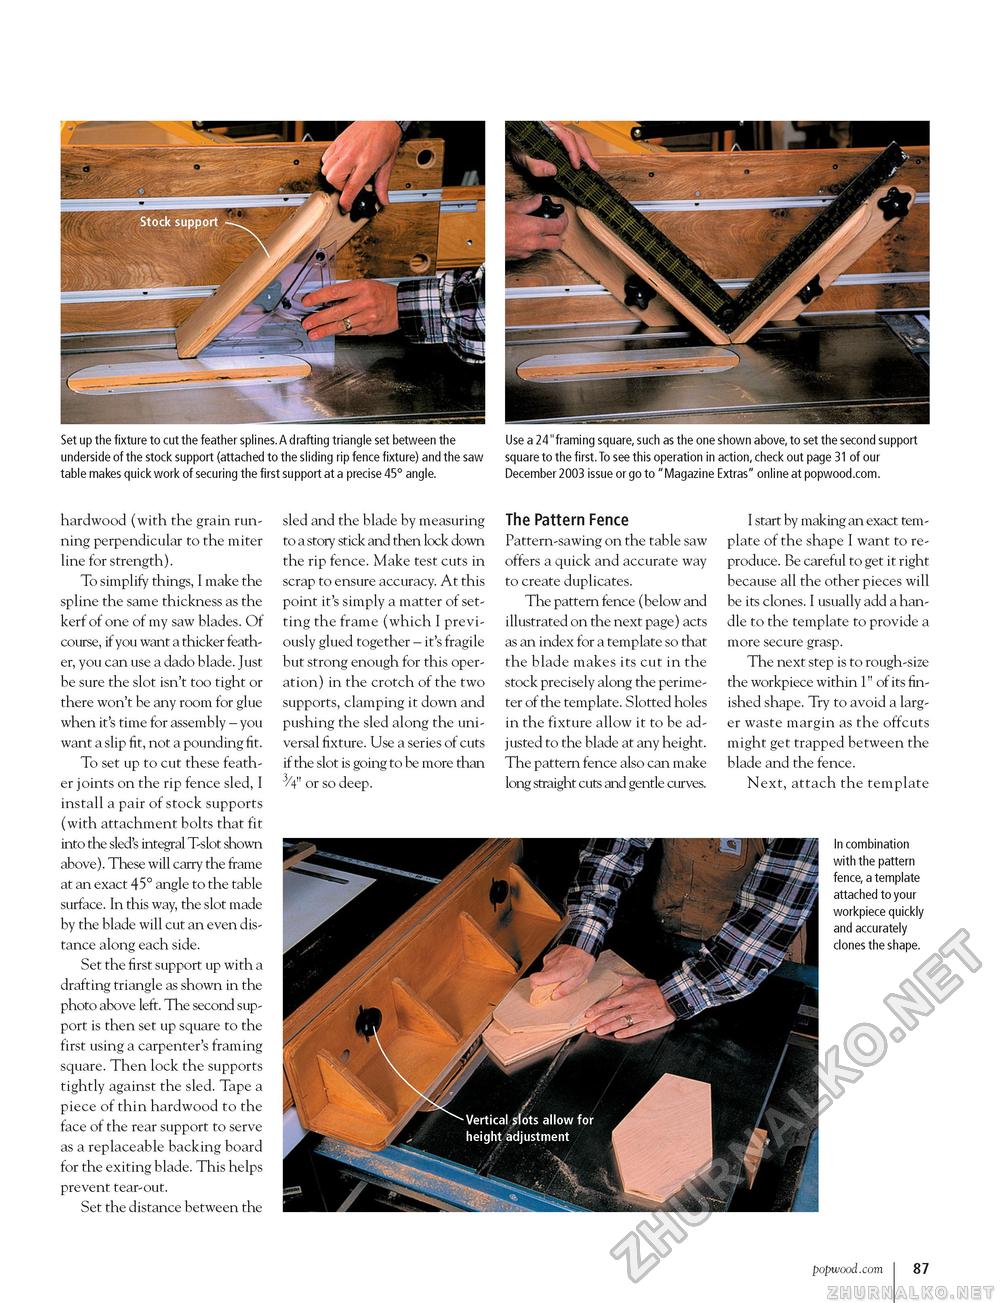
Set up the fixture to cut the feather splines. A drafting triangle set between the Use a 24"framing square, such as the one shown above, to set the second support underside of the stock support (attached to the sliding rip fence fixture) and the saw square to the first.To see this operation in action, check out page 31 of our table makes quick work of securing the first support at a precise 45° angle. December 2003 issue or go to "Magazine Extras" online at popwood.com. hardwood (with the grain running perpendicular to the miter line for strength). To simplify things, I make the spline the same thickness as the kerf of one of my saw blades. Of course, if you want a thicker feather, you can use a dado blade. Just be sure the slot isn't too tight or there won't be any room for glue when it's time for assembly - you want a slip fit, not a pounding fit. To set up to cut these feather joints on the rip fence sled, I install a pair of stock supports (with attachment bolts that fit into the sled's integral T-slot shown above). These will carry the frame at an exact 45° angle to the table surface. In this way, the slot made by the blade will cut an even distance along each side. Set the first support up with a drafting triangle as shown in the photo above left. The second support is then set up square to the first using a carpenter's framing square. Then lock the supports tightly against the sled. Tape a piece of thin hardwood to the face of the rear support to serve as a replaceable backing board for the exiting blade. This helps prevent tear-out. Set the distance between the sled and the blade by measuring to a story stick and then lock down the rip fence. Make test cuts in scrap to ensure accuracy. At this point it's simply a matter of setting the frame (which I previously glued together - it's fragile but strong enough for this operation) in the crotch of the two supports, clamping it down and pushing the sled along the universal fixture. Use a series of cuts if the slot is going to be more than 3/4" or so deep. The Pattern Fence Pattern-sawing on the table saw offers a quick and accurate way to create duplicates. The pattern fence (below and illustrated on the next page) acts as an index for a template so that the blade makes its cut in the stock precisely along the perimeter of the template. Slotted holes in the fixture allow it to be adjusted to the blade at any height. The pattern fence also can make long straight cuts and gentle curves. I start by making an exact template of the shape I want to reproduce. Be careful to get it right because all the other pieces will be its clones. I usually add a handle to the template to provide a more secure grasp. The next step is to rough-size the workpiece within 1" of its finished shape. Try to avoid a larger waste margin as the offcuts might get trapped between the blade and the fence. Next, attach the template In combination with the pattern fence, a template attached to your workpiece quickly and accurately clones the shape. popwood.com 87 |


