Popular Woodworking 2004-10 № 143, страница 100
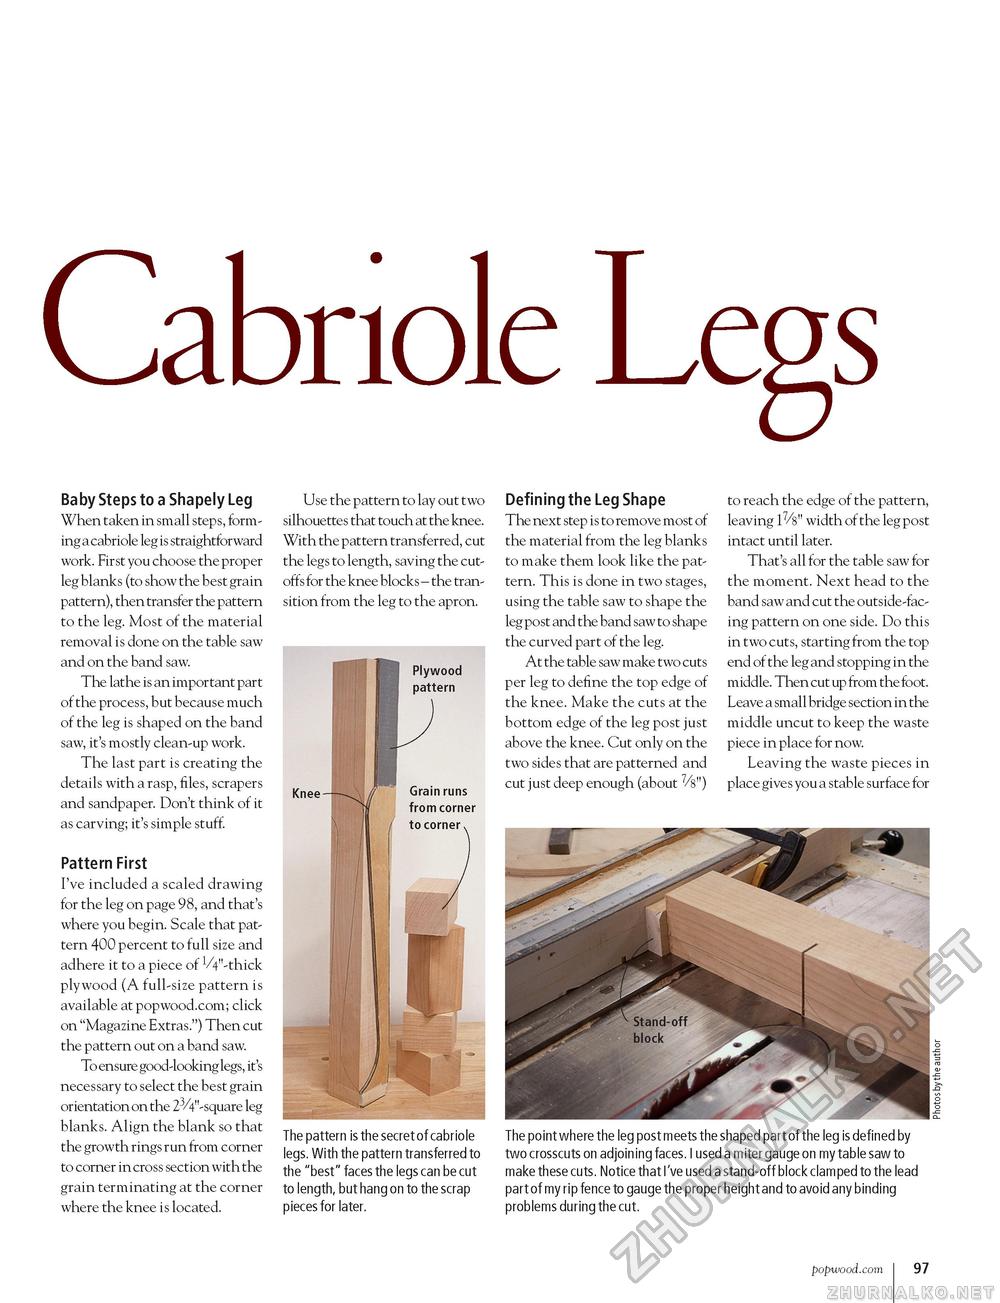
Cabriole LegsBaby Steps to a Shapely Leg When taken in small steps, forming a cabriole leg is straightforward work. First you choose the proper leg blanks (to show the best grain pattern), then transfer the pattern to the leg. Most of the material removal is done on the table saw and on the band saw. The lathe is an important part of the process, but because much of the leg is shaped on the band saw, it's mostly clean-up work. The last part is creating the details with a rasp, files, scrapers and sandpaper. Don't think of it as carving; it's simple stuff. Pattern First I've included a scaled drawing for the leg on page 98, and that's where you begin. Scale that pattern 400 percent to full size and adhere it to a piece of VV'-thick plywood (A full-size pattern is available at popwood.com; click on "Magazine Extras.") Then cut the pattern out on a band saw. To ensure good-looking legs, it's necessary to select the best grain orientation on the 23/f-square leg blanks. Align the blank so that the growth rings run from corner to corner in cross section with the grain terminating at the corner where the knee is located. Use the pattern to lay out two silhouettes that touch at the knee. With the pattern transferred, cut the legs to length, saving the cutoffs for the knee blocks - the transition from the leg to the apron. Plywood pattern Defining the Leg Shape The next step is to remove most of the material from the leg blanks to make them look like the pattern. This is done in two stages, using the table saw to shape the leg post and the band saw to shape the curved part of the leg. At the table saw make two cuts per leg to define the top edge of the knee. Make the cuts at the bottom edge of the leg post just above the knee. Cut only on the two sides that are patterned and cut just deep enough (about %") to reach the edge of the pattern, leaving 1%" width of the leg post intact until later. That's all for the table saw for the moment. Next head to the band saw and cut the outside-facing pattern on one side. Do this in two cuts, starting from the top end of the leg and stopping in the middle. Then cut up from the foot. Leave a small bridge section in the middle uncut to keep the waste piece in place for now. Leaving the waste pieces in place gives you a stable surface for The pattern is the secret of cabriole legs. With the pattern transferred to the "best" faces the legs can be cut to length, but hang on to the scrap pieces for later. The point where the leg post meets the shaped part of the leg is defined by two crosscuts on adjoining faces. I used a miter gauge on my table saw to make these cuts. Notice that I've used a stand-off block clamped to the lead part of my rip fence to gauge the proper height and to avoid any binding problems during the cut. popwood.com 97 |


