Popular Woodworking 2004-10 № 143, страница 97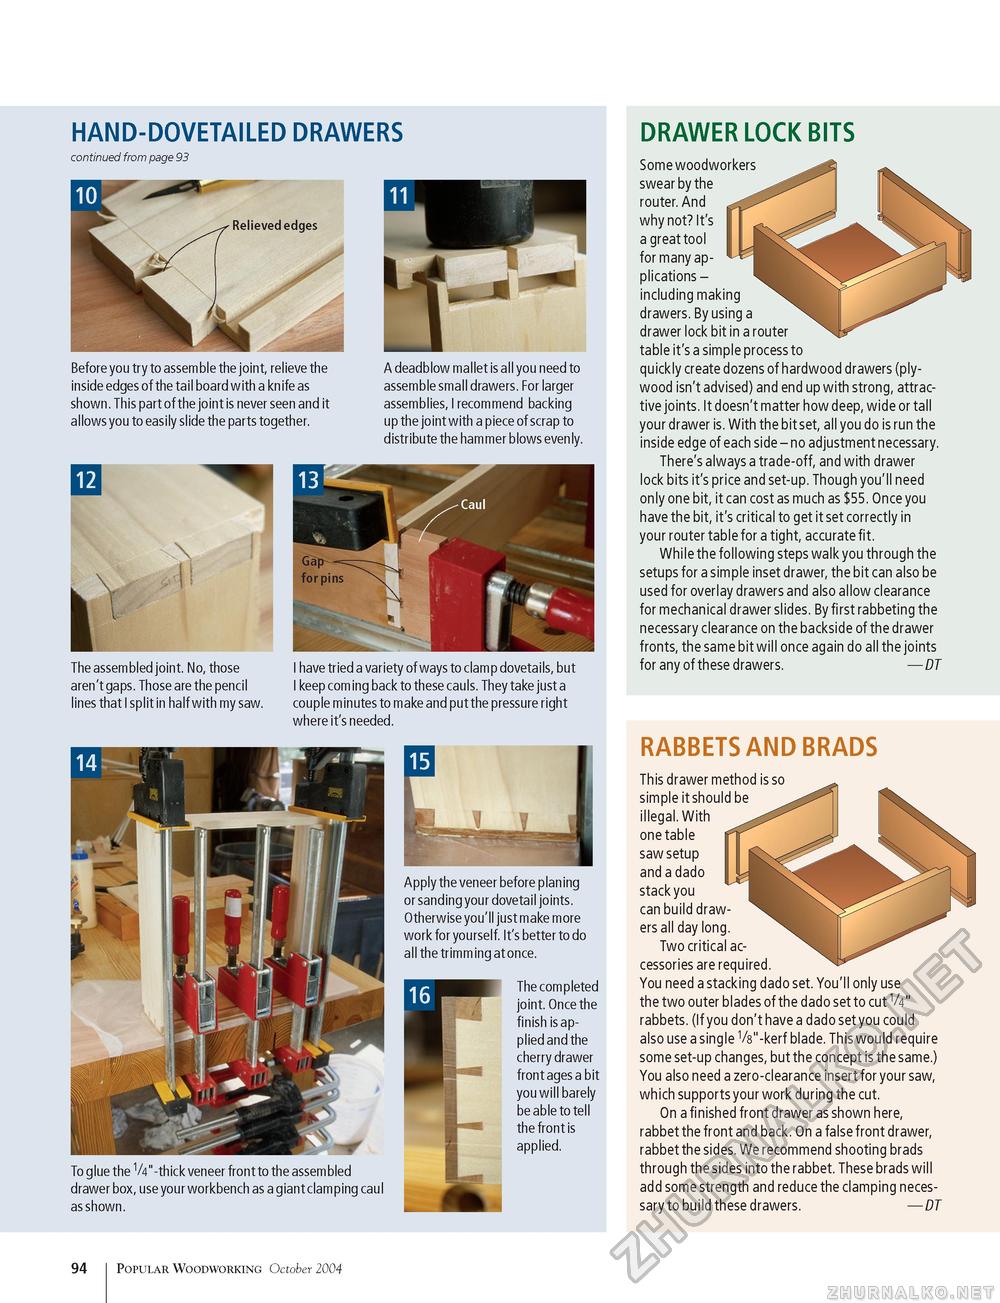
HAND-DOVETAILED DRAWERS continued from page 93 Before you try to assemble the joint, relieve the inside edges of the tail board with a knife as shown. This part of the joint is never seen and it allows you to easily slide the parts together. A deadblow mallet is all you need to assemble small drawers. For larger assemblies, I recommend backing up the joint with a piece of scrap to distribute the hammer blows evenly. I ii The assembled joint. No, those aren't gaps. Those are the pencil lines that I split in half with my saw. I have tried a variety of ways to clamp dovetails, but I keep com ing back to these cauls. They take just a couple minutes to make and put the pressure right where it's needed. Apply the veneer before plan ing or sanding your dovetail joints. Otherwise you'll just make more work for yourself. It's better to do all the trimming at once. The completed joint. Once the finish is applied and the cherry drawer front ages a bit you will barely be able to tell the front is applied. To glue the 1/4"-thick veneer front to the assembled drawer box, use your workbench as a giant clamping caul as shown. DRAWER LOCK BITS Somewoodworkers swear by the router. And why not? It's a great tool for many applications-including making drawers. By using a drawer lock bit in a router table it's a simple process to quickly create dozens of hardwood drawers (plywood isn't advised) and end up with strong, attractive joints. It doesn't matter how deep, wide or tall your drawer is. With the bit set, all you do is run the inside edge of each side - no adjustment necessary. There's always a trade-off, and with drawer lock bits it's price and set-up. Though you'll need only one bit, it can cost as much as $55. Once you have the bit, it's critical to get it set correctly in your router table for a tight, accurate fit. While the following steps walk you through the setups for a simple inset drawer, the bit can also be used for overlay drawers and also allow clearance for mechanical drawer slides. By first rabbeting the necessary clearance on the backside of the drawer fronts, the same bit will once again do all the joints for any of these drawers. — DT RABBETS AND BRADS This drawer method is so simple it should be illegal. With one table saw setup and a dado stack you can build drawers all day long. Two critical accessories are required. You need a stacking dado set. You'll only use the two outer blades of the dado set to cut V4" rabbets. (If you don't have a dado set you could also use a single Vs"-kerf blade. This would require some set-up changes, but the concept is the same.) You also need a zero-clearance insert for your saw, which supports your work during the cut. On a finished front drawer as shown here, rabbet the front and back. On a false front drawer, rabbet the sides. We recommend shooting brads through the sides into the rabbet. These brads will add some strength and reduce the clamping necessary to build these drawers. — DT 12 94 Popular Woodworking October 2004 |


