Popular Woodworking 2004-10 № 143, страница 96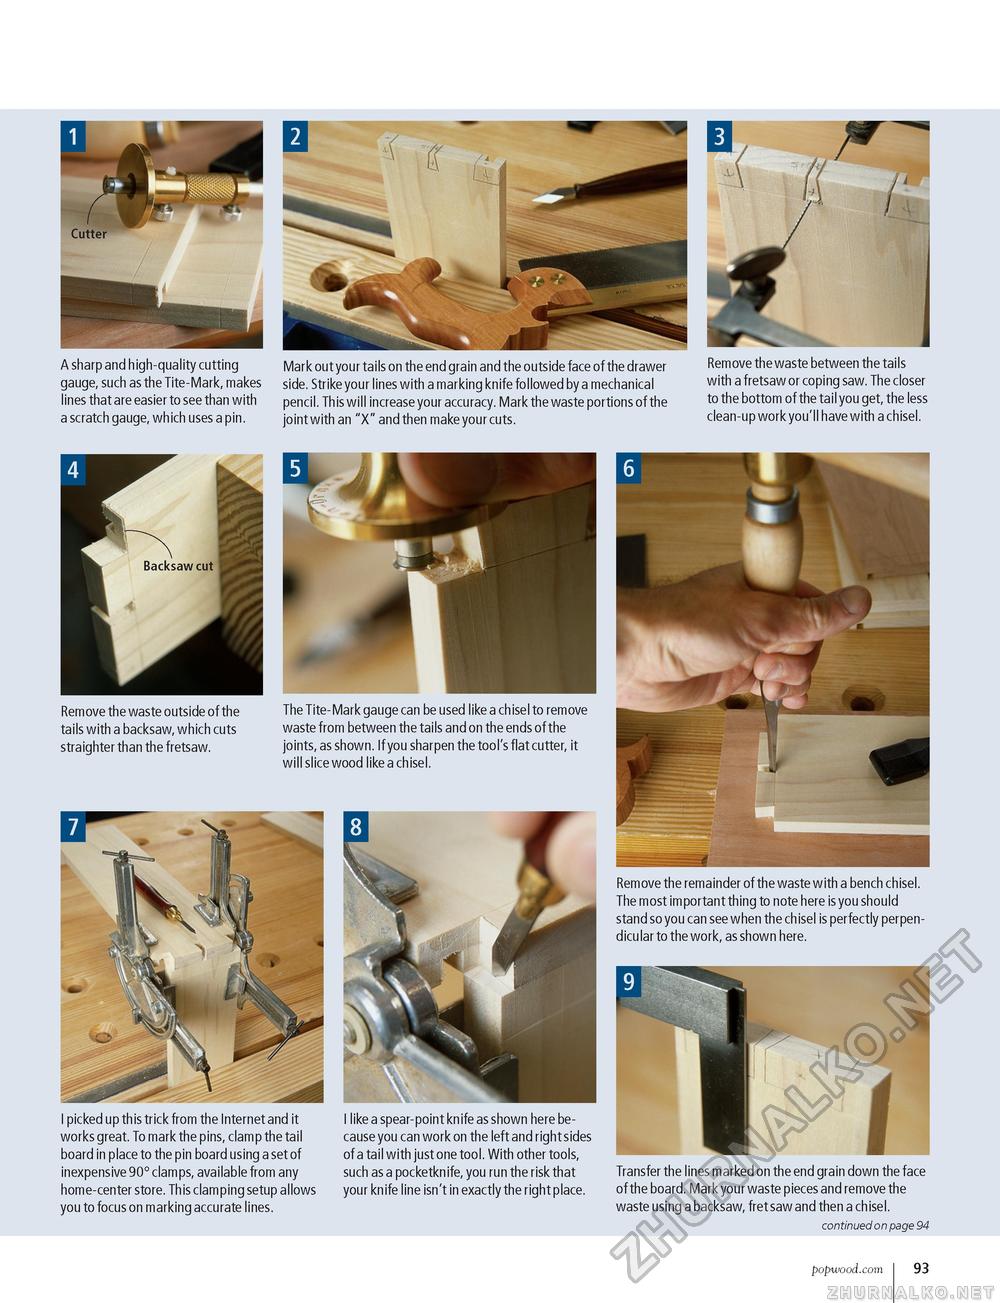
A A sharp and high-quality cutting gauge, such as the Tite-Mark, makes lines that are easier to see than with a scratch gauge, which uses a pin. Mark out your tails on the end grain and the outside face of the drawer side. Strike your lines with a marking knife followed by a mechanical pencil. This will increase your accuracy. Mark the waste portions of the joint with an "X" and then make your cuts. Remove the waste between the tails with a fretsaw or coping saw. The closer to the bottom of the tail you get, the less clean-up work you'll have with a chisel. Remove the waste outside of the tails with a backsaw, which cuts straighter than the fretsaw. The Tite-Mark gauge can be used like a chisel to remove waste from between the tails and on the ends of the joints, as shown. If you sharpen the tool's flat cutter, it will slice wood like a chisel. I picked up this trick from the Internet and it works great. To mark the pins, clamp the tail board in place to the pin board using a set of inexpensive 90° clamps, available from any home-center store. This clamping setup allows you to focus on marking accurate lines. I like a spear-point knife as shown here because you can work on the left and right sides of a tail with just one tool. With other tools, such as a pocketknife, you run the risk that your knife line isn't in exactly the right place. Remove the remainder of the waste with a bench chisel. The most important thing to note here is you should stand so you can see when the ch isel is perfectly perpendicular to the work, as shown here. Transfer the lines marked on the end grain down the face of the board. Mark your waste pieces and remove the waste using a backsaw, fret saw and then a chisel. continued on page 94 popwood.com 93 |


