Popular Woodworking 2005-02 № 146, страница 46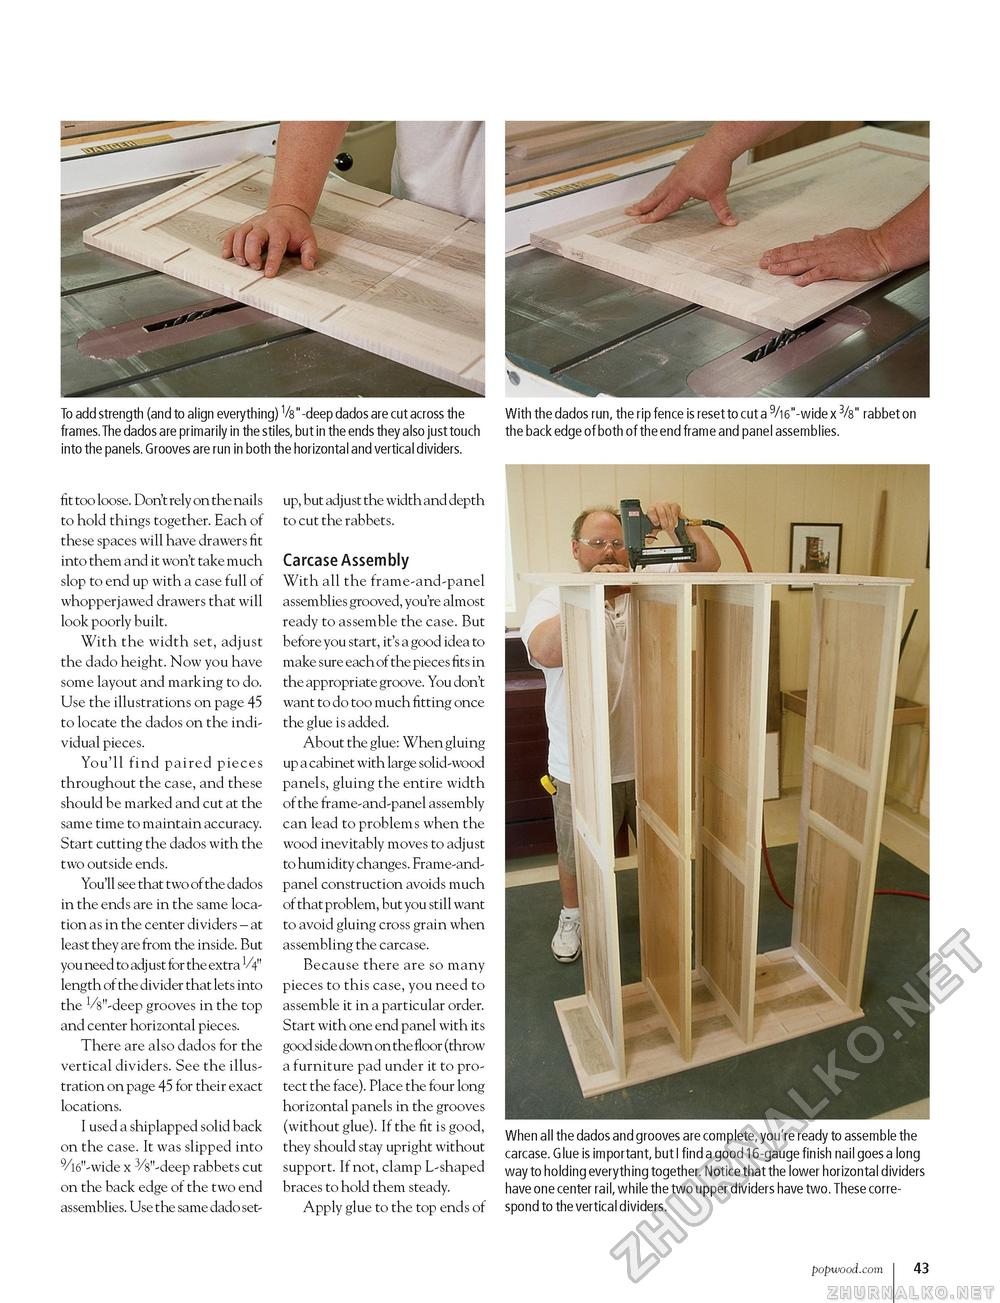
To add strength (and to align everything) V8"-deep dados are cut across the With the dados run, the rip fence is reset to cut a 9/i6"-wide x 3/8" rabbet on frames. The dados are primarily in the stiles, but in the ends they also just touch the back edge of both of the end frame and panel assemblies. into the panels. Grooves are run in both the horizontal and vertical dividers. fit too loose. Don't rely on the nails to hold things together. Each of these spaces will have drawers fit into them and it won't take much slop to end up with a case full of whopperjawed drawers that will look poorly built. With the width set, adjust the dado height. Now you have some layout and marking to do. Use the illustrations on page 45 to locate the dados on the individual pieces. You'll find paired pieces throughout the case, and these should be marked and cut at the same time to maintain accuracy. Start cutting the dados with the two outside ends. You'll see that two of the dados in the ends are in the same location as in the center dividers - at least they are from the inside. But you need to adj ust for the extra 1/4" length of the divider that lets into the ^"-deep grooves in the top and center horizontal pieces. There are also dados for the vertical dividers. See the illustration on page 45 for their exact locations. I used a shiplapped solid back on the case. It was slipped into 9/l6"-wide x 3/8"-deep rabbets cut on the back edge of the two end assemblies. Use the same dado set up, but adjust the width and depth to cut the rabbets. Carcase Assembly With all the frame-and-panel assemblies grooved, you're almost ready to assemble the case. But before you start, it's a good idea to make sure each of the pieces fits in the appropriate groove. You don't want to do too much fitting once the glue is added. About the glue: When gluing up a cabinet with large solid-wood panels, gluing the entire width of the frame-and-panel assembly can lead to problems when the wood inevitably moves to adjust to humidity changes. Frame-and-panel construction avoids much of that problem, but you still want to avoid gluing cross grain when assembling the carcase. Because there are so many pieces to this case, you need to assemble it in a particular order. Start with one end panel with its good side down on the floor (throw a furniture pad under it to protect the face). Place the four long horizontal panels in the grooves (without glue). If the fit is good, they should stay upright without support. If not, clamp L-shaped braces to hold them steady. Apply glue to the top ends of When all the dados and grooves are complete, you're ready to assemble the carcase. G lue is important, but I find a good 16-gauge finish nail goes a long way to holding everything together. Notice that the lower horizontal dividers have one center rail, while the two upper dividers have two. These correspond to the vertical dividers. popwood.com 43 |


