Popular Woodworking 2005-02 № 146, страница 47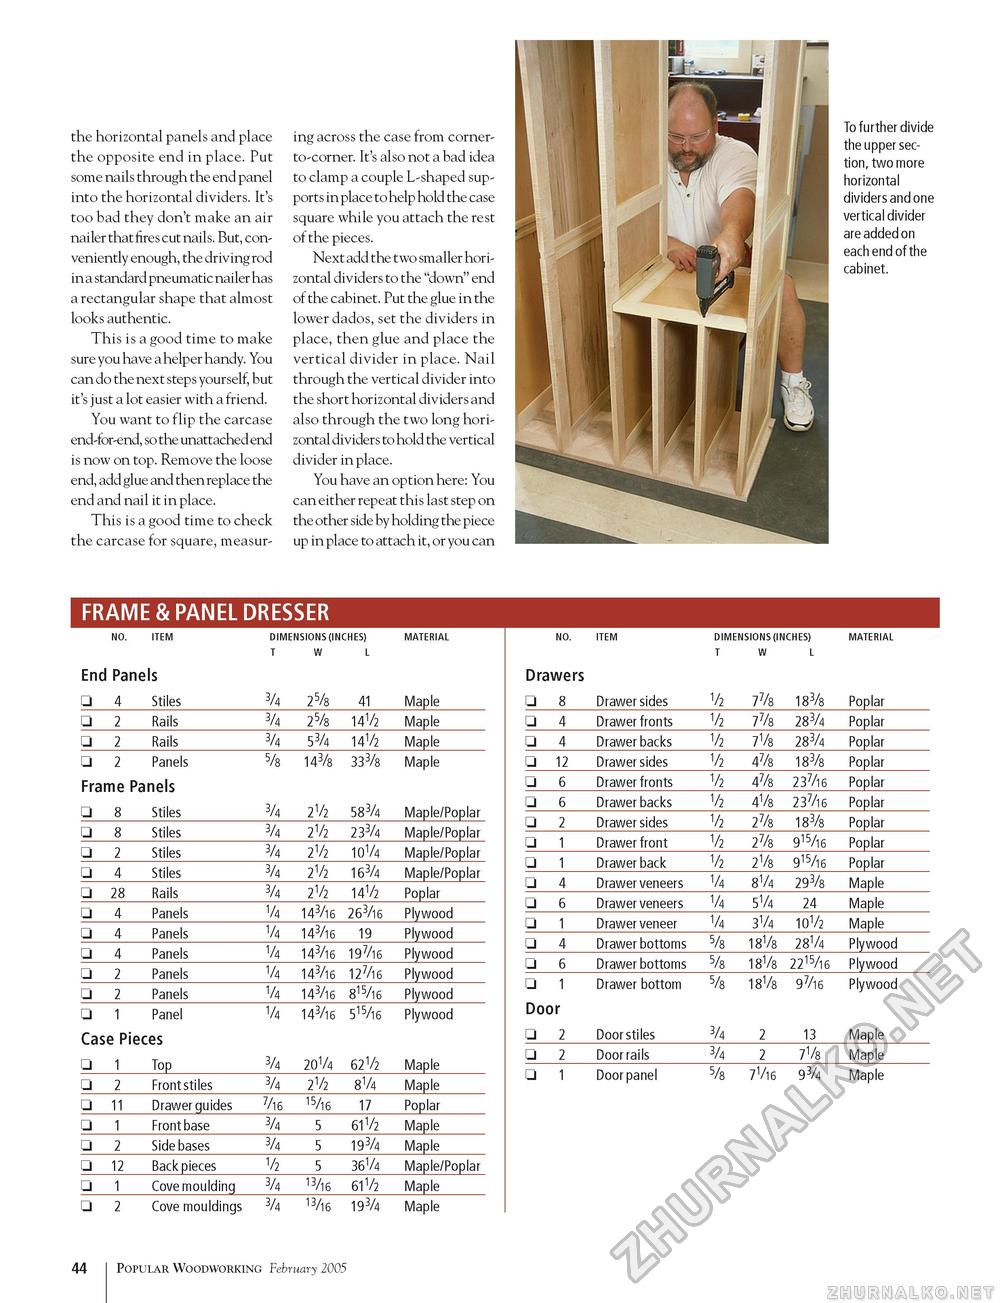
the horizontal panels and place the opposite end in place. Put some nails through the end panel into the horizontal dividers. It's too bad they don't make an air nailer that fires cut nails. But, conveniently enough, the driving rod in a standard pneumatic nailer has a rectangular shape that almost looks authentic. This is a good time to make sure you have a helper handy. You can do the next steps yourself, but it's just a lot easier with a friend. You want to flip the carcase end-for-end, so the unattached end is now on top. Remove the loose end, add glue and then replace the end and nail it in place. This is a good time to check the carcase for square, measur ing across the case from corner-to-corner. It's also not a bad idea to clamp a couple L-shaped supports in place to help hold the case square while you attach the rest of the pieces. Next add the two smaller horizontal dividers to the "down" end of the cabinet. Put the glue in the lower dados, set the dividers in place, then glue and place the vertical divider in place. Nail through the vertical divider into the short horizontal dividers and also through the two long horizontal dividers to hold the vertical divider in place. You have an option here: You can either repeat this last step on the other side by holding the piece up in place to attach it, or you can To further divide the upper section, two more horizontal dividers and one vertical divider are added on each end of the cabinet. FRAME & PANEL DRESSER End Panels □ 4 Stiles DIMENSIONS (INCHES) T W L 3/4 25/8 41 Maple 41 Maple
DIMENSIONS (INCHES) MATERIAL T W L DIMENSIONS (INCHES) MATERIAL T W L NO. TEM
NO. TEM NO. TEM |
|||||||||||||||||||||||||||||||||||||||||||||||||||||||||||||||||||||||||||||||||||||||||||||||||||||||||||||||||||||||||||||||||||||||||||||||||||||||||||||||||||||||||||||||||||||||||||||||||||||||||||||||||||||||||||||||||||||||||||||||||||||||||||||||||||||||||||||||||||||||||||||||||||||||||||||||||||||||||||


