Popular Woodworking 2005-02 № 146, страница 73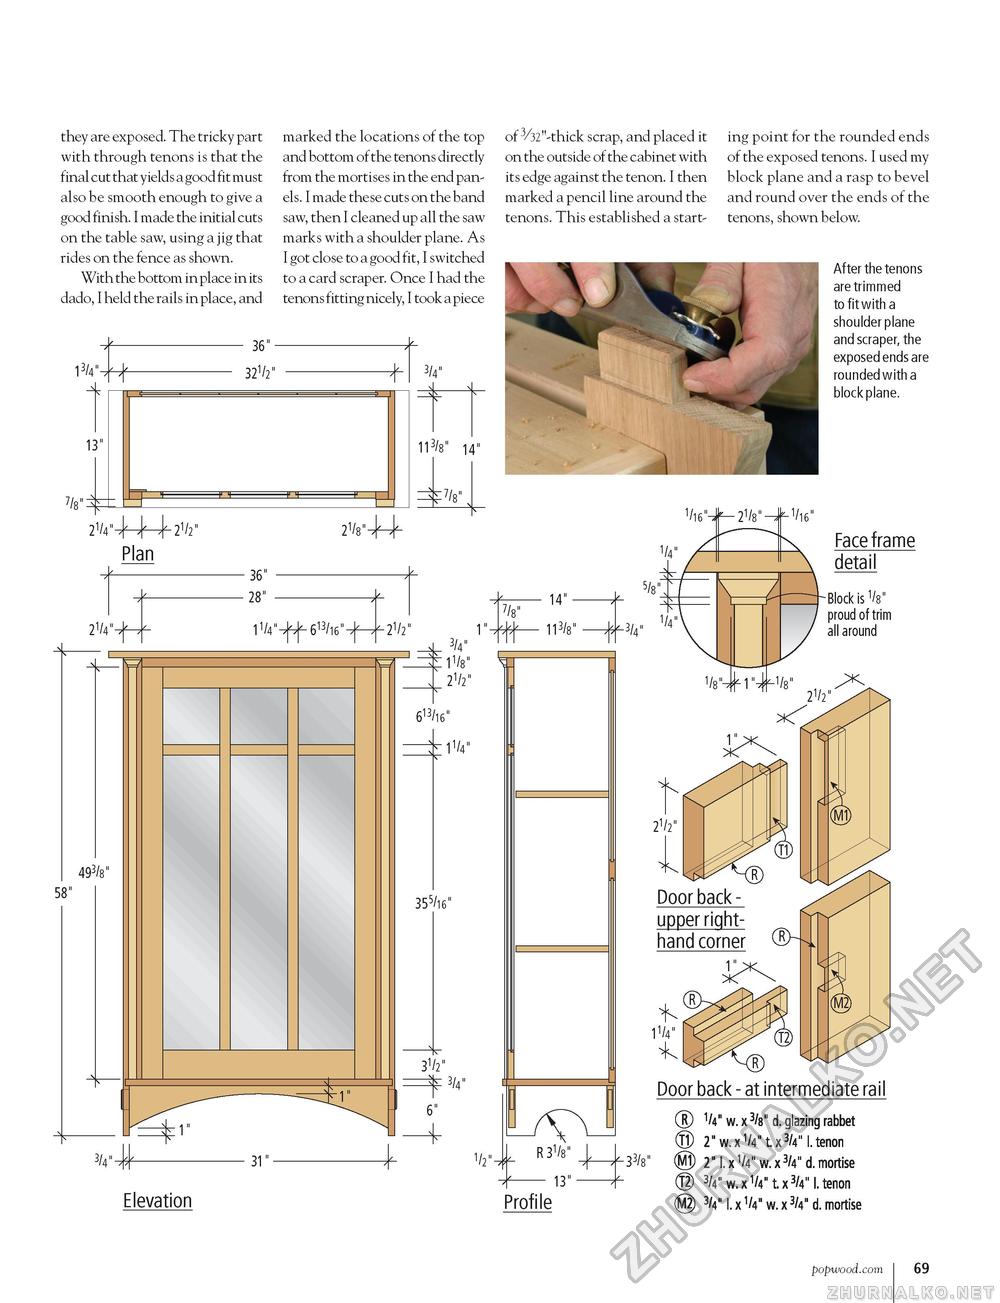
they are exposed. The tricky part with through tenons is that the final cut that yields a good fit must also be smooth enough to give a good finish. I made the initial cuts on the table saw, using a jig that rides on the fence as shown. With the bottom in place in its dado, I held the rails in place, and marked the locations of the top and bottom of the tenons directly from the mortises in the end panels. I made these cuts on the band saw, then I cleaned up all the saw marks with a shoulder plane. As I got close to a good fit, I switched to a card scraper. Once I had the tenons fitting nicely, I took a piece of 3/32"-thick scrap, and placed it on the outside of the cabinet with its edge against the tenon. I then marked a pencil line around the tenons. This established a start- ing point for the rounded ends of the exposed tenons. I used my block plane and a rasp to bevel and round over the ends of the tenons, shown below. After the tenons are trimmed to fit with a shoulder plane and scraper, the exposed ends are rounded with a block plane. Elevation Profile Door back - at intermediate rail ® 1/4"w.x3/8"d. glazing rabbet © 2" w.x1/4"t.x3/4" I. tenon 33/8" @ 2"l.x1/4"w.x3/4"d.mortise © 3/4" w. x V4" t. x lk" I. tenon ® V I. x1/4"w.x3/4"d. mortise popwood.com 69 |


