Popular Woodworking 2005-04 № 147, страница 44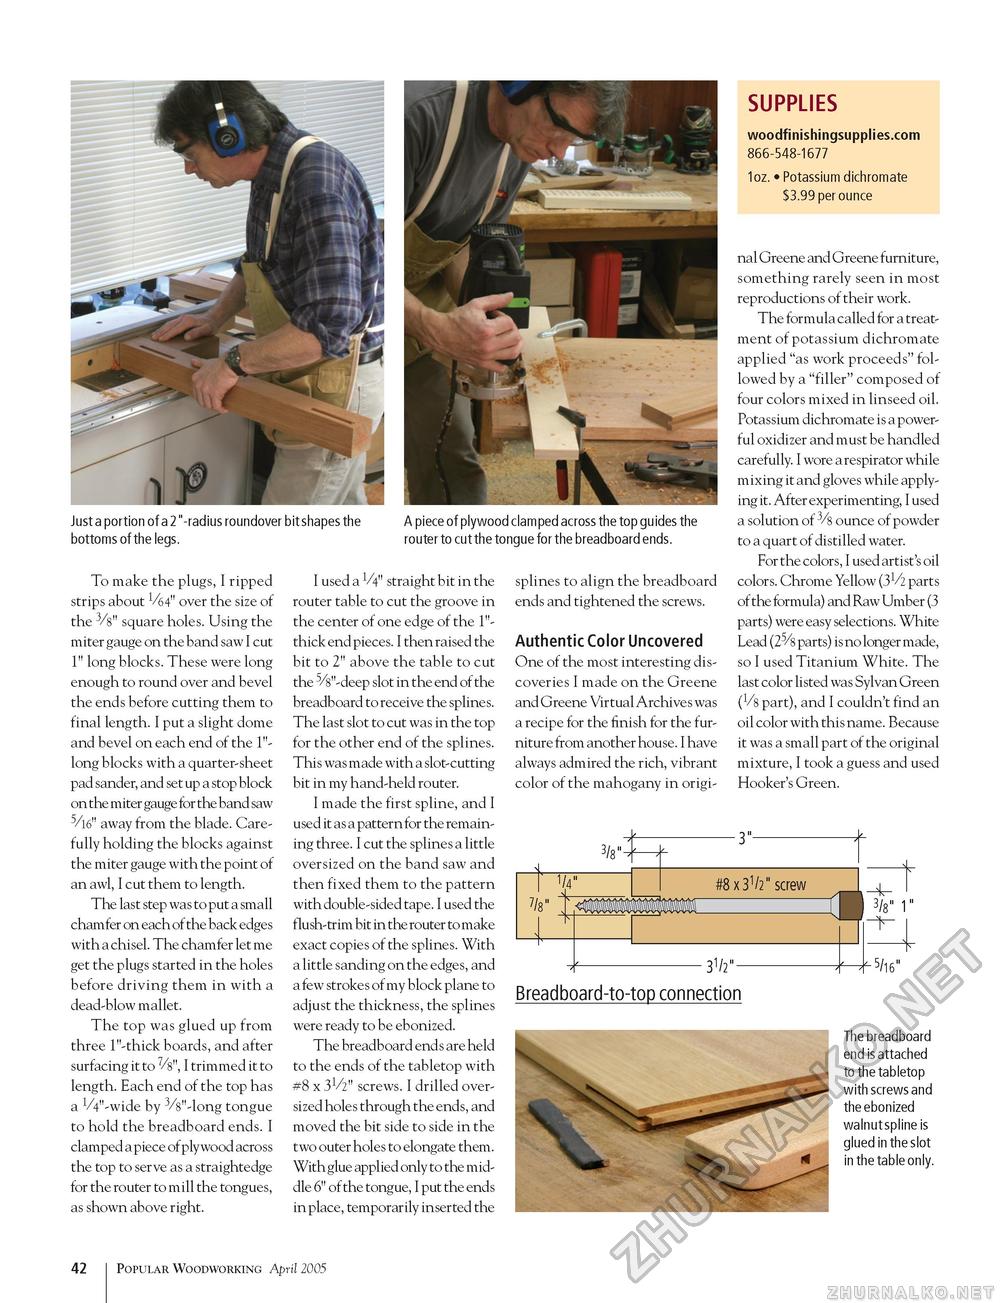
Just a portion of a 2 "-radius roundover bit shapes the bottoms of the legs. A piece of plywood clamped across the top gu ides the router to cut the tongue for the breadboard ends. To make the plugs, I ripped strips about V64" over the size of the 3/8" square holes. Using the miter gauge on the band saw I cut 1" long blocks. These were long enough to round over and bevel the ends before cutting them to final length. I put a slight dome and bevel on each end of the 1"-long blocks with a quarter-sheet pad sander, and set up a stop block on the miter gauge for the band saw 5/16" away from the blade. Carefully holding the blocks against the miter gauge with the point of an awl, I cut them to length. The last step was to put a small chamfer on each of the back edges with a chisel. The chamfer let me get the plugs started in the holes before driving them in with a dead-blow mallet. The top was glued up from three 1"-thick boards, and after surfacing it to 7/8", I trimmed it to length. Each end of the top has a VV'-wide by 3/8"-long tongue to hold the breadboard ends. I clamped a piece of plywood across the top to serve as a straightedge for the router to mill the tongues, as shown above right. I used a V4" straight bit in the router table to cut the groove in the center of one edge of the 1"-thick end pieces. I then raised the bit to 2" above the table to cut the 5/8"-deep slot in the end of the breadboard to receive the splines. The last slot to cut was in the top for the other end of the splines. This was made with a slot-cutting bit in my hand-held router. I made the first spline, and I used it as a pattern for the remaining three. I cut the splines a little oversized on the band saw and then fixed them to the pattern with double-sided tape. I used the flush-trim bit in the router to make exact copies of the splines. With a little sanding on the edges, and a few stroke s of my block plane to adjust the thickness, the splines were ready to be ebonized. The breadboard ends are held to the ends of the tabletop with #8 x 3V2" screws. I drilled oversized holes through the ends, and moved the bit side to side in the two outer holes to elongate them. With glue applied only to the middle 6" of the tongue, I put the ends in place, temporarily inserted the splines to align the breadboard ends and tightened the screws. Authentic Color Uncovered One of the most interesting discoveries I made on the Greene and Greene Virtual Archive s was a recipe for the finish for the furniture from another house. I have always admired the rich, vibrant color of the mahogany in origi- SUPPLIES woodfinishingsupplies.com 866-548-1677 1oz. • Potassium dichromate $3.99 per ounce nal Greene and Greene furniture, something rarely seen in most reproductions of their work. The formula called for a treatment of potassium dichromate applied "as work proceeds" followed by a "filler" composed of four colors mixed in linseed oil. Potassium dichromate is a powerful oxidizer and must be handled carefully. I wore a respirator while mixing it and gloves while applying it. After experimenting, I used a solution of 3/8 ounce of powder to a quart of distilled water. For the colors, I used artist's oil colors. Chrome Yellow (3V2 parts of the formula) and Raw Umber (3 parts) were easy selections. White Lead (25/8 parts) is no longer made, so I used Titanium White. The last color listed was Sylvan Green 8 part), and I couldn't find an oil color with this name. Because it was a small part of the original mixture, I took a guess and used Hooker's Green. Breadboard-to-top connection The breadboard end is attached to the tabletop with screws and the ebonized walnut spline is glued in the slot in the table only. 42 1 Popular Woodworking April 2005 |


