Popular Woodworking 2005-04 № 147, страница 48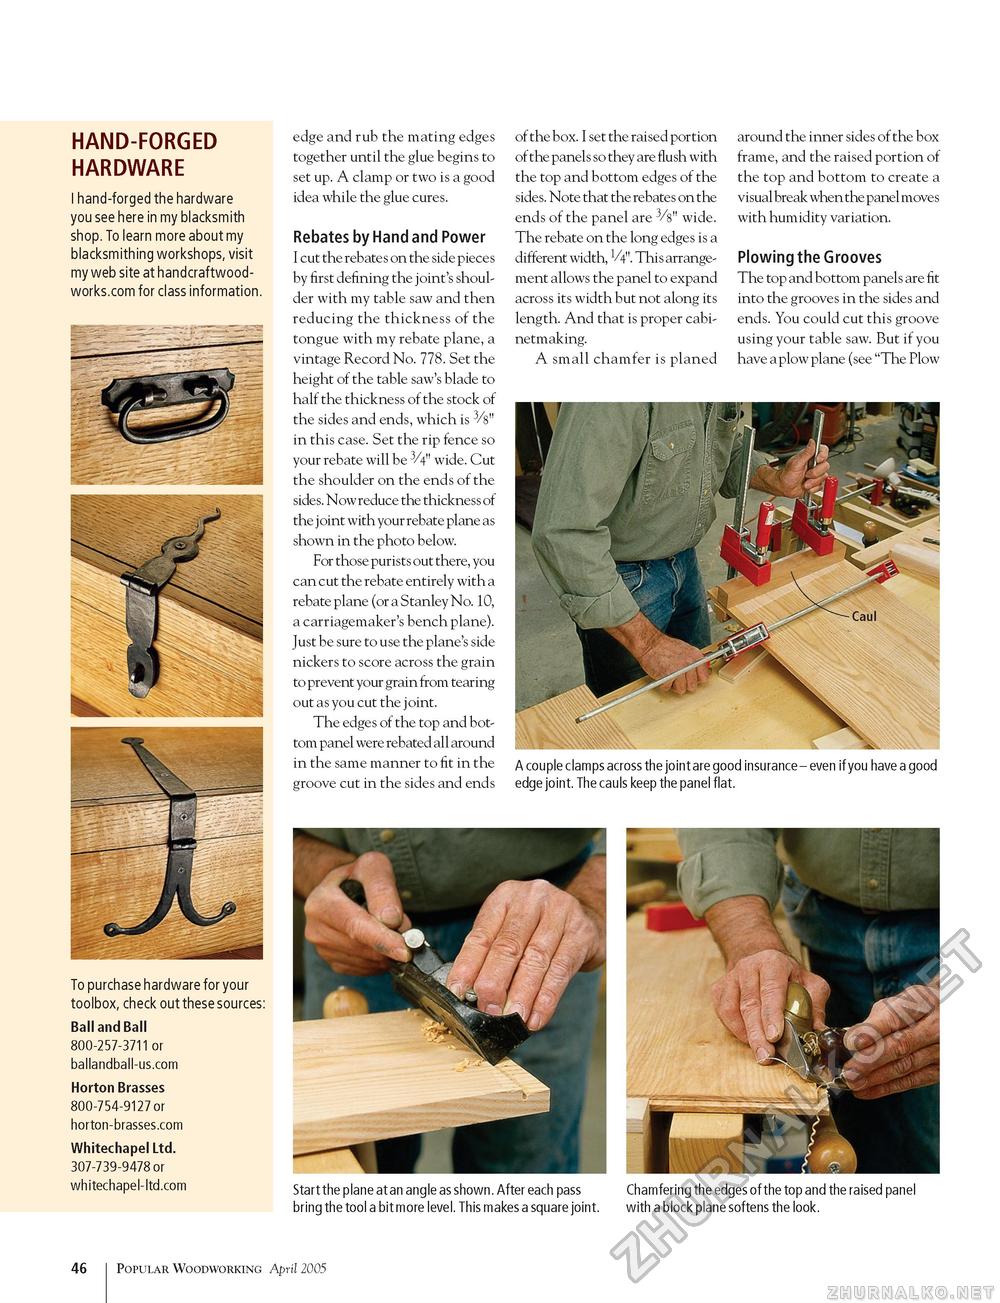
HAND-FORGED HARDWARE I hand-forged the hardware you see here in my blacksmith shop. To learn more about my blacksmithing workshops, visit my web site at handcraftwood-works.com for class information. To purchase hardware for your toolbox, check out these sources: Ball and Ball 800-257-3711 or ballandball-us.com Horton Brasses 800-754-9127 or horton-brasses.com Whitechapel Ltd. 307-739-9478 or whitechapel-ltd.com edge and rub the mating edges together until the glue begins to set up. A clamp or two is a good idea while the glue cures. Rebates by Hand and Power I cut the rebates on the side pieces by first defining the joint's shoulder with my table saw and then reducing the thickness of the tongue with my rebate plane, a vintage Record No. 778. Set the height of the table saw's blade to half the thickness of the stock of the sides and ends, which is 3/8" in this case. Set the rip fence so your rebate will be 3/4" wide. Cut the shoulder on the ends of the sides. Now reduce the thickness of the j oint with your rebate plane as shown in the photo below. For those purists out there, you can cut the rebate entirely with a rebate plane (or a Stanley No. 10, a carriagemaker's bench plane). Just be sure to use the plane's side nickers to score across the grain to prevent your grain from tearing out as you cut the j oint. The edges of the top and bottom panel were rebated all around in the same manner to fit in the groove cut in the sides and ends of the box. I set the raised portion of the panels so they are flush with the top and bottom edges of the sides. Note that the rebates on the ends of the panel are 3/8" wide. The rebate on the long edges is a different width, V4". This arrangement allows the panel to expand across its width but not along its length. And that is proper cabi-netmaking. A small chamfer is planed around the inner sides of the box frame, and the raised portion of the top and bottom to create a visual break when the panel moves with humidity variation. Plowing the Grooves The top and bottom panels are fit into the grooves in the sides and ends. You could cut this groove using your table saw. But if you have a plow plane (see "The Plow A couple clamps across the joint are good insurance - even if you have a good edge joint. The cauls keep the panel flat. Start the plane at an angle as shown. After each pass Chamfering the edges of the top and the raised panel bring the tool a bit more level. This makes a square joint. with a block plane softens the look. 46 1 Popular Woodworking April 2005 |


