Popular Woodworking 2005-04 № 147, страница 49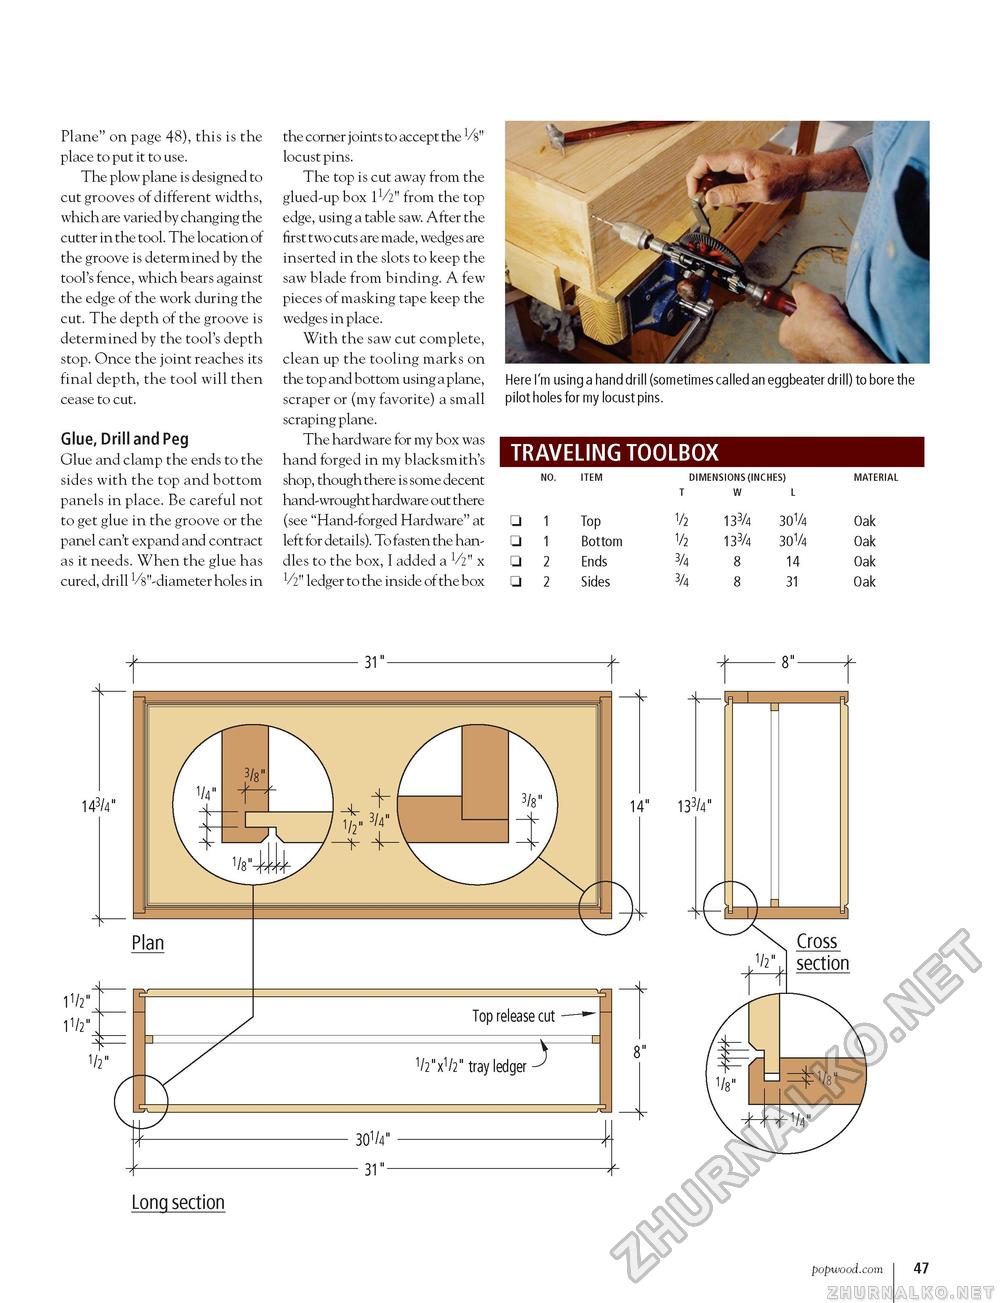
Plane" on page 48), this is the place to put it to use. The plow plane is designed to cut grooves of different widths, which are varied by changing the cutter in the tool. The location of the groove is determined by the tool's fence, which bears against the edge of the work during the cut. The depth of the groove is determined by the tool's depth stop. Once the joint reaches its final depth, the tool will then cease to cut. Glue, Drill and Peg Glue and clamp the ends to the sides with the top and bottom panels in place. Be careful not to get glue in the groove or the panel can't expand and contract as it needs. When the glue has cured, drill ^"-diameter holes in the corner joints to accept the V8" locust pins. The top is cut away from the glued-up box 1V2" from the top edge, using a table saw. After the first two cuts are made, wedges are inserted in the slots to keep the saw blade from binding. A few pieces of masking tape keep the wedges in place. With the saw cut complete, clean up the tooling marks on the top and bottom using a plane, scraper or (my favorite) a small scraping plane. The hardware for my box was hand forged in my blacksmith's shop, though there is some decent hand-wrought hardware out there (see "Hand-forged Hardware" at left for details). To fasten the handles to the box, I added a Vz" x V2" ledger to the inside of the box Here I'm using a hand drill (sometimes called an eggbeater drill) to bore the pilot holes for my locust pins. TRAVELING TOOLBOX DIMENSIONS (INCHES) DIMENSIONS (INCHES) NO ITEM
NO ITEM 14" 133/4" Long section popwood.com 47 |


