Popular Woodworking 2005-06 № 148, страница 38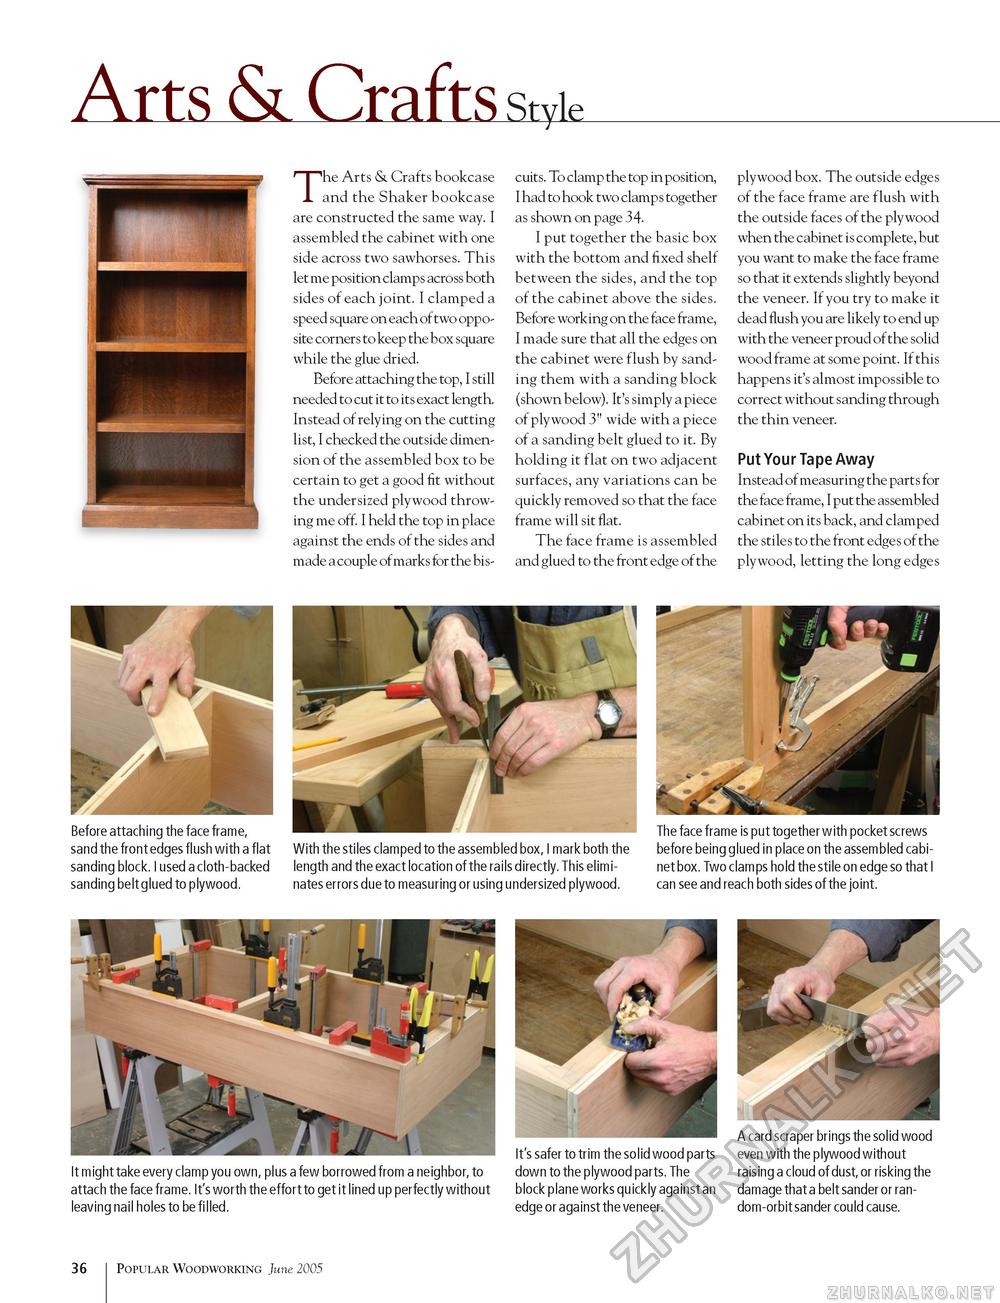
Arts & Crafts style The Arts & Crafts bookcase and the Shaker bookcase are constructed the same way. I assembled the cabinet with one side across two sawhorses. This let me position clamps across both sides of each joint. I clamped a speed square on each of two opposite corners to keep the box square while the glue dried. Before attaching the top, I still needed to cut it to its exact length. Instead of relying on the cutting list, I checked the outside dimension of the assembled box to be certain to get a good fit without the undersized plywood throwing me off. I held the top in place against the ends of the sides and made a couple of marks for the bis cuits. To clamp the top in position, I had to hook two clamp s together as shown on page 34. I put together the basic box with the bottom and fixed shelf between the sides, and the top of the cabinet above the sides. Before working on the face frame, I made sure that all the edges on the cabinet were flush by sanding them with a sanding block (shown below). It's simply a piece of plywood 3" wide with a piece of a sanding belt glued to it. By holding it flat on two adjacent surfaces, any variations can be quickly removed so that the face frame will sit flat. The face frame is assembled and glued to the front edge of the plywood box. The outside edges of the face frame are flush with the outside faces of the plywood when the cabinet is complete, but you want to make the face frame so that it extends slightly beyond the veneer. If you try to make it dead flush you are likely to end up with the veneer proud of the solid wood frame at some point. If this happens it's almost impossible to correct without sanding through the thin veneer. Put Your Tape Away Instead of measuring the parts for the face frame, I put the assembled cabinet on its back, and clamped the stiles to the front edges of the plywood, letting the long edges Before attaching the face frame, sand the front edges flush with a flat With the stiles clamped to the assembled box, I mark both the sanding block. I used a cloth-backed length and the exact location of the rails directly. This elimi-sanding belt glued to plywood. nates errors due to measuring or using undersized plywood. The face frame is put together with pocket screws before being glued in place on the assembled cabinet box. Two clamps hold the stile on edge so that I can see and reach both sides of the joint. It might take every clamp you own, plus a few borrowed from a neighbor, to attach the face frame. It's worth the effort to get it lined up perfectly without leaving nail holes to be filled. A card scraper brings the solid wood It's safer to trim the solid wood parts even with the plywood without down to the plywood parts. The raising a cloud of dust, or risking the block plane works quickly against an damage that a belt sander or ran- edge or against the veneer. dom-orbit sander could cause. 36 Popular Woodworking June 2005 |


