Popular Woodworking 2005-06 № 148, страница 40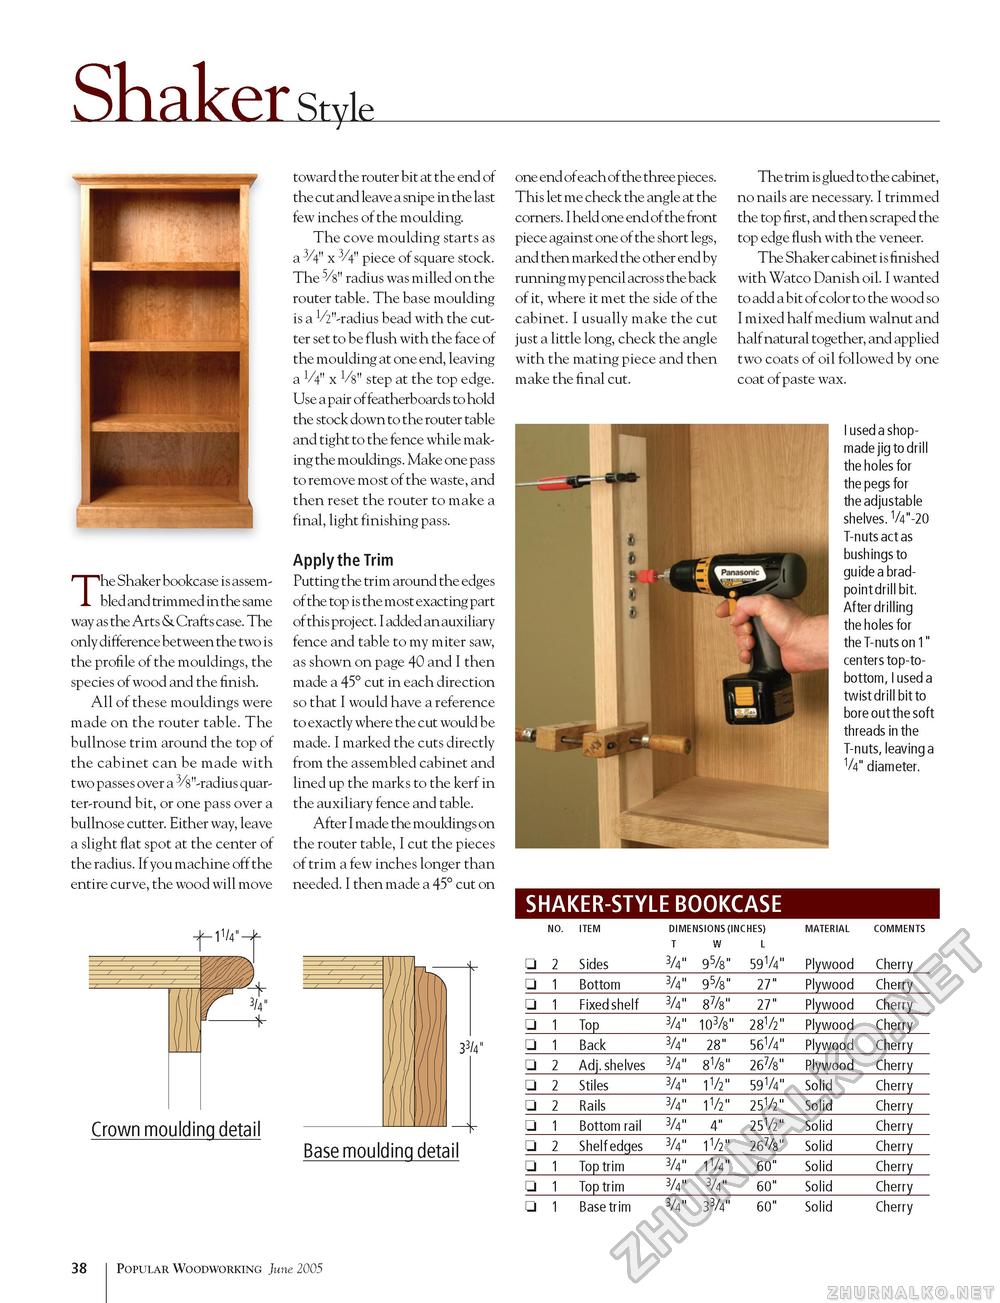
The Shaker bookcase is assembled and trimmed in the same way as the Arts & Crafts case. The only difference between the two is the profile of the mouldings, the species of wood and the finish. All of these mouldings were made on the router table. The bullnose trim around the top of the cabinet can be made with two passes over a 3/s"-radius quarter-round bit, or one pass over a bullnose cutter. Either way, leave a slight flat spot at the center of the radius. If you machine off the entire curve, the wood will move -1l/4" Crown moulding detail toward the router bit at the end of the cut and leave a snipe in the last few inches of the moulding. The cove moulding starts as a 3/4" x 3/4" piece of square stock. The 5/8" radius was milled on the router table. The base moulding is a VV'-radius bead with the cutter set to be flush with the face of the moulding at one end, leaving a 1/4" x Vs" step at the top edge. Use a pair of featherboards to hold the stock down to the router table and tight to the fence while making the mouldings. Make one pass to remove most of the waste, and then reset the router to make a final, light finishing pass. Apply the Trim Putting the trim around the edges of the top is the most exacting part of this proj ect. I added an auxiliary fence and table to my miter saw, as shown on page 40 and I then made a 45° cut in each direction so that I would have a reference to exactly where the cut would be made. I marked the cuts directly from the assembled cabinet and lined up the marks to the kerf in the auxiliary fence and table. After I made the mouldings on the router table, I cut the pieces of trim a few inches longer than needed. I then made a 45° cut on 33/4" Base moulding detail one end of each of the three pieces. This let me check the angle at the corners. I held one end of the front piece against one of the short legs, and then marked the other end by running my pencil across the back of it, where it met the side of the cabinet. I usually make the cut just a little long, check the angle with the mating piece and then make the final cut. The trim is glued to the cabinet, no nails are necessary. I trimmed the top first, and then scraped the top edge flush with the veneer. The Shaker cabinet is finished with Watco Danish oil. I wanted to add a bit of color to the wood so I mixed half medium walnut and half natural together, and applied two coats of oil followed by one coat of paste wax. I used a shop-made jig to drill the holes for the pegs for the adjustable shelves. 1/4"-20 T-nuts act as bushings to guide a brad-point drill bit. After drilling the holes for the T-nuts on 1" centers top-to-bottom, I used a twist drill bit to bore out the soft threads in the T-nuts, leaving a V4" diameter. SHAKER-STYLE BOOKCASE
38 Popular Woodworking June 2005 |
||||||||||||||||||||||||||||||||||||||||||||||||||||||||||||||||||||||||||||||||||||||||||||||||||||||||||||||||


