Popular Woodworking 2005-06 № 148, страница 43
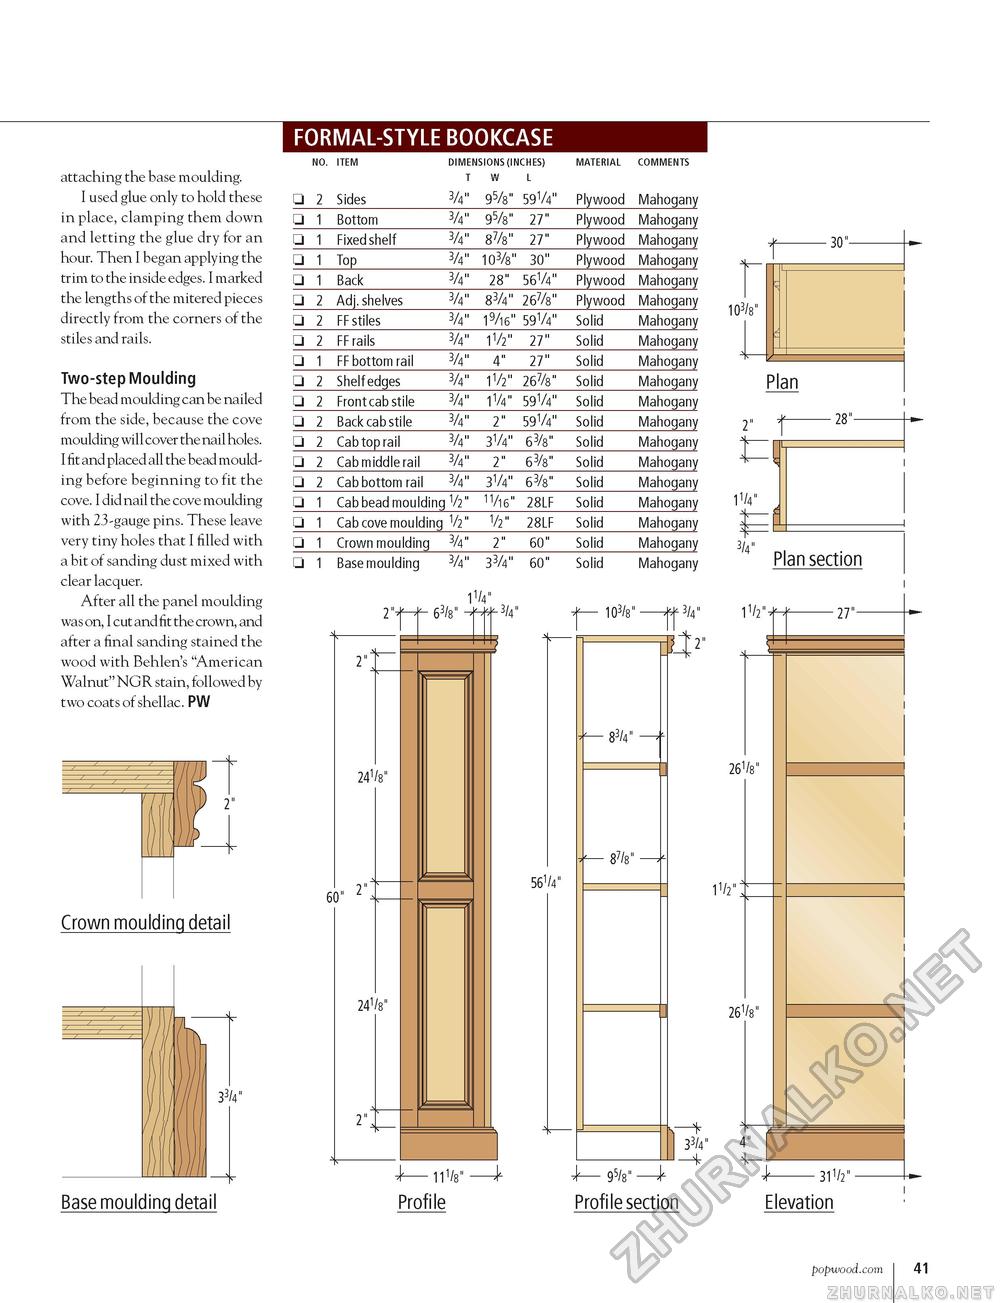
attaching the base moulding. I used glue only to hold these in place, clamping them down and letting the glue dry for an hour. Then I began applying the trim to the inside edges. I marked the lengths of the mitered pieces directly from the corners of the stiles and rails. Two-step Moulding The bead moulding can be nailed from the side, because the cove moulding will cover the nail holes. I fit and placed all the bead moulding before beginning to fit the cove. I did nail the cove moulding with 23-gauge pins. These leave very tiny holes that I filled with a bit of sanding dust mixed with clear lacquer. After all the panel moulding was on, I cut and fit the crown, and after a final sanding stained the wood with Behlen's "American Walnut" NGR stain, followed by two coats of shellac. PW Crown moulding detail 33/4" Base moulding detail FORMAL-STYLE BOOKCASE
63/8" 103/8" 3/4" 2" 241/8" 60" 241/s" 2", 1V 63/8" 561/4" 11l/8" -± 103/8" IT 83/4" 3/4" 2" Profile - 95/8" - Profile section 103/8" ■30" Plan 1V -27" 261/s" 11/2"I 261/s" 33/4" ■31l/2" Elevation popwood.com 41 |
||||||||||||||||||||||||||||||||||||||||||||||||||||||||||||||||||||||||||||||||||||||||||||||||||||||||||||||||||||||||||||||||||||||||||||||||||||||||||||||||


