Popular Woodworking 2005-06 № 148, страница 49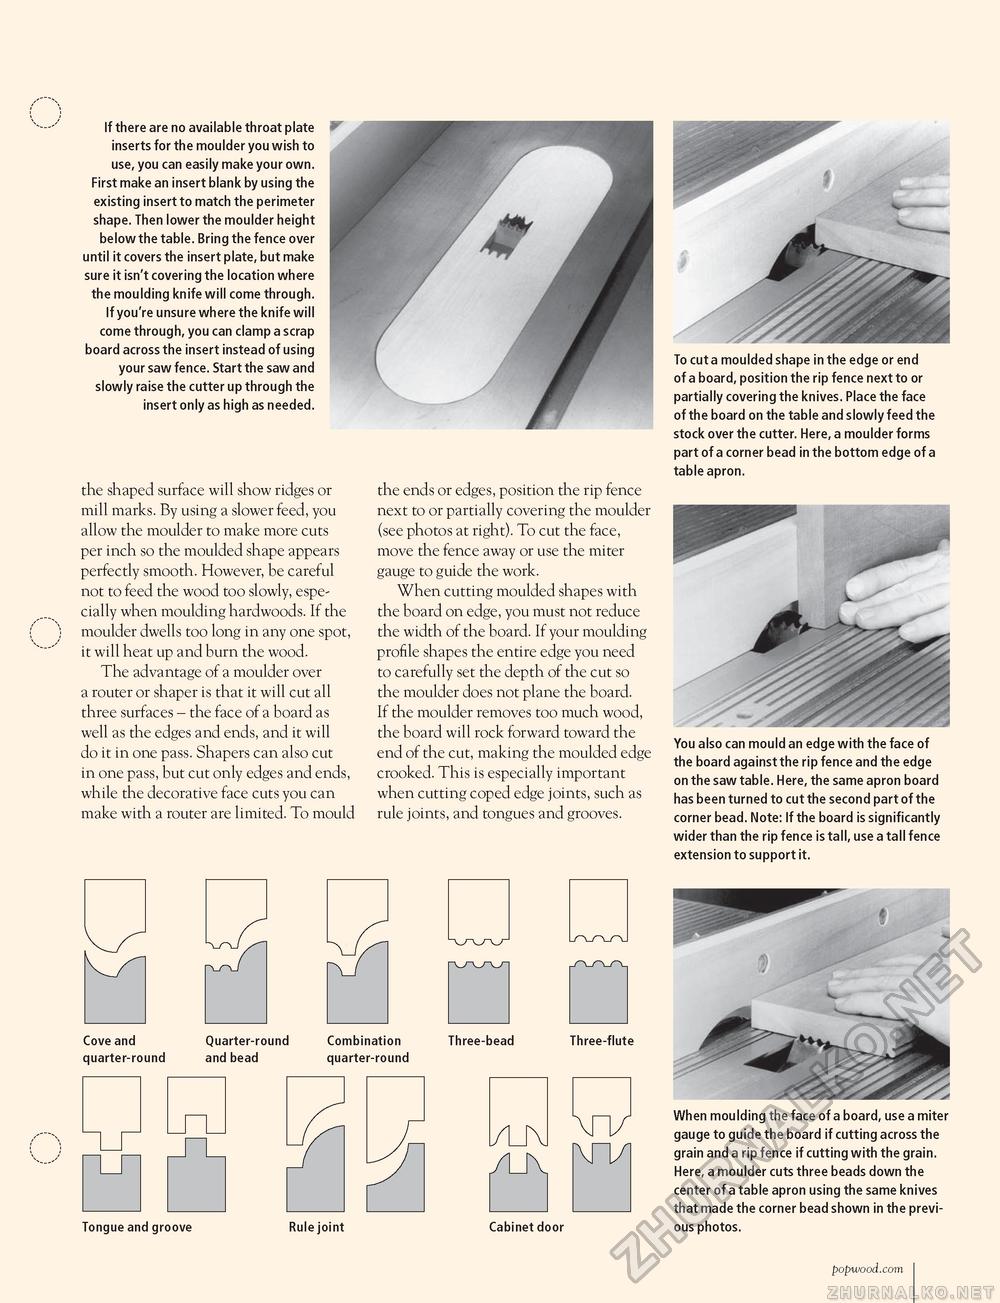
If there are no available throat plate inserts for the moulder you wish to use, you can easily make your own. First make an insert blank by using the existing insert to match the perimeter shape. Then lower the moulder height below the table. Bring the fence over until it covers the insert plate, but make sure it isn't covering the location where the moulding knife will come through. If you're unsure where the knife will come through, you can clamp a scrap board across the insert instead of using your saw fence. Start the saw and slowly raise the cutter up through the insert only as high as needed. the shaped surface will show ridges or mill marks. By using a slower feed, you allow the moulder to make more cuts per inch so the moulded shape appears perfectly smooth. However, be careful not to feed the wood too slowly, especially when moulding hardwoods. If the moulder dwells too long in any one spot, it will heat up and burn the wood. The advantage of a moulder over a router or shaper is that it will cut all three surfaces - the face of a board as well as the edges and ends, and it will do it in one pass. Shapers can also cut in one pass, but cut only edges and ends, while the decorative face cuts you can make with a router are limited. To mould the ends or edges, position the rip fence next to or partially covering the moulder (see photos at right). To cut the face, move the fence away or use the miter gauge to guide the work. When cutting moulded shapes with the board on edge, you must not reduce the width of the board. If your moulding profile shapes the entire edge you need to carefully set the depth of the cut so the moulder does not plane the board. If the moulder removes too much wood, the board will rock forward toward the end of the cut, making the moulded edge crooked. This is especially important when cutting coped edge joints, such as rule joints, and tongues and grooves. Cove and Quarter-round Combination Three-bead quarter-round and bead quarter-round Three-flute l/u\l AA W To cut a moulded shape in the edge or end of a board, position the rip fence next to or partially covering the knives. Place the face of the board on the table and slowly feed the stock over the cutter. Here, a moulder forms part of a corner bead in the bottom edge of a table apron. You also can mould an edge with the face of the board against the rip fence and the edge on the saw table. Here, the same apron board has been turned to cut the second part of the corner bead. Note: If the board is significantly wider than the rip fence is tall, use a tall fence extension to support it. Tongue and groove Rule joint Cabinet door When moulding the face of a board, use a miter gauge to guide the board if cutting across the grain and a rip fence if cutting with the grain. Here, a moulder cuts three beads down the center of a table apron using the same knives that made the corner bead shown in the previous photos. popwood.com 49 |


