Popular Woodworking 2005-06 № 148, страница 48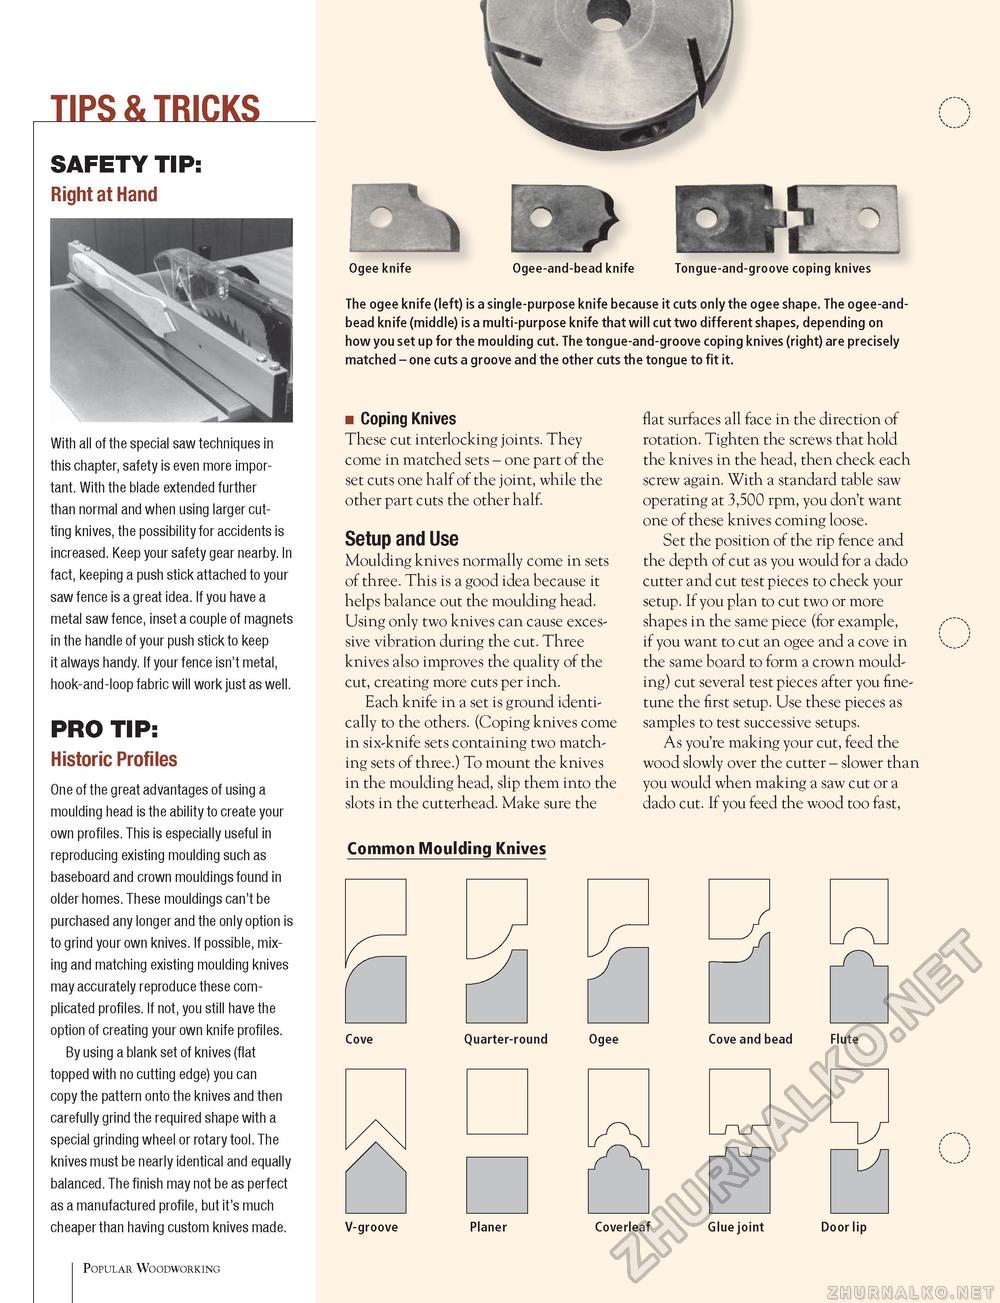
TIPS & TRICKS SAFETY TIP: Right at Hand With all of the special saw techniques in this chapter, safety is even more important. With the blade extended further than normal and when using larger cutting knives, the possibility for accidents is increased. Keep your safety gear nearby. In fact, keeping a push stick attached to your saw fence is a great idea. If you have a metal saw fence, inset a couple of magnets in the handle of your push stick to keep it always handy. If your fence isn't metal, hook-and-loop fabric will work just as well. PRO TIP: Historic Profiles One of the great advantages of using a moulding head is the ability to create your own profiles. This is especially useful in reproducing existing moulding such as baseboard and crown mouldings found in older homes. These mouldings can't be purchased any longer and the only option is to grind your own knives. If possible, mixing and matching existing moulding knives may accurately reproduce these complicated profiles. If not, you still have the option of creating your own knife profiles. By using a blank set of knives (flat topped with no cutting edge) you can copy the pattern onto the knives and then carefully grind the required shape with a special grinding wheel or rotary tool. The knives must be nearly identical and equally balanced. The finish may not be as perfect as a manufactured profile, but it's much cheaper than having custom knives made. Ogee knife Ogee-and-bead knife Tongue-and-groove coping knives The ogee knife (left) is a single-purpose knife because it cuts only the ogee shape. The ogee-and-bead knife (middle) is a multi-purpose knife that will cut two different shapes, depending on how you set up for the moulding cut. The tongue-and-groove coping knives (right) are precisely matched - one cuts a groove and the other cuts the tongue to fit it. ■ Coping Knives These cut interlocking joints. They come in matched sets - one part of the set cuts one half of the joint, while the other part cuts the other half. Setup and Use Moulding knives normally come in sets of three. This is a good idea because it helps balance out the moulding head. Using only two knives can cause excessive vibration during the cut. Three knives also improves the quality of the cut, creating more cuts per inch. Each knife in a set is ground identically to the others. (Coping knives come in six-knife sets containing two matching sets of three.) To mount the knives in the moulding head, slip them into the slots in the cutterhead. Make sure the flat surfaces all face in the direction of rotation. Tighten the screws that hold the knives in the head, then check each screw again. With a standard table saw operating at 3,500 rpm, you don't want one of these knives coming loose. Set the position of the rip fence and the depth of cut as you would for a dado cutter and cut test pieces to check your setup. If you plan to cut two or more shapes in the same piece (for example, if you want to cut an ogee and a cove in the same board to form a crown moulding) cut several test pieces after you fine-tune the first setup. Use these pieces as samples to test successive setups. As you're making your cut, feed the wood slowly over the cutter - slower than you would when making a saw cut or a dado cut. If you feed the wood too fast, Common Moulding Knives Popular Woodworking |


