Popular Woodworking 2005-10 № 150, страница 82
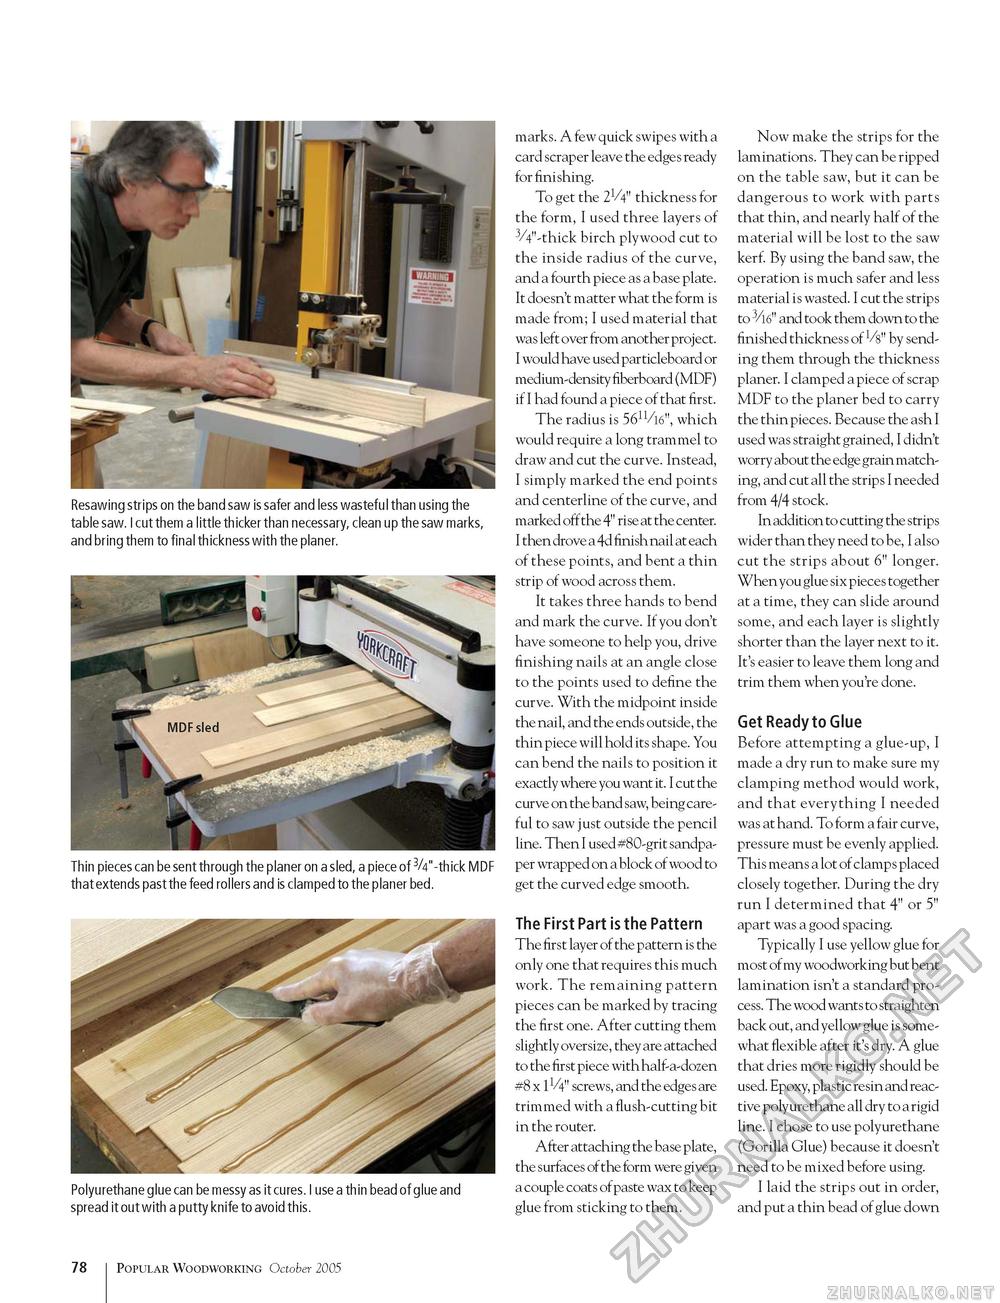
Resawing strips on the band saw is safer and less wasteful than using the table saw. I cut them a little thicker than necessary, clean up the saw marks, and bring them to final thickness with the planer. Thin pieces can be sent through the planer on a sled, a piece of 3/4"-thick MDF that extends past the feed rollers and is clamped to the planer bed. Polyurethane glue can be messy as it cures. I use a thin bead of glue and spread it out with a putty knife to avoid this. marks. A few quick swipes with a card scraper leave the edges ready for finishing. To get the 21/4" thickness for the form, I used three layers of 3/4"-thick birch plywood cut to the inside radius of the curve, and a fourth piece as a base plate. It doesn't matter what the form is made from; I used material that was left over from another project. I would have used particleboard or medium-density fiberboard (MDF) if I had found a piece of that first. The radius is 5611/l6", which would require a long trammel to draw and cut the curve. Instead, I simply marked the end points and centerline of the curve, and marked off the 4" rise at the center. I then drove a 4d finish nail at each of these points, and bent a thin strip of wood across them. It takes three hands to bend and mark the curve. If you don't have someone to help you, drive finishing nails at an angle close to the points used to define the curve. With the midpoint inside the nail, and the ends outside, the thin piece will hold its shape. You can bend the nails to position it exactly where you want it. I cut the curve on the band saw, being careful to saw just outside the pencil line. Then I used #80-grit sandpaper wrapped on a block of wood to get the curved edge smooth. The First Part is the Pattern The first layer of the pattern is the only one that requires this much work. The remaining pattern pieces can be marked by tracing the first one. After cutting them slightly oversize, they are attached to the first piece with half-a-dozen #8 x screws, and the edges are trimmed with a flush-cutting bit in the router. After attaching the base plate, the surfaces of the form were given a couple coats of paste wax to keep glue from sticking to them. Now make the strips for the laminations. They can be ripped on the table saw, but it can be dangerous to work with parts that thin, and nearly half of the material will be lost to the saw kerf. By using the band saw, the operation is much safer and less material is wasted. I cut the strips to 3/l6" and took them down to the finished thickness of 1/8" by sending them through the thickness planer. I clamped a piece of scrap MDF to the planer bed to carry the thin pieces. Because the ash I used was straight grained, I didn't worry about the edge grain matching, and cut all the strips I needed from 4/4 stock. In addition to cutting the strips wider than they need to be, I also cut the strips about 6" longer. When you glue six pieces together at a time, they can slide around some, and each layer is slightly shorter than the layer next to it. It's easier to leave them long and trim them when you're done. Get Ready to Glue Before attempting a glue-up, I made a dry run to make sure my clamping method would work, and that everything I needed was at hand. To form a fair curve, pressure must be evenly applied. This means a lot of clamps placed closely together. During the dry run I determined that 4" or 5" apart was a good spacing. Typically I use yellow glue for most of my woodworking but bent lamination isn't a standard process. The wood wants to straighten back out, and yellow glue is somewhat flexible after it's dry. A glue that dries more rigidly should be used. Epoxy, plastic resin and reactive polyurethane all dry to a rigid line. I chose to use polyurethane (Gorilla Glue) because it doesn't need to be mixed before using. I laid the strips out in order, and put a thin bead of glue down 78 Popular Woodworking October 2005 |


