Popular Woodworking 2005-10 № 150, страница 83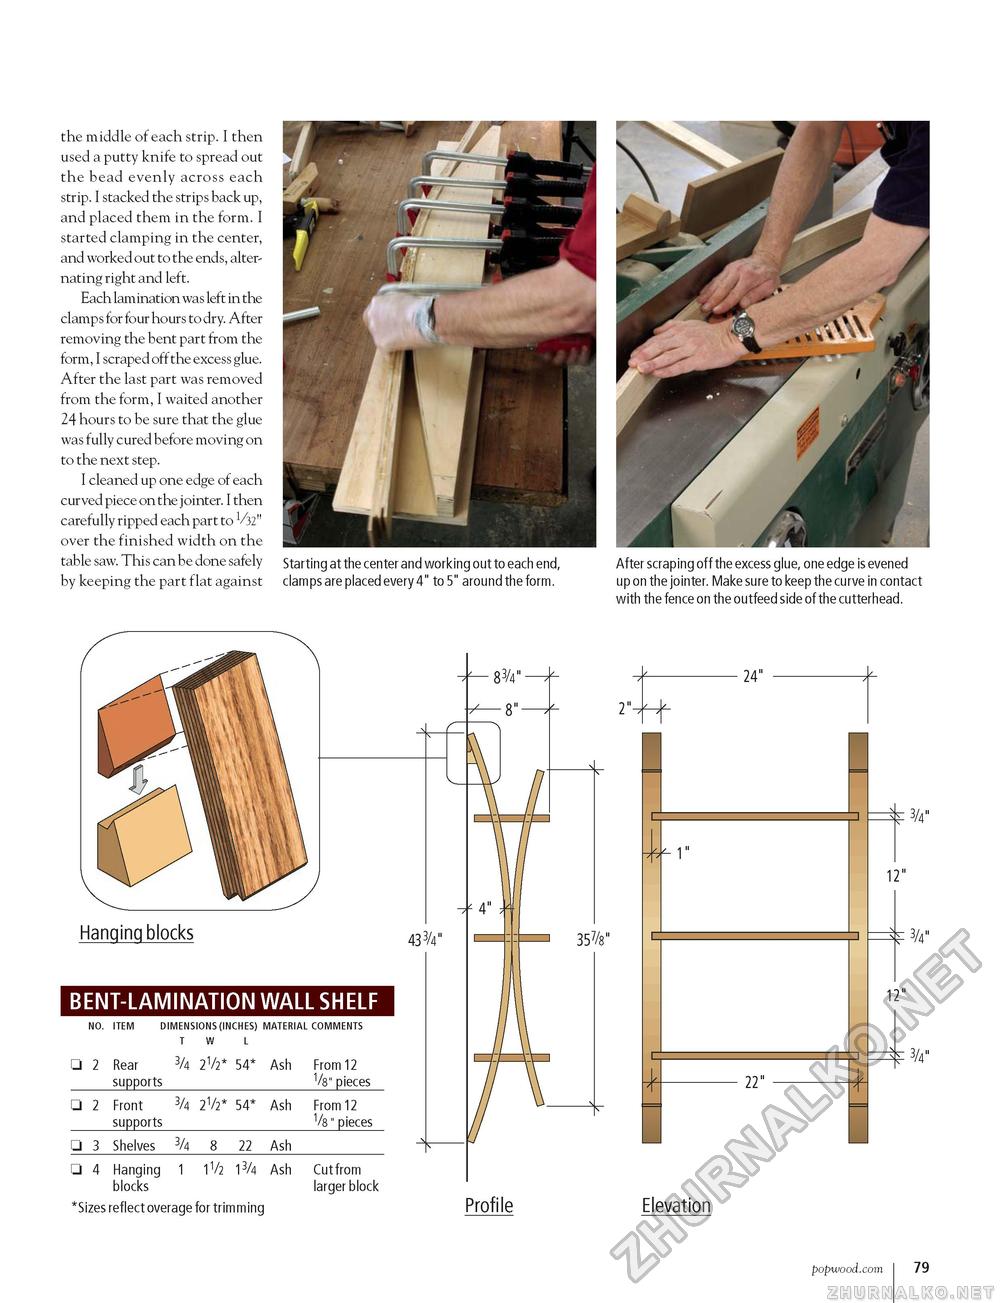
the middle of each strip. I then used a putty knife to spread out the bead evenly across each strip. I stacked the strips back up, and placed them in the form. I started clamping in the center, and worked out to the ends, alternating right and left. Each lamination was left in the clamps for four hours to dry. After removing the bent part from the form, I scraped off the excess glue. After the last part was removed from the form, I waited another 24 hours to be sure that the glue was fully cured before moving on to the next step. I cleaned up one edge of each curved piece on the j ointer. I then carefully ripped each part to 1/32" over the finished width on the table saw. This can be done safely by keeping the part flat against Starting at the center and working out to each end, clamps are placed every 4" to 5" around the form. After scraping off the excess glue, one edge is evened up on the jointer. Make sure to keep the curve in contact with the fence on the outfeed side of the cutterhead. Hanging blocks BENT-LAMINATION WALL SHELF NO. ITEM DIMENSIONS (INCHES) MATERIAL COMMENTS T W L □ 2 Rear 3/4 2V2* 54* Ash From 12 □ 2 Rear 3/4 2V2* 54* Ash From 12
□ 4 Hanging 1 1V2 13/4 Ash Cut from blocks larger block *Sizes reflect overage for trimming □ 4 Hanging 1 1V2 13/4 Ash Cut from blocks larger block *Sizes reflect overage for trimming 2"- 24" 433/4" 22" 3/4" 12" 3/4" 12" 3/4" Profile Elevation popwood.com i 79 |


