Popular Woodworking 2006-02 № 153, страница 65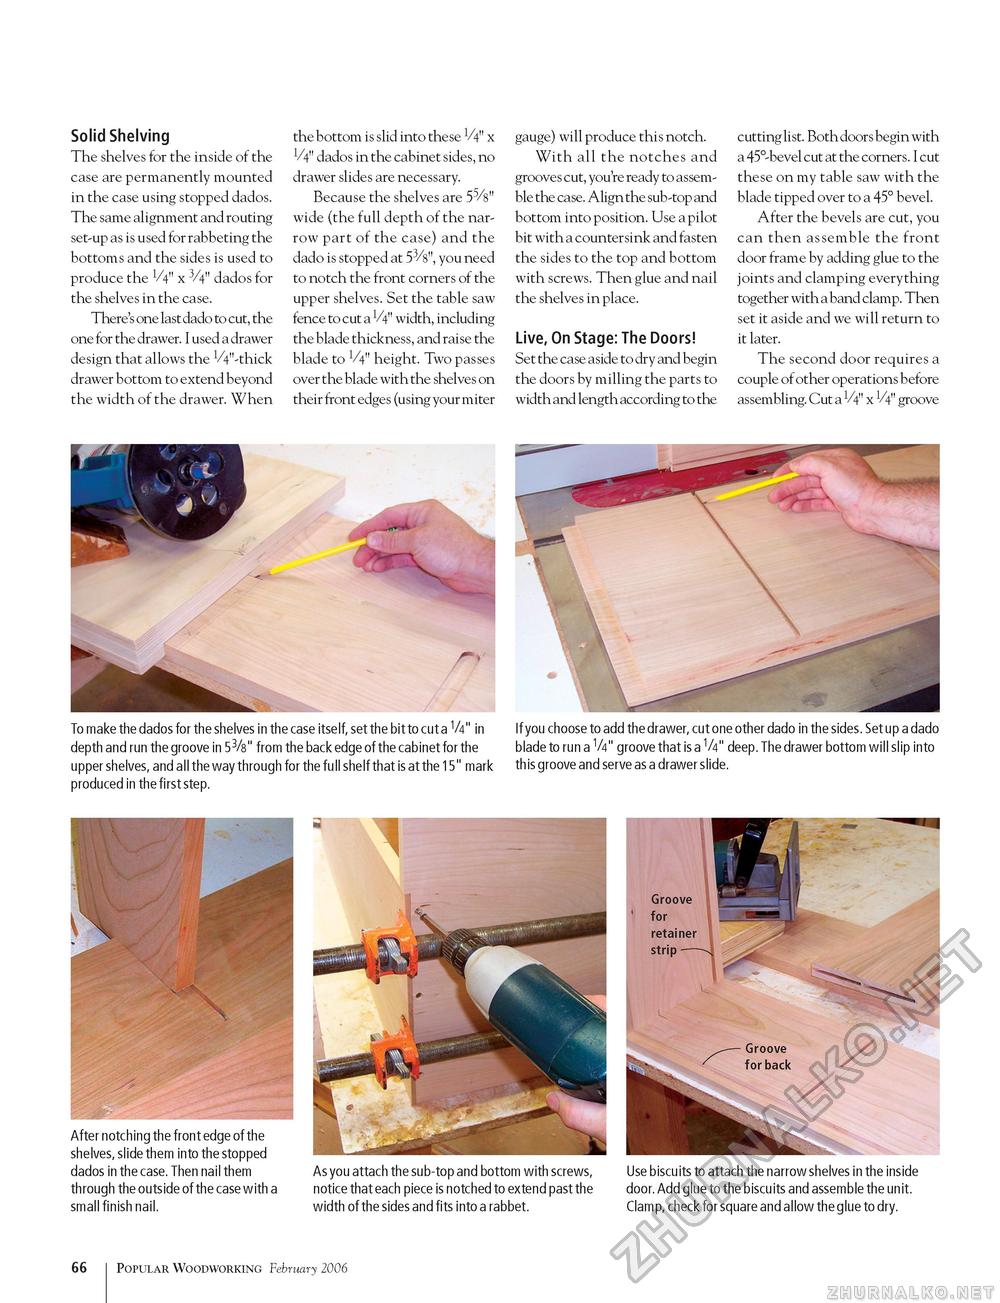
Solid Shelving The shelves for the inside of the case are permanently mounted in the case using stopped dados. The same alignment and routing set-up as is used for rabbeting the bottoms and the sides is used to produce the V4" x V4" dados for the shelves in the case. There's one last dado to cut, the one for the drawer. I used a drawer design that allows the VV'-thick drawer bottom to extend beyond the width of the drawer. When the bottom is slid into these V4" x V4" dados in the cabinet sides, no drawer slides are necessary. Because the shelves are wide (the full depth of the narrow part of the case) and the dado is stopped at 53/8", you need to notch the front corners of the upper shelves. Set the table saw fence to cut a V4" width, including the blade thickness, and raise the blade to V4" height. Two passes over the blade with the shelves on their front edges (using your miter gauge) will produce this notch. With all the notches and grooves cut, you're ready to assemble the case. Align the sub-top and bottom into position. Use a pilot bit with a countersink and fasten the sides to the top and bottom with screws. Then glue and nail the shelves in place. Live, On Stage: The Doors! Set the case aside to dry and begin the doors by milling the parts to width and length according to the cutting list. Both doors begin with a 45°-bevel cut at the corners. I cut these on my table saw with the blade tipped over to a 45° bevel. After the bevels are cut, you can then assemble the front door frame by adding glue to the joints and clamping everything together with a band clamp. Then set it aside and we will return to it later. The second door requires a couple of other operations before assembling. Cut a V4" x V4" groove To make the dados for the shelves in the case itself, set the bit to cut a V4" in depth and run the groove in 53/s" from the back edge of the cabinet for the upper shelves, and all the way through for the full shelf that is at the 15" mark produced in the first step. If you choose to add the drawer, cut one other dado in the sides. Set up a dado blade to run a V4" groove that is a V4" deep. The drawer bottom will slip into this groove and serve as a drawer slide. After notching the front edge of the shelves, slide them into the stopped dados in the case. Then nail them through the outside of the case with a small finish nail. As you attach the sub-top and bottom with screws, notice that each piece is notched to extend past the width of the sides and fits into a rabbet. Groove for retainer strip Use biscuits to attach the narrow shelves in the inside door. Add glue to the biscuits and assemble the unit. Clamp, check for square and allow the glue to dry. 66 102 Popular Woodworking February 2006 |


