Popular Woodworking 2006-02 № 153, страница 68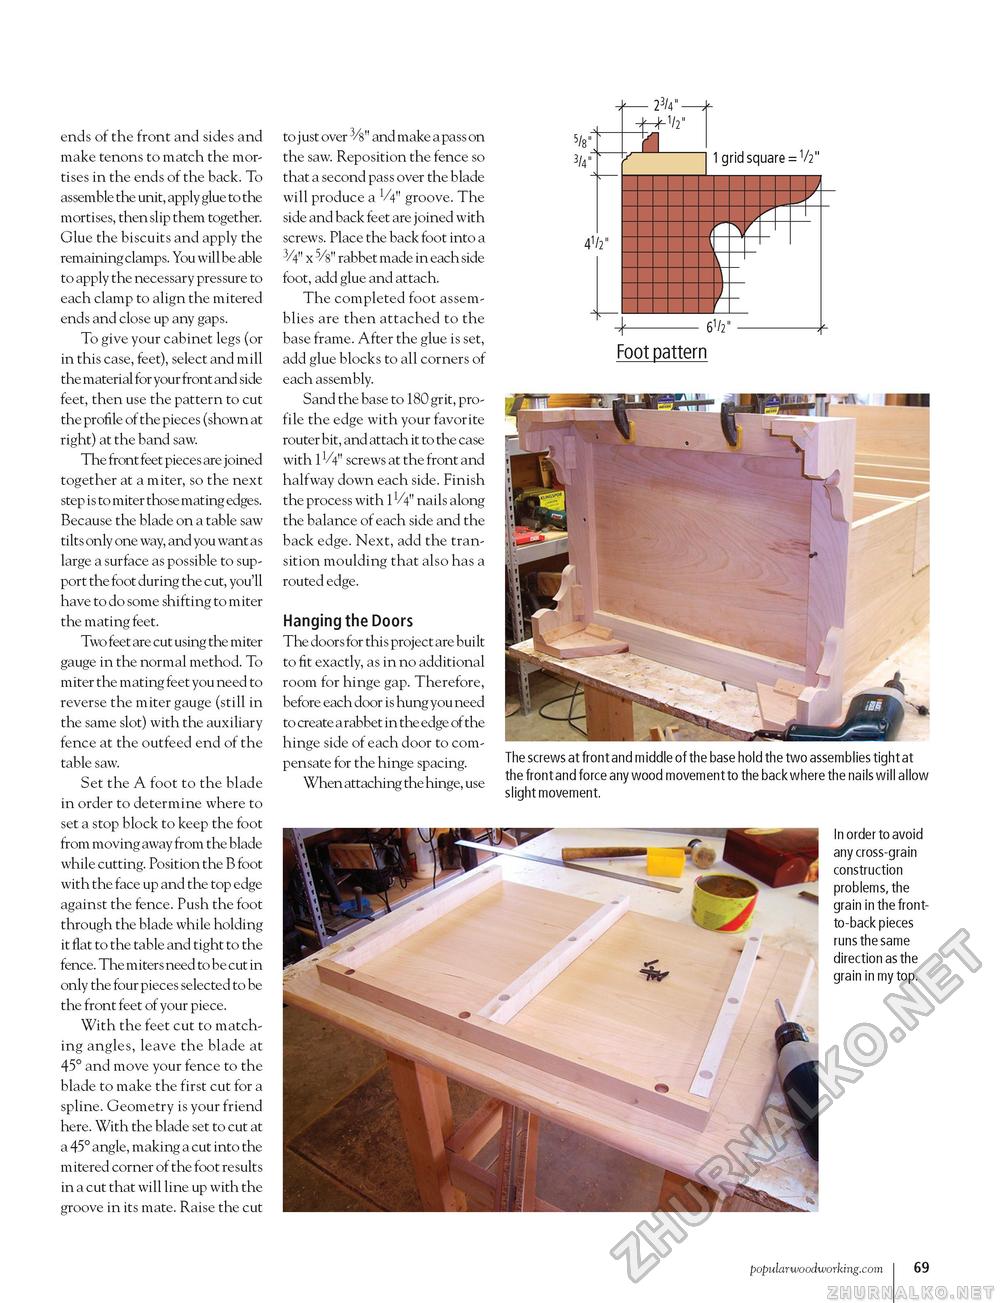
ends of the front and sides and make tenons to match the mortises in the ends of the back. To assemble the unit, apply glue to the mortises, then slip them together. Glue the biscuits and apply the remaining clamps. You will be able to apply the necessary pressure to each clamp to align the mitered ends and close up any gaps. To give your cabinet legs (or in this case, feet), select and mill the material for your front and side feet, then use the pattern to cut the profile of the pieces (shown at right) at the band saw. The front feet pieces are joined together at a miter, so the next step is to miter those mating edges. Because the blade on a table saw tilts only one way, and you want as large a surface as possible to support the foot during the cut, you'll have to do some shifting to miter the mating feet. Two feet are cut using the miter gauge in the normal method. To miter the mating feet you need to reverse the miter gauge (still in the same slot) with the auxiliary fence at the outfeed end of the table saw. Set the A foot to the blade in order to determine where to set a stop block to keep the foot from moving away from the blade while cutting. Position the B foot with the face up and the top edge against the fence. Push the foot through the blade while holding it flat to the table and tight to the fence. The miters need to be cut in only the four pieces selected to be the front feet of your piece. With the feet cut to matching angles, leave the blade at 45° and move your fence to the blade to make the first cut for a spline. Geometry is your friend here. With the blade set to cut at a 45° angle, making a cut into the mitered corner of the foot results in a cut that will line up with the groove in its mate. Raise the cut to just over 3/8" and make a pass on the saw. Reposition the fence so that a second pass over the blade will produce a groove. The side and back feet are joined with screws. Place the back foot into a 3/4" x rabbet made in each side foot, add glue and attach. The completed foot assemblies are then attached to the base frame. After the glue is set, add glue blocks to all corners of each assembly. Sand the base to 180 grit, profile the edge with your favorite router bit, and attach it to the case with 1V4" screws at the front and halfway down each side. Finish the process with 11/4" nails along the balance of each side and the back edge. Next, add the transition moulding that also has a routed edge. Hanging the Doors The doors for this project are built to fit exactly, as in no additional room for hinge gap. Therefore, before each door is hung you need to create a rabbet in the edge of the hinge side of each door to compensate for the hinge spacing. When attaching the hinge, use V 4V -23/4"- ZH-1/2" 1 grid square = V2" 1-3 6V Foot pattern The screws at front and middle of the base hold the two assemblies tight at the front and force any wood movement to the back where the nails will allow slight movement. In order to avoid any cross-grain construction problems, the grain in the front-to-back pieces runs the same direction as the grain in my top. popularwoodworking.com I 103 |


