Popular Woodworking 2006-02 № 153, страница 67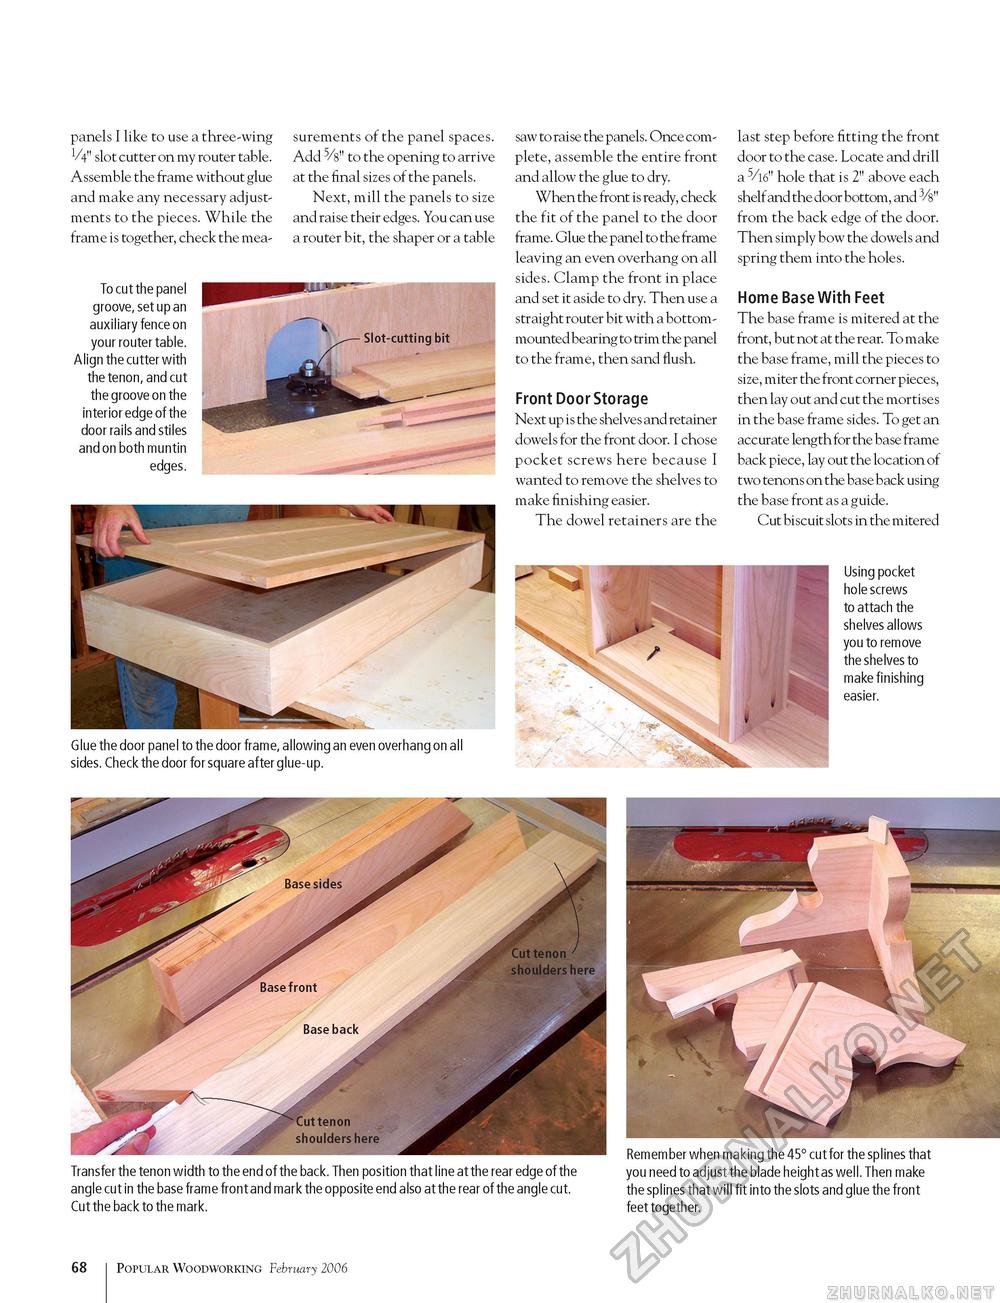
panels I like to use a three-wing V4" slot cutter on my router table. Assemble the frame without glue and make any necessary adjustments to the pieces. While the frame is together, check the mea- To cut the panel groove, set up an auxiliary fence on your router table. Align the cutter with the tenon, and cut the groove on the interior edge of the door rails and stiles and on both muntin edges. surements of the panel spaces. Add 5/8" to the opening to arrive at the final sizes of the panels. Next, mill the panels to size and raise their edges. You can use a router bit, the shaper or a table Slot-cutting bit saw to raise the panels. Once complete, assemble the entire front and allow the glue to dry. When the front is ready, check the fit of the panel to the door frame. Glue the panel to the frame leaving an even overhang on all sides. Clamp the front in place and set it aside to dry. Then use a straight router bit with a bottom-mounted bearing to trim the panel to the frame, then sand flush. Front Door Storage Next up is the shelves and retainer dowels for the front door. I chose pocket screws here because I wanted to remove the shelves to make finishing easier. The dowel retainers are the last step before fitting the front door to the case. Locate and drill a hole that is 2" above each shelf and the door bottom, and 3/8" from the back edge of the door. Then simply bow the dowels and spring them into the holes. Home Base With Feet The base frame is mitered at the front, but not at the rear. To make the base frame, mill the pieces to size, miter the front corner pieces, then lay out and cut the mortises in the base frame sides. To get an accurate length for the base frame back piece, lay out the location of two tenons on the base back using the base front as a guide. Cut biscuit slots in the mitered Using pocket hole screws to attach the shelves allows you to remove the shelves to make finishing Glue the door panel to the door frame, allowing an even overhang on all sides. Check the door for square after glue-up. Transfer the tenon width to the end of the back. Then position that line at the rear edge of the angle cut in the base frame front and mark the opposite end also at the rear of the angle cut. Cut the back to the mark. Remember when making the 45° cut for the splines that you need to adjust the blade height as well. Then make the splines that will fit into the slots and glue the front feet together. 68 102 Popular Woodworking February 2006 |


