Popular Woodworking 2006-02 № 153, страница 66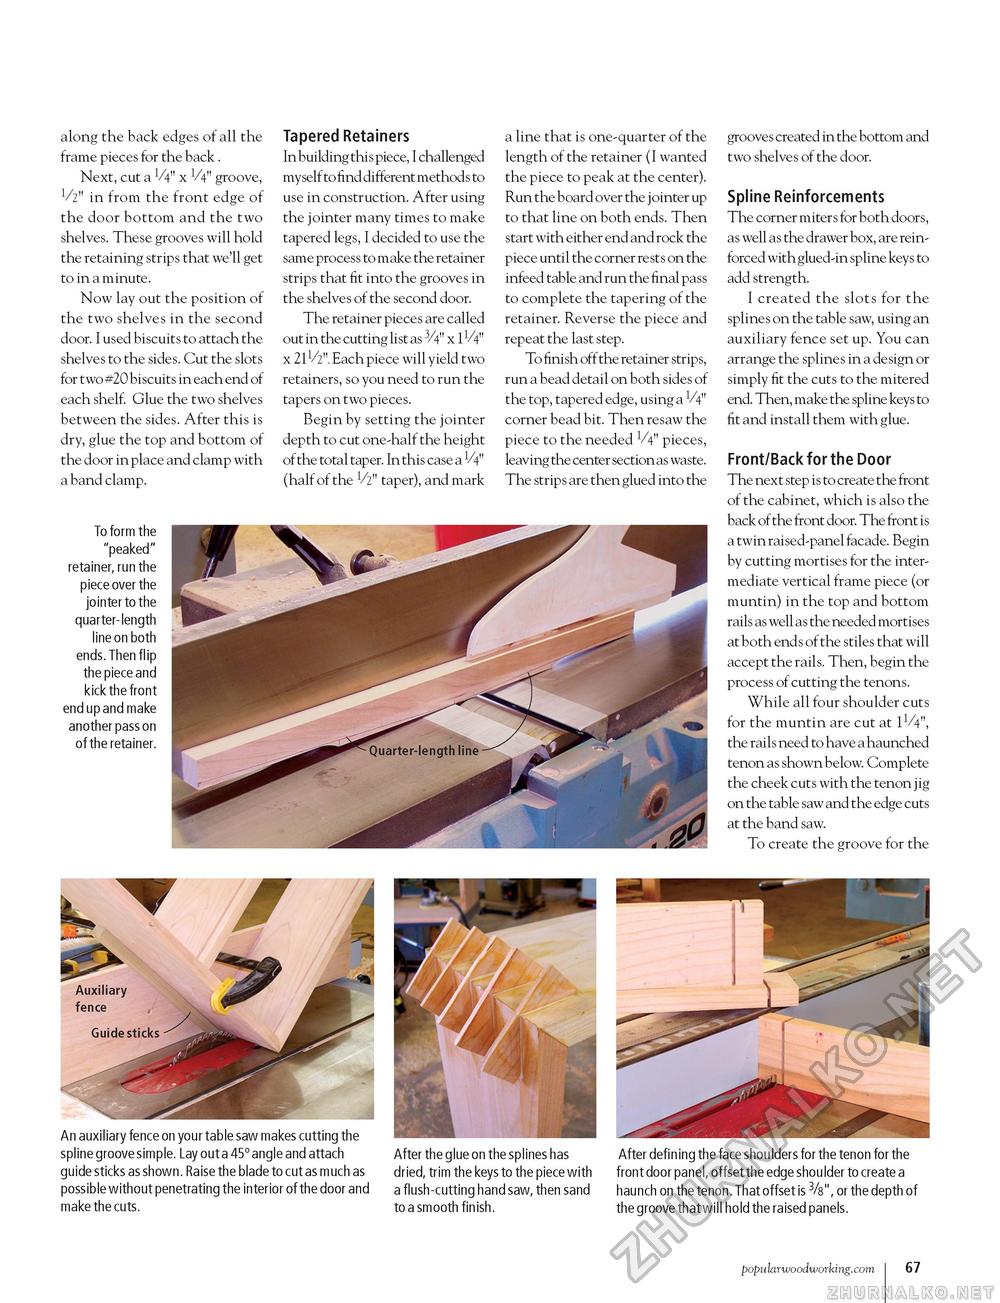
along the back edges of all the frame pieces for the back . Next, cut a V4" x V4" groove, 1/2" in from the front edge of the door bottom and the two shelves. These grooves will hold the retaining strips that we'll get to in a minute. Now lay out the position of the two shelves in the second door. I used biscuits to attach the shelves to the sides. Cut the slots for two #20 biscuits in each end of each shelf. Glue the two shelves between the sides. After this is dry, glue the top and bottom of the door in place and clamp with a band clamp. Tapered Retainers In building this piece, I challenged myself to find different methods to use in construction. After using the jointer many times to make tapered legs, I decided to use the same process to make the retainer strips that fit into the grooves in the shelves of the second door. The retainer pieces are called out in the cutting list as 3/4" x 1V4" x 21V2". Each piece will yield two retainers, so you need to run the tapers on two pieces. Begin by setting the jointer depth to cut one-half the height of the total taper. In this case a V4" (half of the V2" taper), and mark a line that is one-quarter of the length of the retainer (I wanted the piece to peak at the center). Run the board over the jointer up to that line on both ends. Then start with either end and rock the piece until the corner rests on the infeed table and run the final pass to complete the tapering of the retainer. Reverse the piece and repeat the last step. To finish off the retainer strips, run a bead detail on both sides of the top, tapered edge, using a corner bead bit. Then resaw the piece to the needed V4" pieces, leaving the center section as waste. The strips are then glued into the To form the "peaked" retainer, run the piece over the jointer to the quarter-length line on both ends. Then flip the piece and kick the front end up and make another pass on of the retainer. grooves created in the bottom and two shelves of the door. Spline Reinforcements The corner miters for both doors, as well as the drawer box, are reinforced with glued-in spline keys to add strength. I created the slots for the splines on the table saw, using an auxiliary fence set up. You can arrange the splines in a design or simply fit the cuts to the mitered end. Then, make the spline keys to fit and install them with glue. Front/Back for the Door The next step is to create the front of the cabinet, which is also the back of the front door. The front is a twin raised-panel facade. Begin by cutting mortises for the intermediate vertical frame piece (or muntin) in the top and bottom rails as well as the needed mortises at both ends of the stiles that will accept the rails. Then, begin the process of cutting the tenons. While all four shoulder cuts for the muntin are cut at 1V4", the rails need to have a haunched tenon as shown below. Complete the cheek cuts with the tenon j ig on the table saw and the edge cuts at the band saw. To create the groove for the An auxiliary fence on your table saw makes cutting the spline groove simple. Lay out a 45° angle and attach guide sticks as shown. Raise the blade to cut as much as possible without penetrating the interior of the door and make the cuts. After the glue on the splines has dried, trim the keys to the piece with a flush-cutting hand saw, then sand to a smooth finish. After defining the face shoulders for the tenon for the front door panel, offset the edge shoulder to create a haunch on the tenon. That offset is 3/s", or the depth of the groove that will hold the raised panels. popularwoodworking.com I 103 |


