Popular Woodworking 2006-10 № 157, страница 57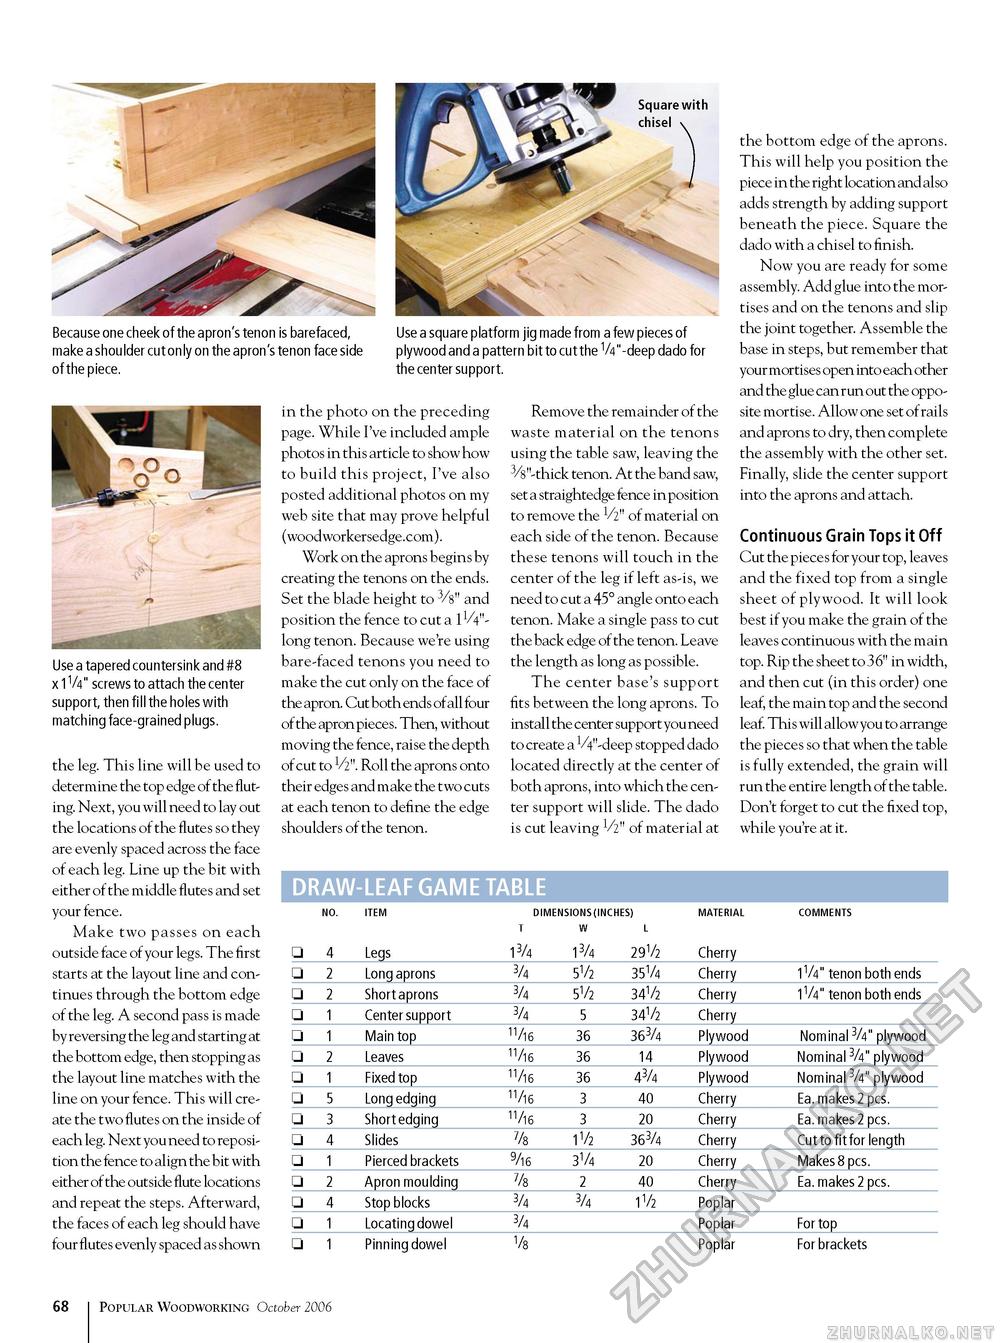
Because one cheek of the apron's tenon make a shoulder cut only on the apron's of the piece. is barefaced, Use a square platform jig made from a few pieces of tenon face side plywood and a pattern bit to cut the V4"-deep dado for the center support. Use a tapered countersink and #8 x 1V4" screws to attach the center support, then fill the holes with matching face-grained plugs. the leg. This line will be used to determine the top edge of the fluting. Next, you will need to lay out the locations of the flutes so they are evenly spaced across the face of each leg. Line up the bit with either of the middle flutes and set your fence. Make two passes on each outside face of your legs. The first starts at the layout line and continues through the bottom edge of the leg. A second pass is made by reversing the leg and starting at the bottom edge, then stopping as the layout line matches with the line on your fence. This will create the two flutes on the inside of each leg. Next you need to reposition the fence to align the bit with either of the outside flute locations and repeat the steps. Afterward, the faces of each leg should have four flutes evenly spaced as shown in the photo on the preceding page. While I've included ample photos in this article to show how to build this project, I've also posted additional photos on my web site that may prove helpful (woodworkersedge.com). Work on the aprons begins by creating the tenons on the ends. Set the blade height to 3/8" and position the fence to cut a 1V4"-long tenon. Because we're using bare-faced tenons you need to make the cut only on the face of the apron. Cut both ends of all four of the apron pieces. Then, without moving the fence, raise the depth of cut to V2". Roll the aprons onto their edges and make the two cuts at each tenon to define the edge shoulders of the tenon. Remove the remainder of the waste material on the tenons using the table saw, leaving the 3/8 "-thick tenon. At the band saw, set a straightedge fence in position to remove the V2" of material on each side of the tenon. Because these tenons will touch in the center of the leg if left as-is, we need to cut a 45° angle onto each tenon. Make a single pass to cut the back edge of the tenon. Leave the length as long as possible. The center base's support fits between the long aprons. To install the center support you need to create a 1/4'-deep stopped dado located directly at the center of both aprons, into which the center support will slide. The dado is cut leaving V2" of material at the bottom edge of the aprons. This will help you position the piece in the right location and also adds strength by adding support beneath the piece. Square the dado with a chisel to finish. Now you are ready for some assembly. Add glue into the mortises and on the tenons and slip the joint together. Assemble the base in steps, but remember that your mortises open into each other and the glue can run out the opposite mortise. Allow one set of rails and aprons to dry, then complete the assembly with the other set. Finally, slide the center support into the aprons and attach. Continuous Grain Tops it Off Cut the pieces for your top, leaves and the fixed top from a single sheet of plywood. It will look best if you make the grain of the leaves continuous with the main top. Rip the sheet to 36" in width, and then cut (in this order) one leaf, the main top and the second leaf. This will allow you to arrange the pieces so that when the table is fully extended, the grain will run the entire length of the table. Don't forget to cut the fixed top, while you're at it. DRAW-LEAF GAME TABLE DIMENSIONS (INCHES) T W L DIMENSIONS (INCHES) T W L
68 Popular Woodworking October 2006 |


